Tables
Tables
Pressbooks offers two ways to create tables in your books. The first is through the visual editor toolbar, which allows you to create basic tables for all your book formats. The second method uses the TablePress plugin. The TablePress plugin lets you build dynamic, interactive tables which can be sorted, filtered, and searched in the webbook and exported as static tables to PDF and ebook formats. Please see our chapter on TablePress.
Visual Editor Table Tool
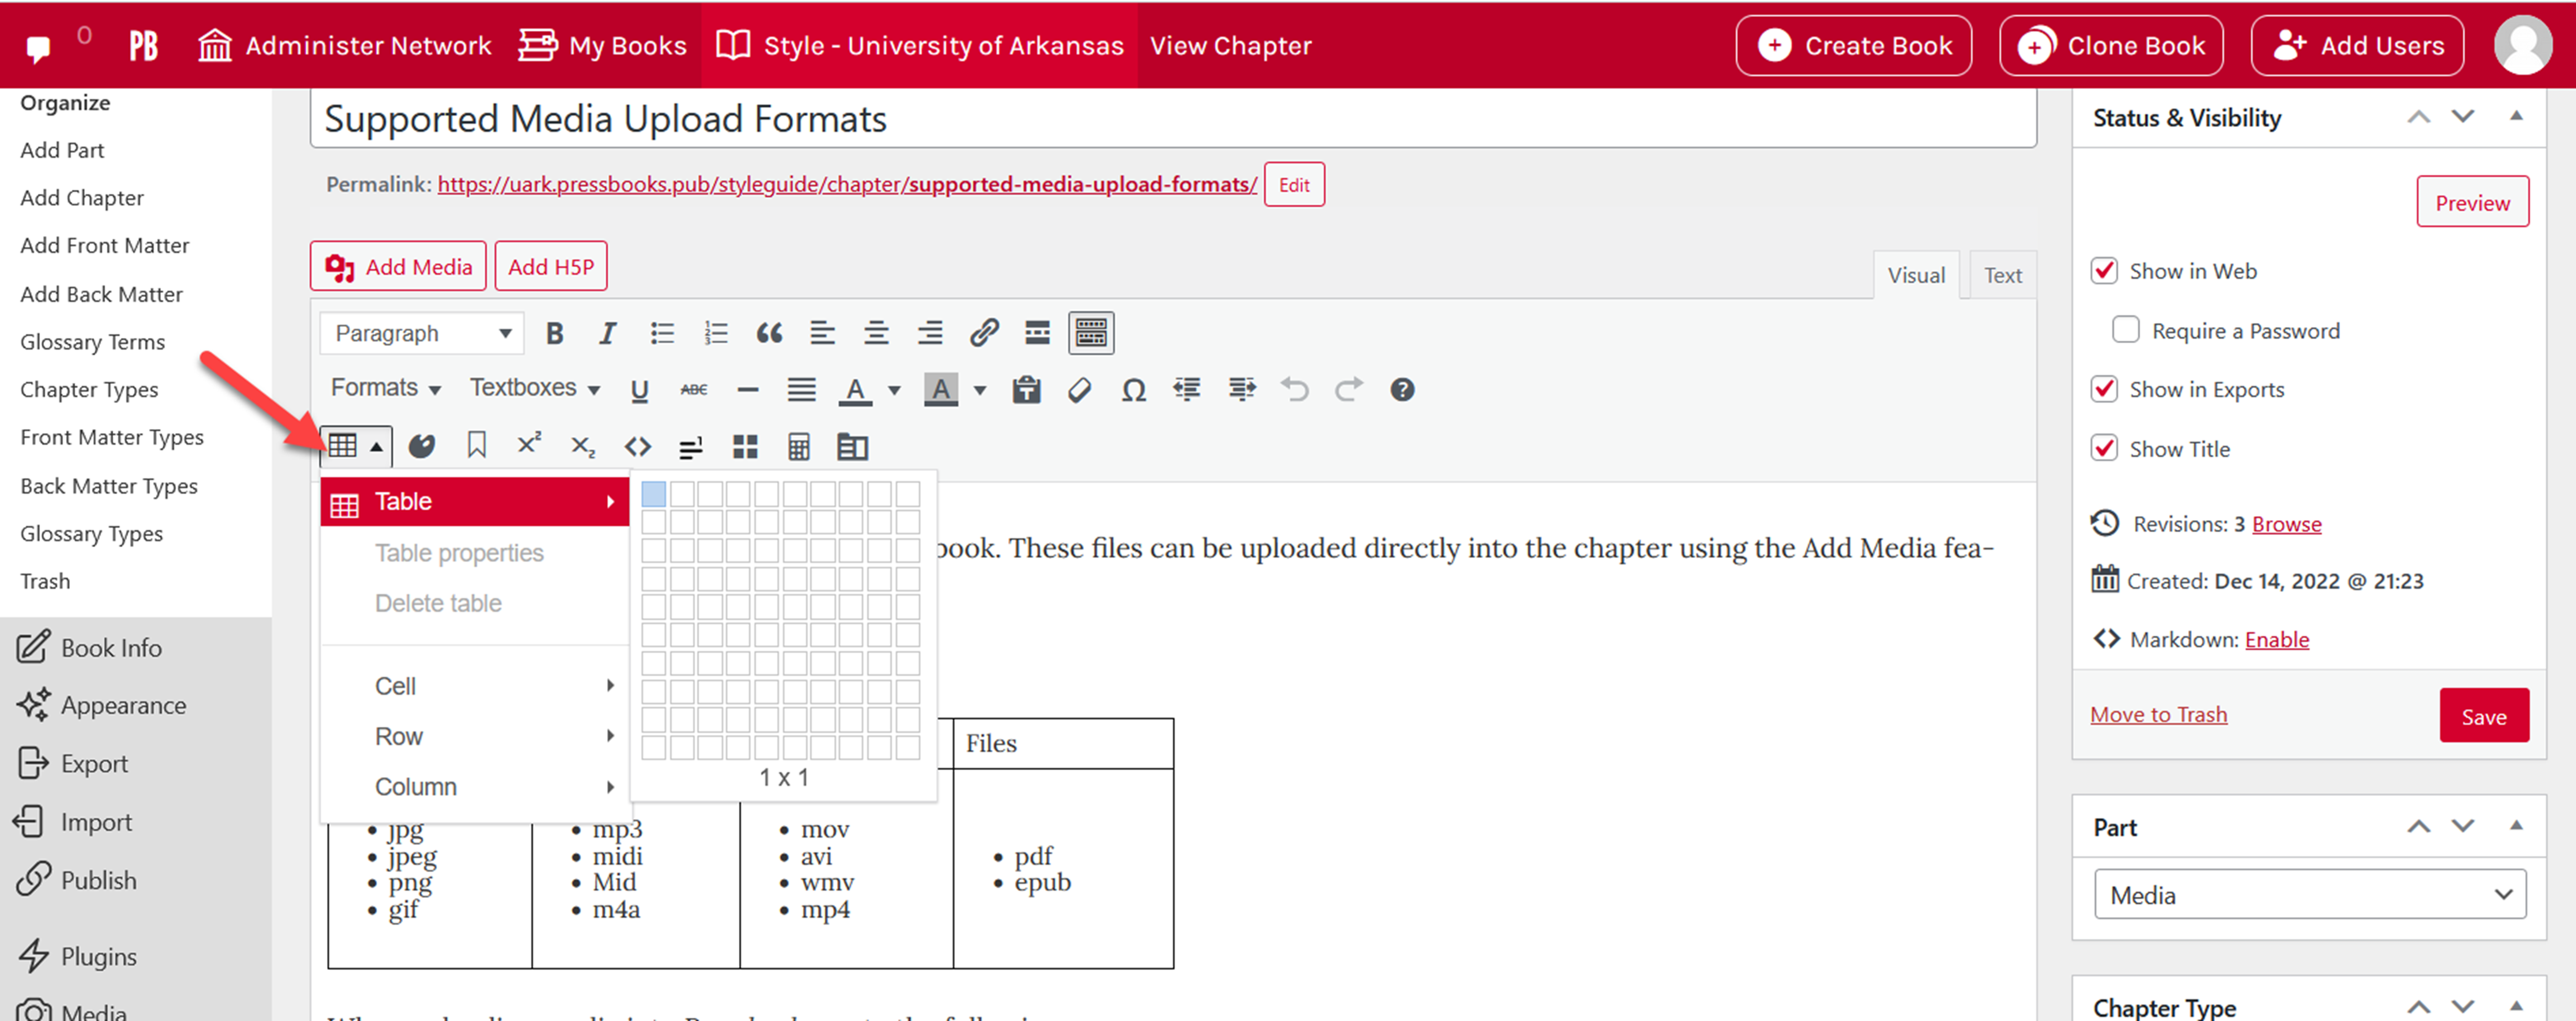
To access the table tool, look for the table icon on the visual editor toolbar. Follow the steps below to create your table.
- Click the table icon on the visual editor toolbar
- Hover over Table and then select the initial row and column layout you’d like for your table from the grid that appears
Once you’ve selected the number of cells, the table tool will close and your table will appear. At this point you can now enter your content or style the table.
Table Structure
There are many options for customizing your table. To modify the structure of the table for Cells, Rows, or Columns, follow these steps:
- Click and highlight the cells, rows, or columns you wish to modify
- Open the table tool
- Hover over Cell, Row, or Column depending on your needs
- Select the action you want to occur
This tool allows you to complete the following actions:
- Insert another table within a cell
- Edit cell, row and column properties
- Merge and split cells
- Add and remove rows and columns
- Copy, cut and paste rows and columns
The two other settings that appear on the table menu include Delete table and Table properties. To delete your table, click anywhere inside the table, then open the table tool menu and select Delete table. For further styling options, click within the table and then select Table properties.
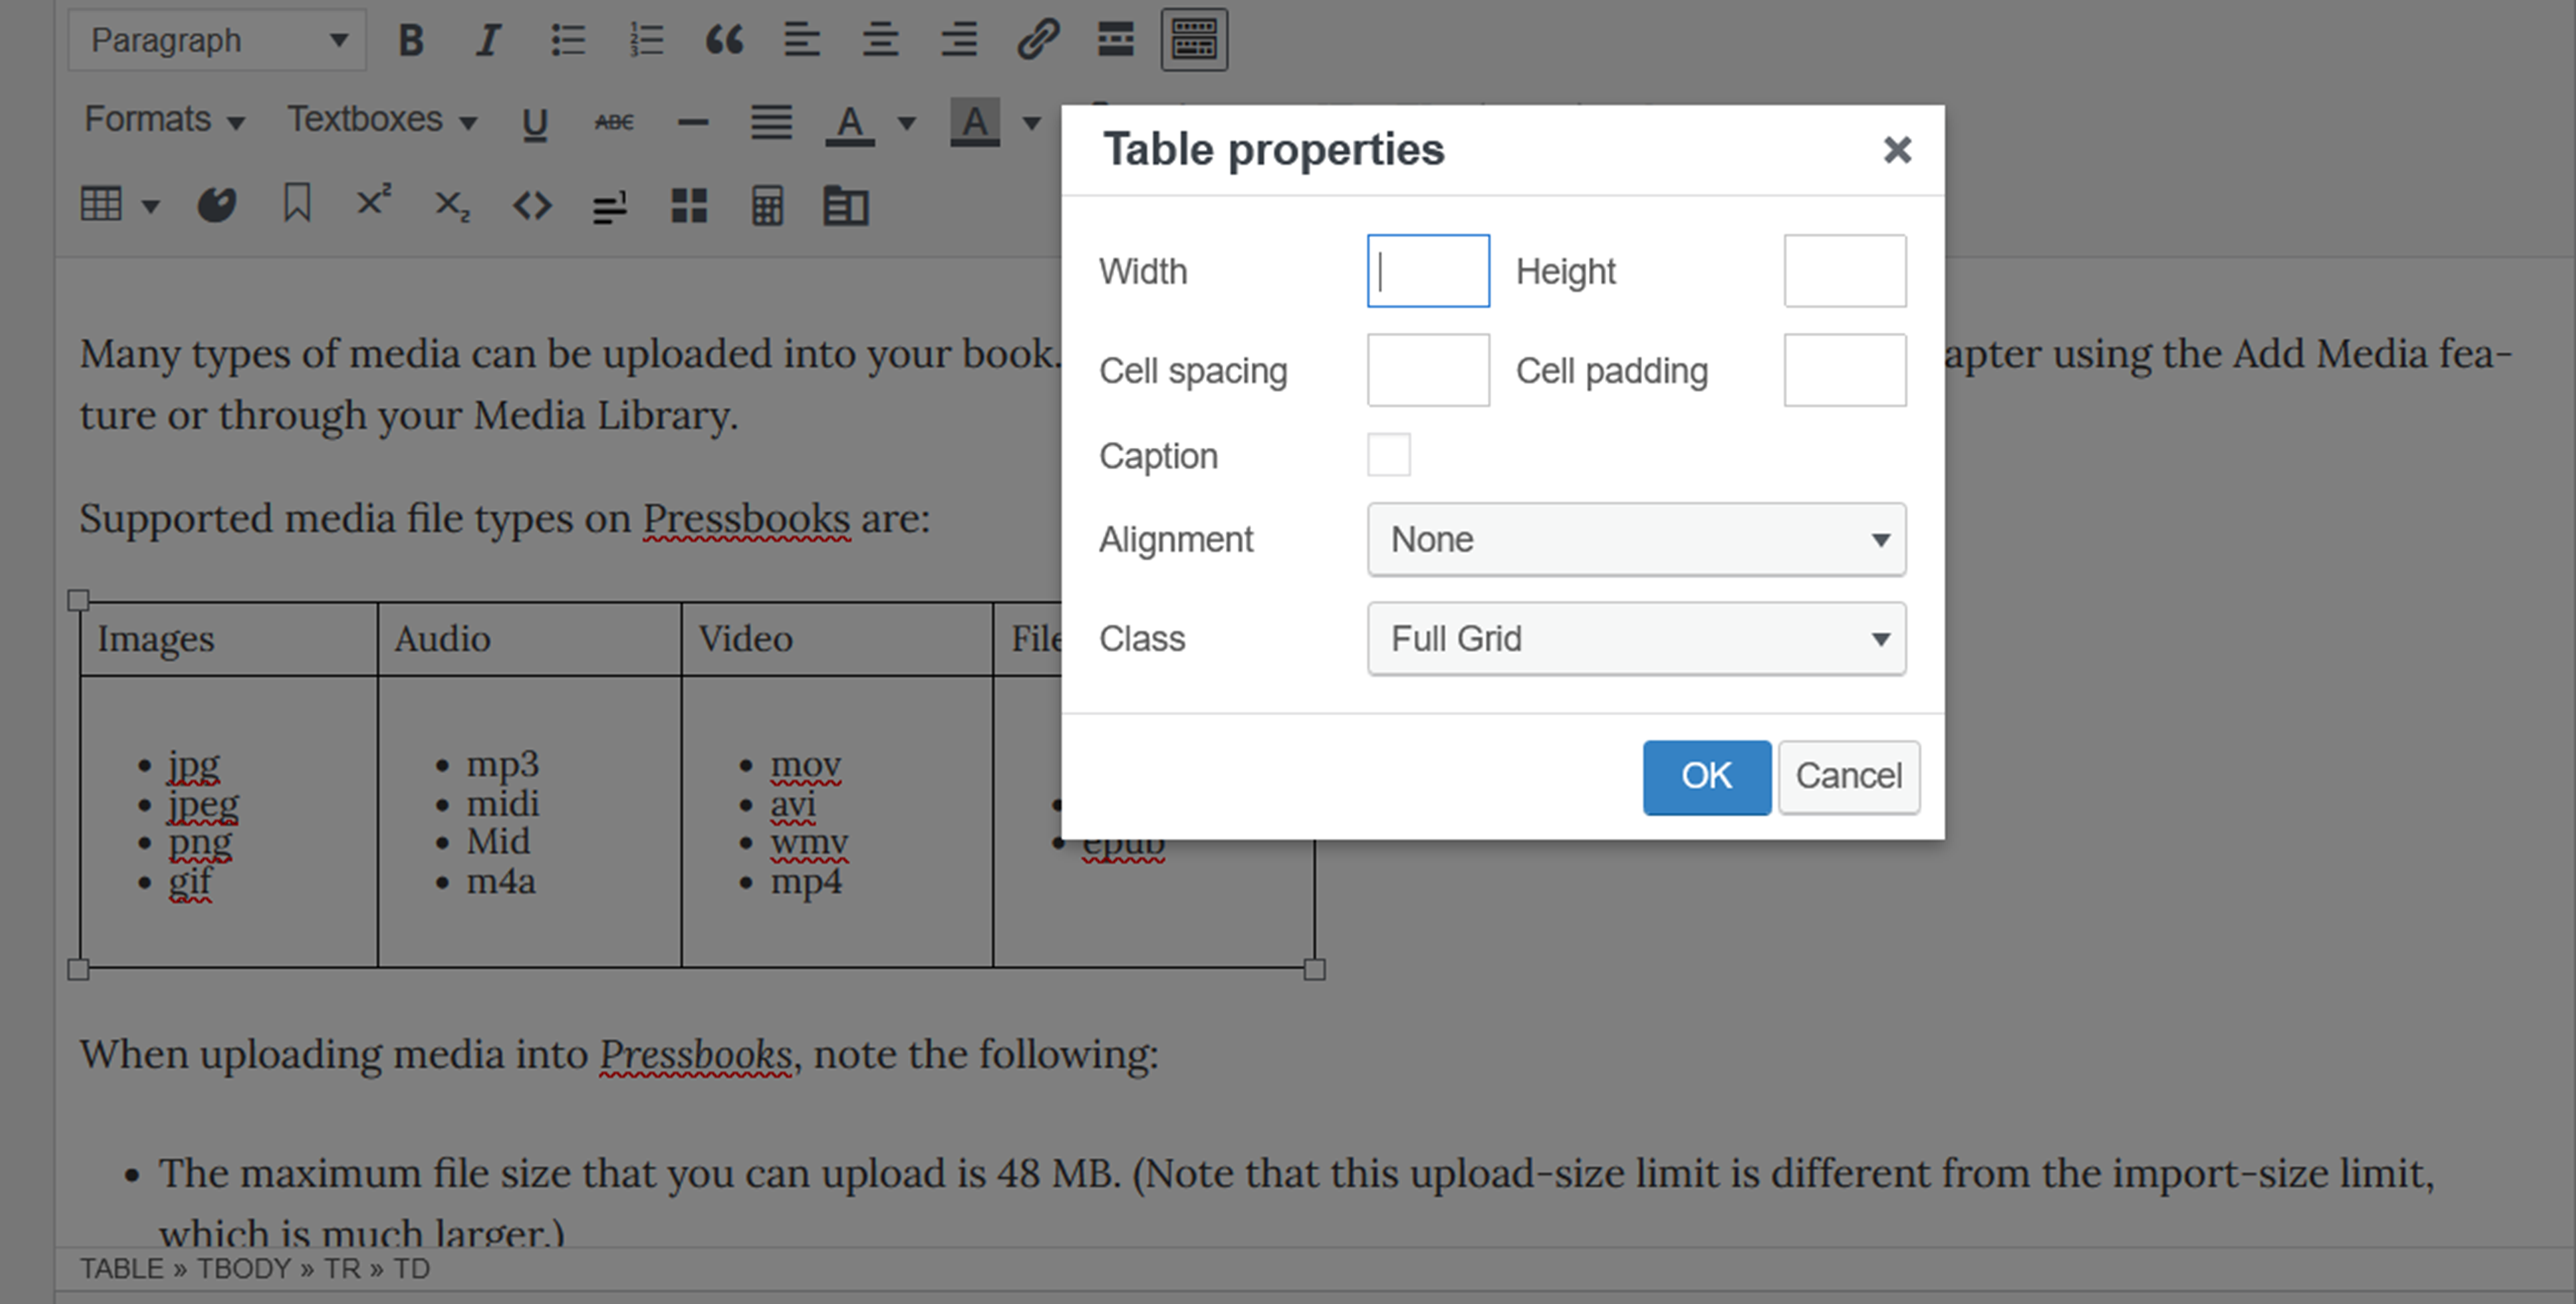
Table Properties
Through Table Properties, you can:
- Adjust the width and height of your table
- Adjust the cell padding and cell spacing
- Increase or decrease the weight of the border
- Add a caption
- Change the alignment
- Change the class
Adjust Width and Height
Width
The width of your table is set as a percentage of the page size or as a pixel value. For print and fixed format export versions of your book, this width size remains static.
In responsive versions of your book (for instance, your webbook or EPUB file), tables with percentage widths will be responsive to the device – for example, a reader viewing the table on their phone will see a far narrower table than a reader that view the same table on a large computer. Both readers see the entire table within their screen.
A table set in pixels will be static on all exports and not responsive to the device. Actual displayed widths may also vary depending on the content inside the table. For instance, if the content inside the table exceeds the width percentage or pixel value you’ve set, the table will still expand past those parameters to display all of the content.
By default, the width of your table will be set at 100%. This means that the table will take up the entire width of its parent element (typically, the page) and end at the left and right margins. You can increase or decrease your table’s width by changing the percentage or settings a pixel value.
To set a percentage width: Enter “50%” (or other value) next to Width in the Table Properties window
To set a pixel width: Enter “50px” (or other value) next to Width in the Table Properties window
Height
Table height, by contrast, is measured only in pixels, or “px” because height is static across all export types.
There is a minimum height pixel value that you can set a table to, and the minimum height will depend on how many rows your table has. A two-row table, for example, cannot have a pixel height value of less than 50px; the table will return to the default size if a value lower than that is entered.
To set a pixel height: Enter “100px” (or other value) next to Height in the Table Properties window.
Table Captions
The table caption option can be enabled by checking the box next to Caption on the Table Properties window. Be sure to click OK after you’ve enabled this feature.
You will then see a blank space above your table in the visual editor. Click in this space to type your table caption.
The caption will display below your table in your Pressbooks webbook. In your ebook and print exports, the caption will display on top of the table.
Alignment
You can change the alignment of your table by clicking on the Alignment dropdown menu in the Table Properties menu.
The default alignment for all tables is “None.” You can change the alignment to Left or Right.
Right and left aligned tables will also automatically have body text wrap around them in your webbook.
This wrapping feature is not yet available for exports other than the webbook
Class
You can change the class of your table by clicking on the dropdown menu next to Class in the Table Properties window. Each class defines a preset look for the table.
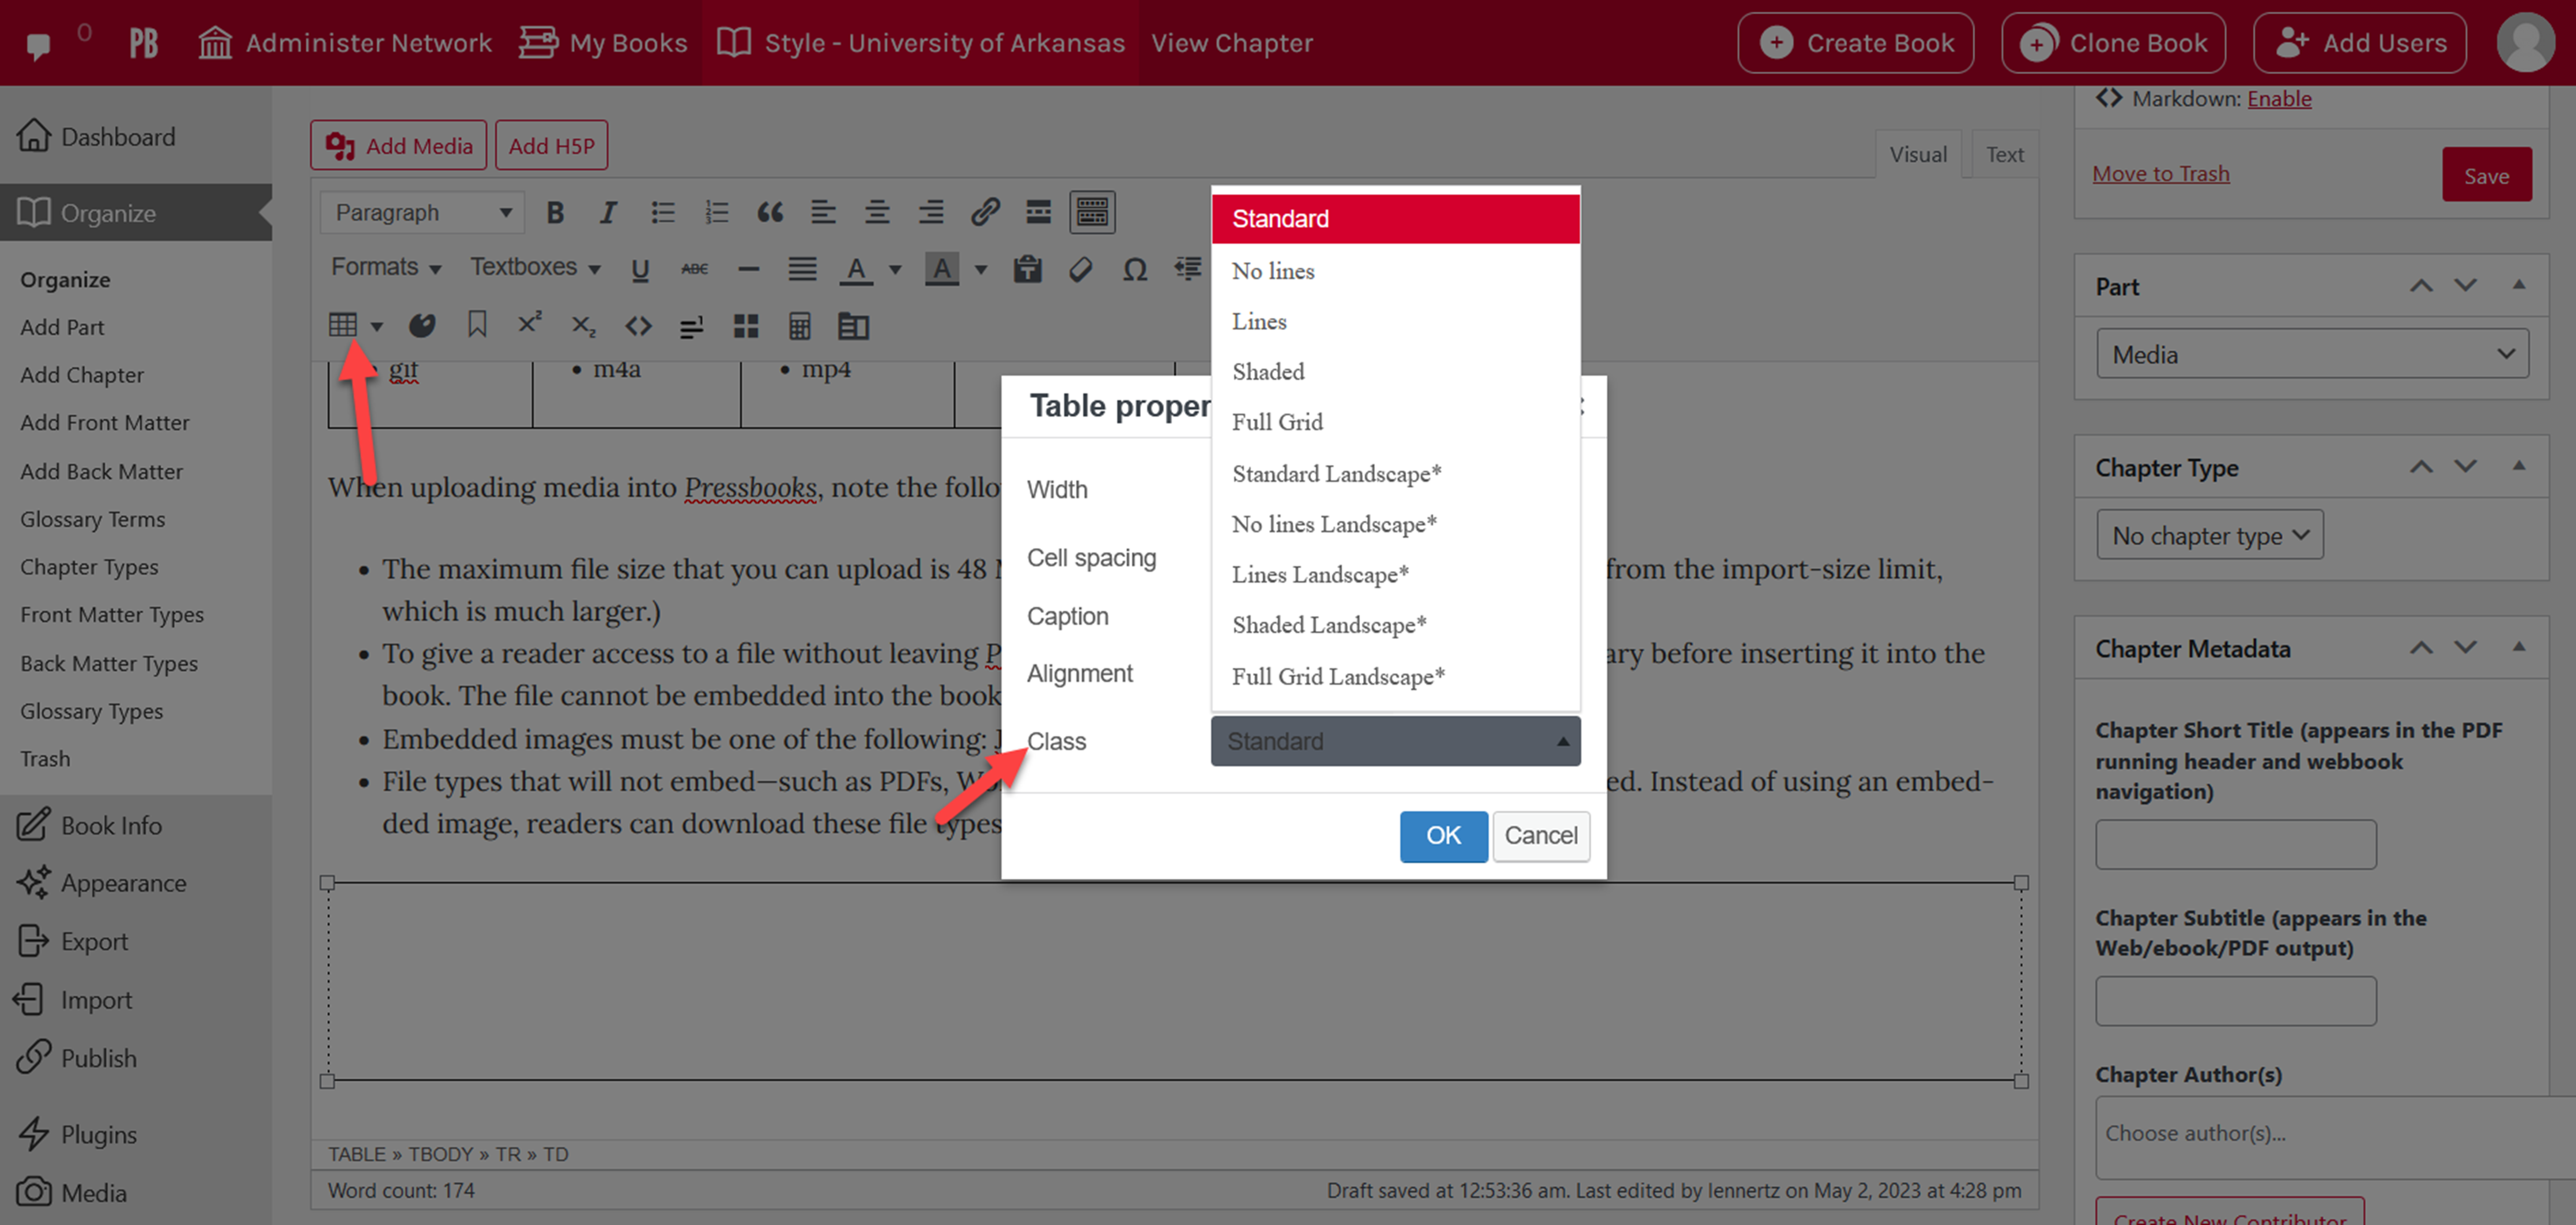
All tables default to the Standard class. You can choose any of the following classes:
- Standard
- No lines
- Lines
- Shaded
- Full Grid
- Standard Landscape*
- No lines Landscape*
- Lines Landscape*
- Shaded Landscape*
- Full Grid Landscape*
Be sure to click OK after you make any changes to the class.

Feedback/Errata