TablePress
The TablePress plugin allows you to create and display dynamic tables in your webbook that users can sort, filter, and search within. For more information on TablePress, go to https://tablepress.org.
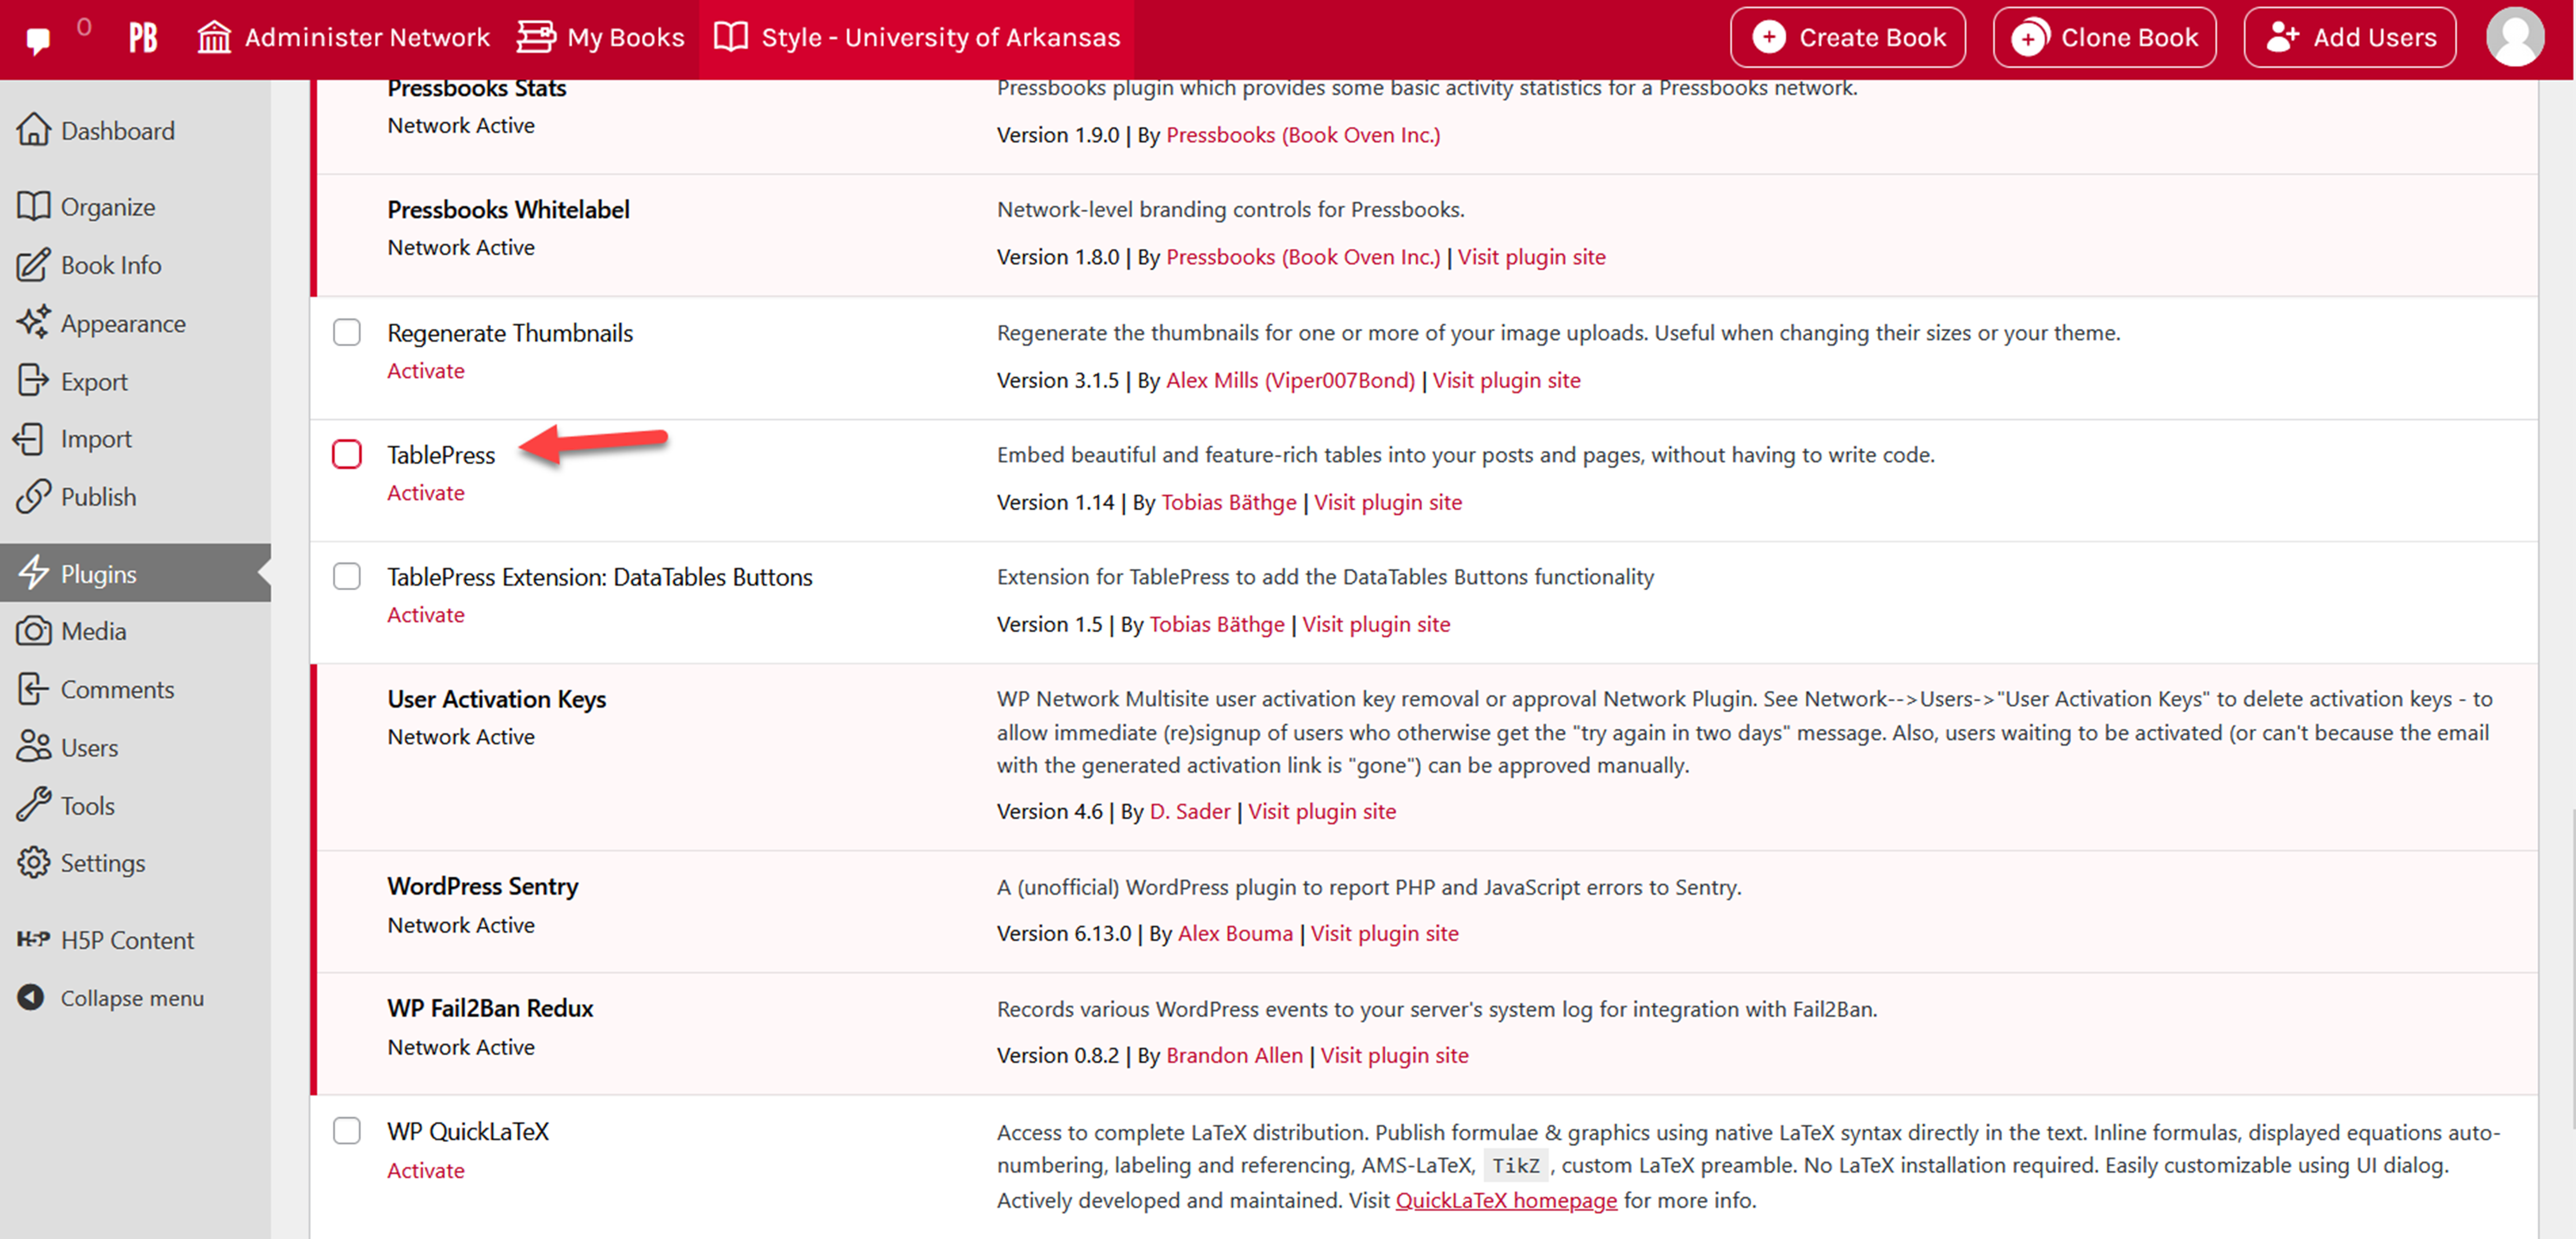
Before you can create or import tables using the TablePress tool, the plugin must first be activated in your book. To do this, select Plugins from the left sidebar menu, then find TablePress in the plugins list and click Activate.
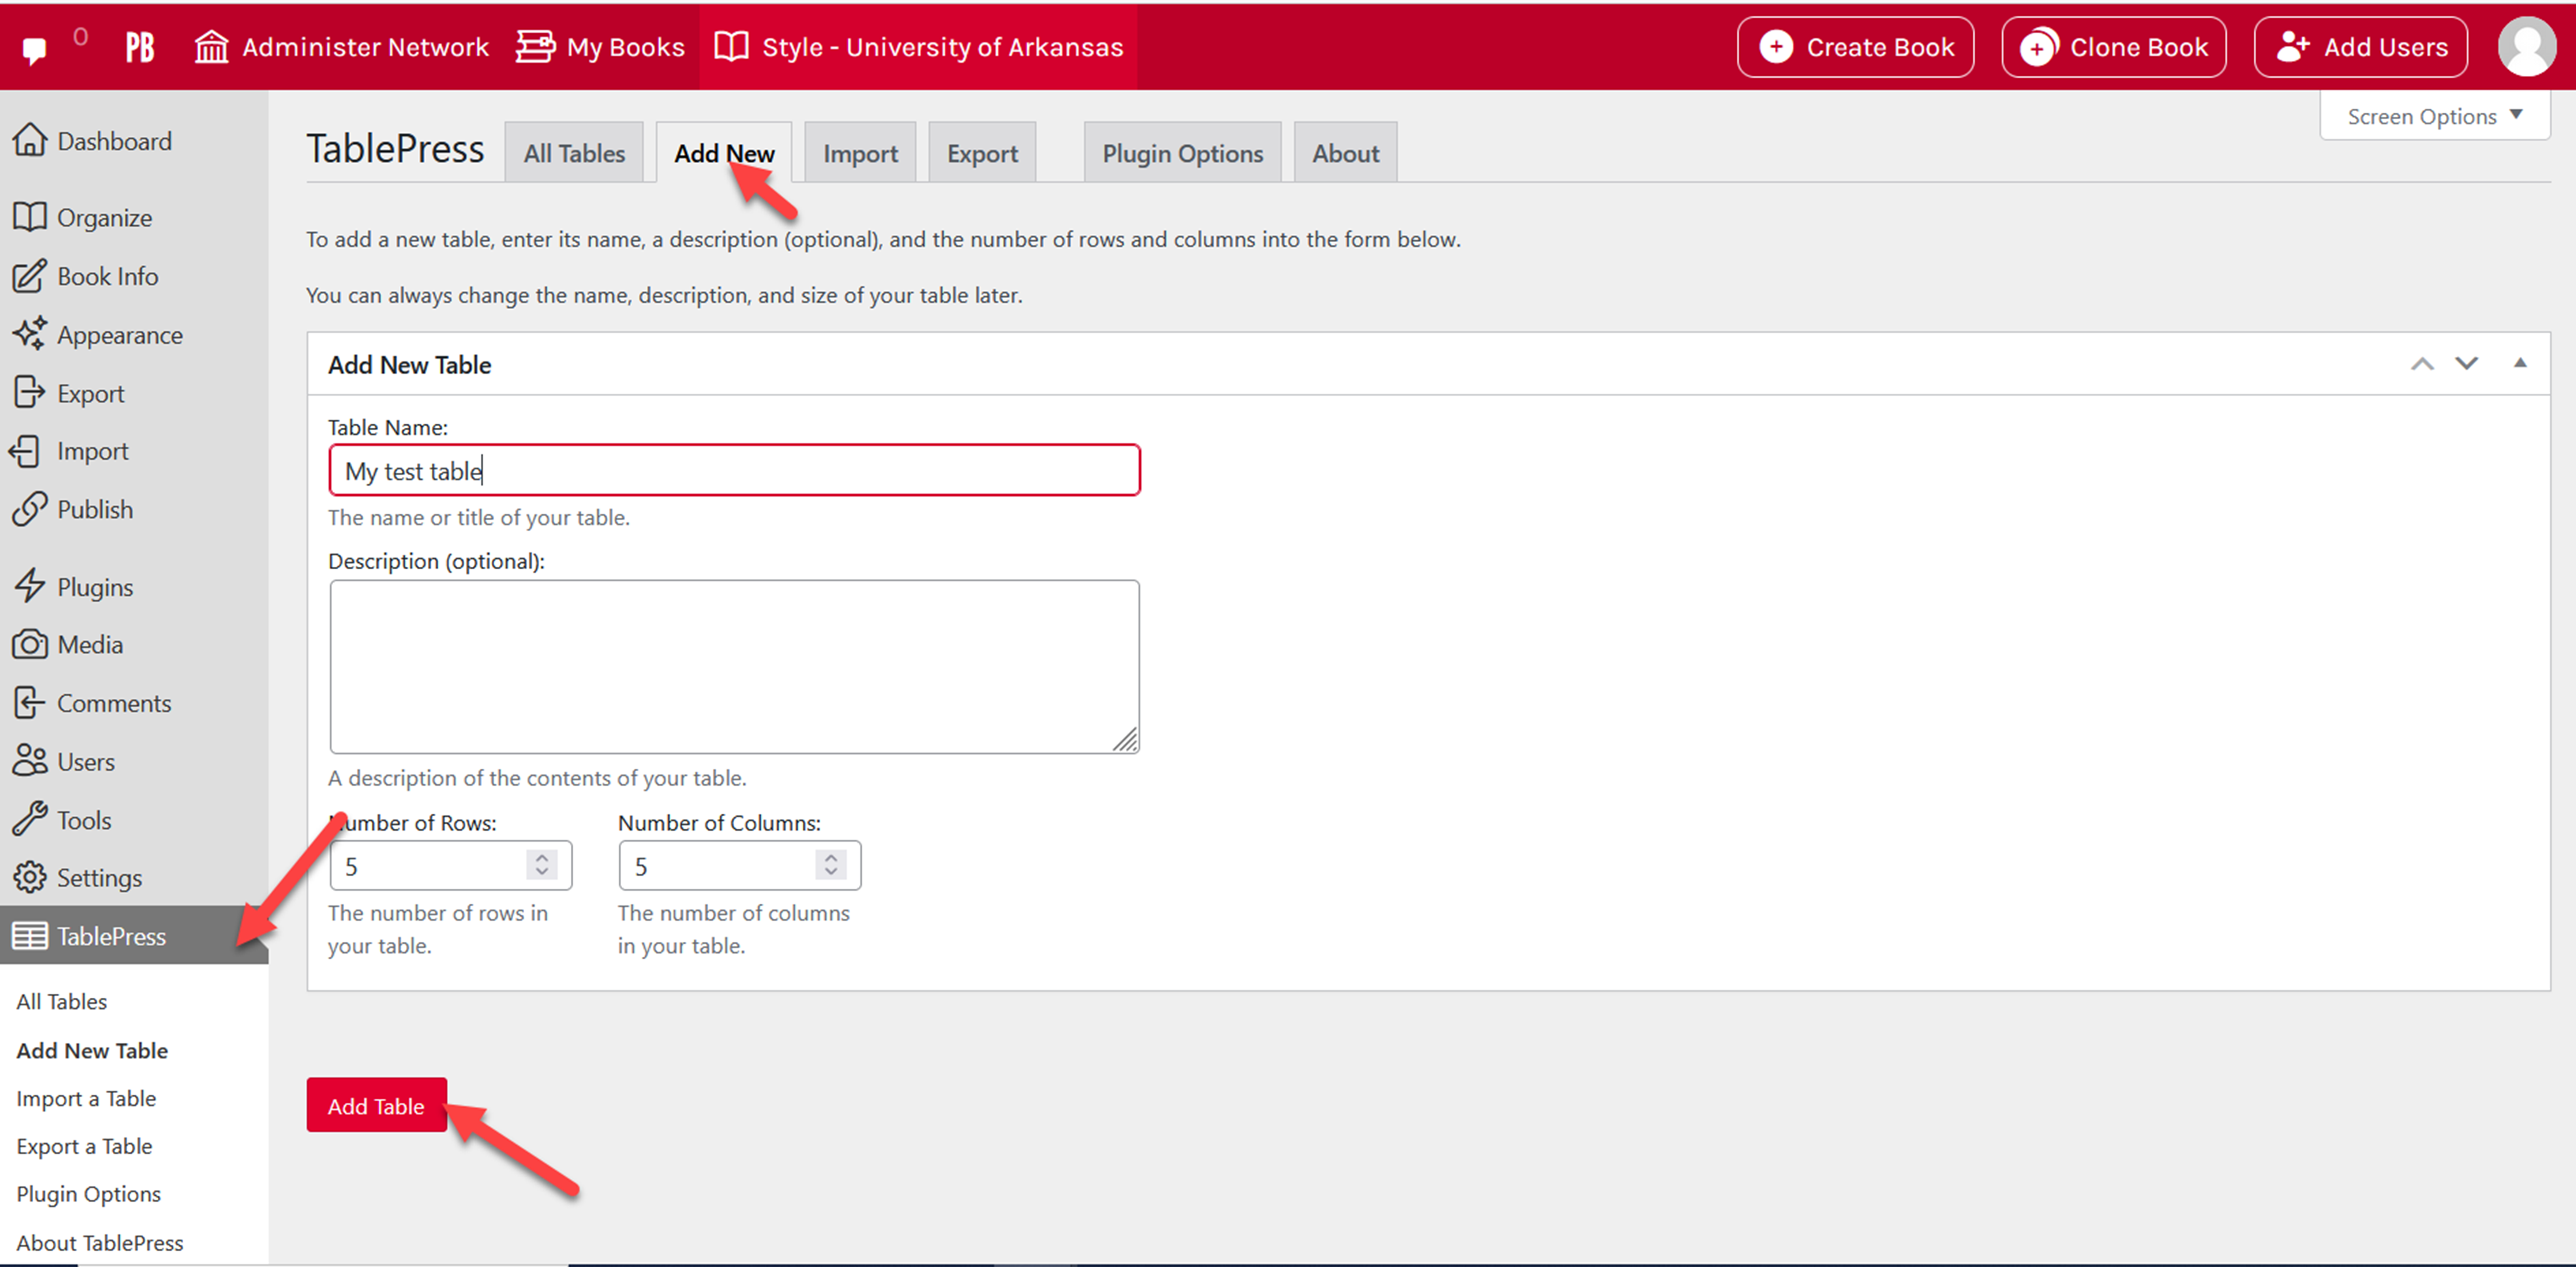
Once TablePress has been activated, you should see a TablePress link in your left sidebar menu. To begin creating your tables, open TablePress from the new sidebar menu option, then follow these steps.
- Select the Add New tab from the top of the page, or from the left sidebar menu
- Enter your table name and an optional description of the table, then select the number of rows and columns you’d like your table to have
- Click Add Table
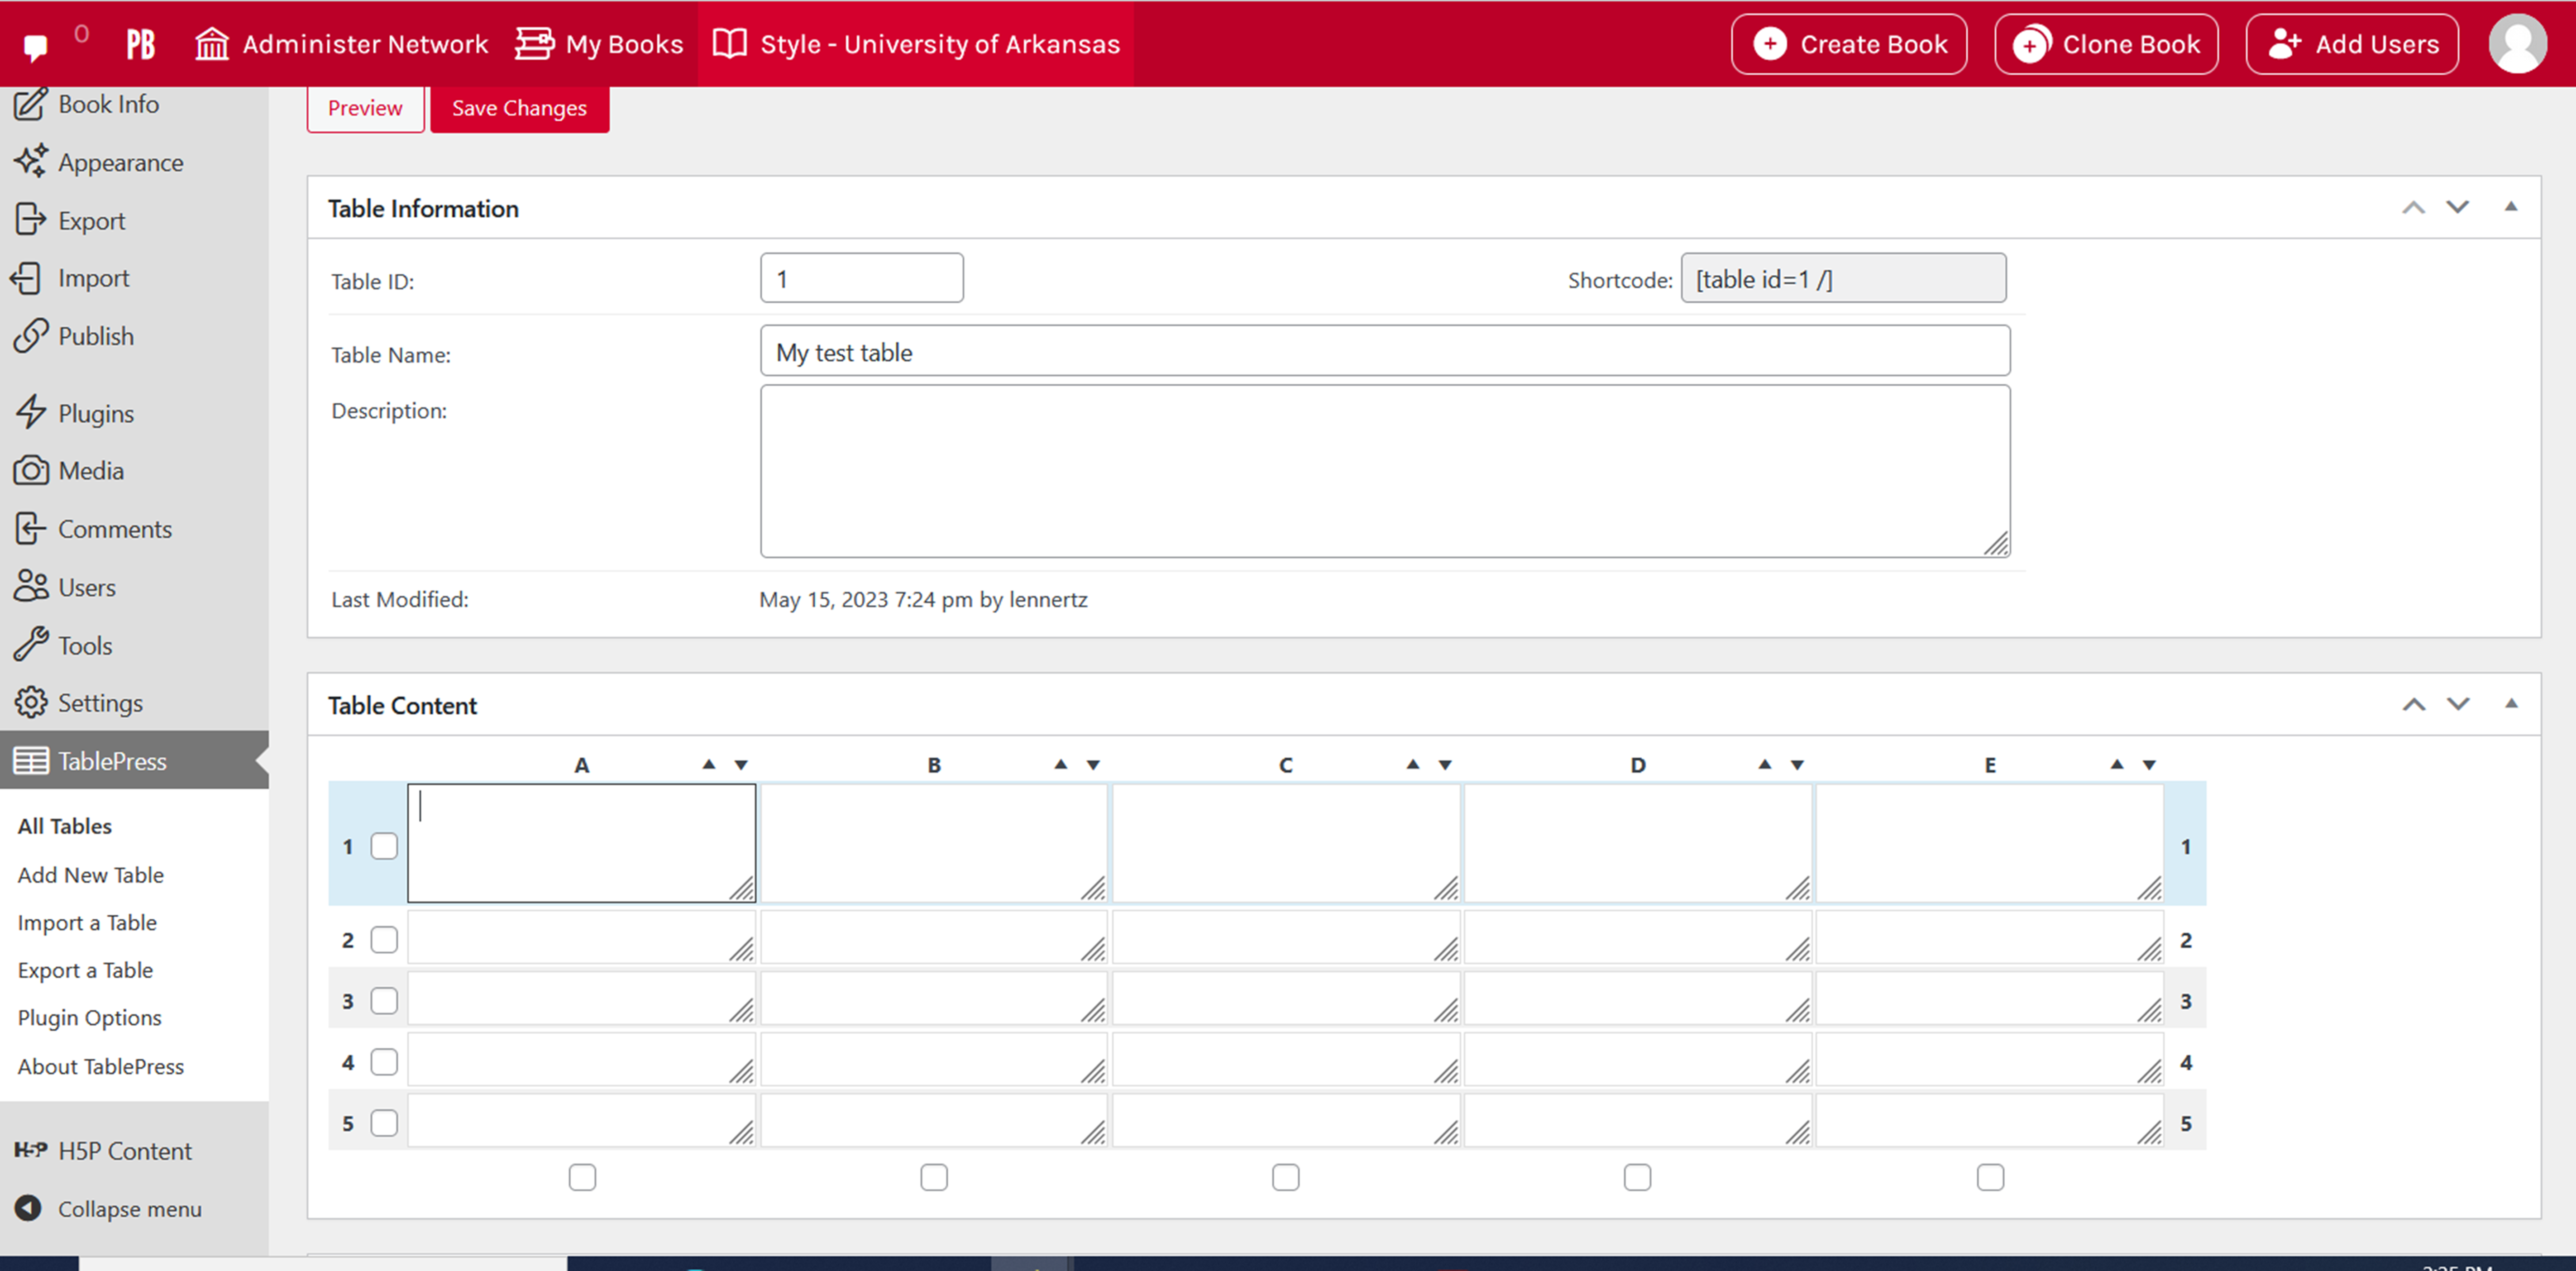
Once you click Add Table, you’ll be brought to your new table and will be able to enter content into the cells. Find the table in the Table Content panel, and click any cell to enter your data.
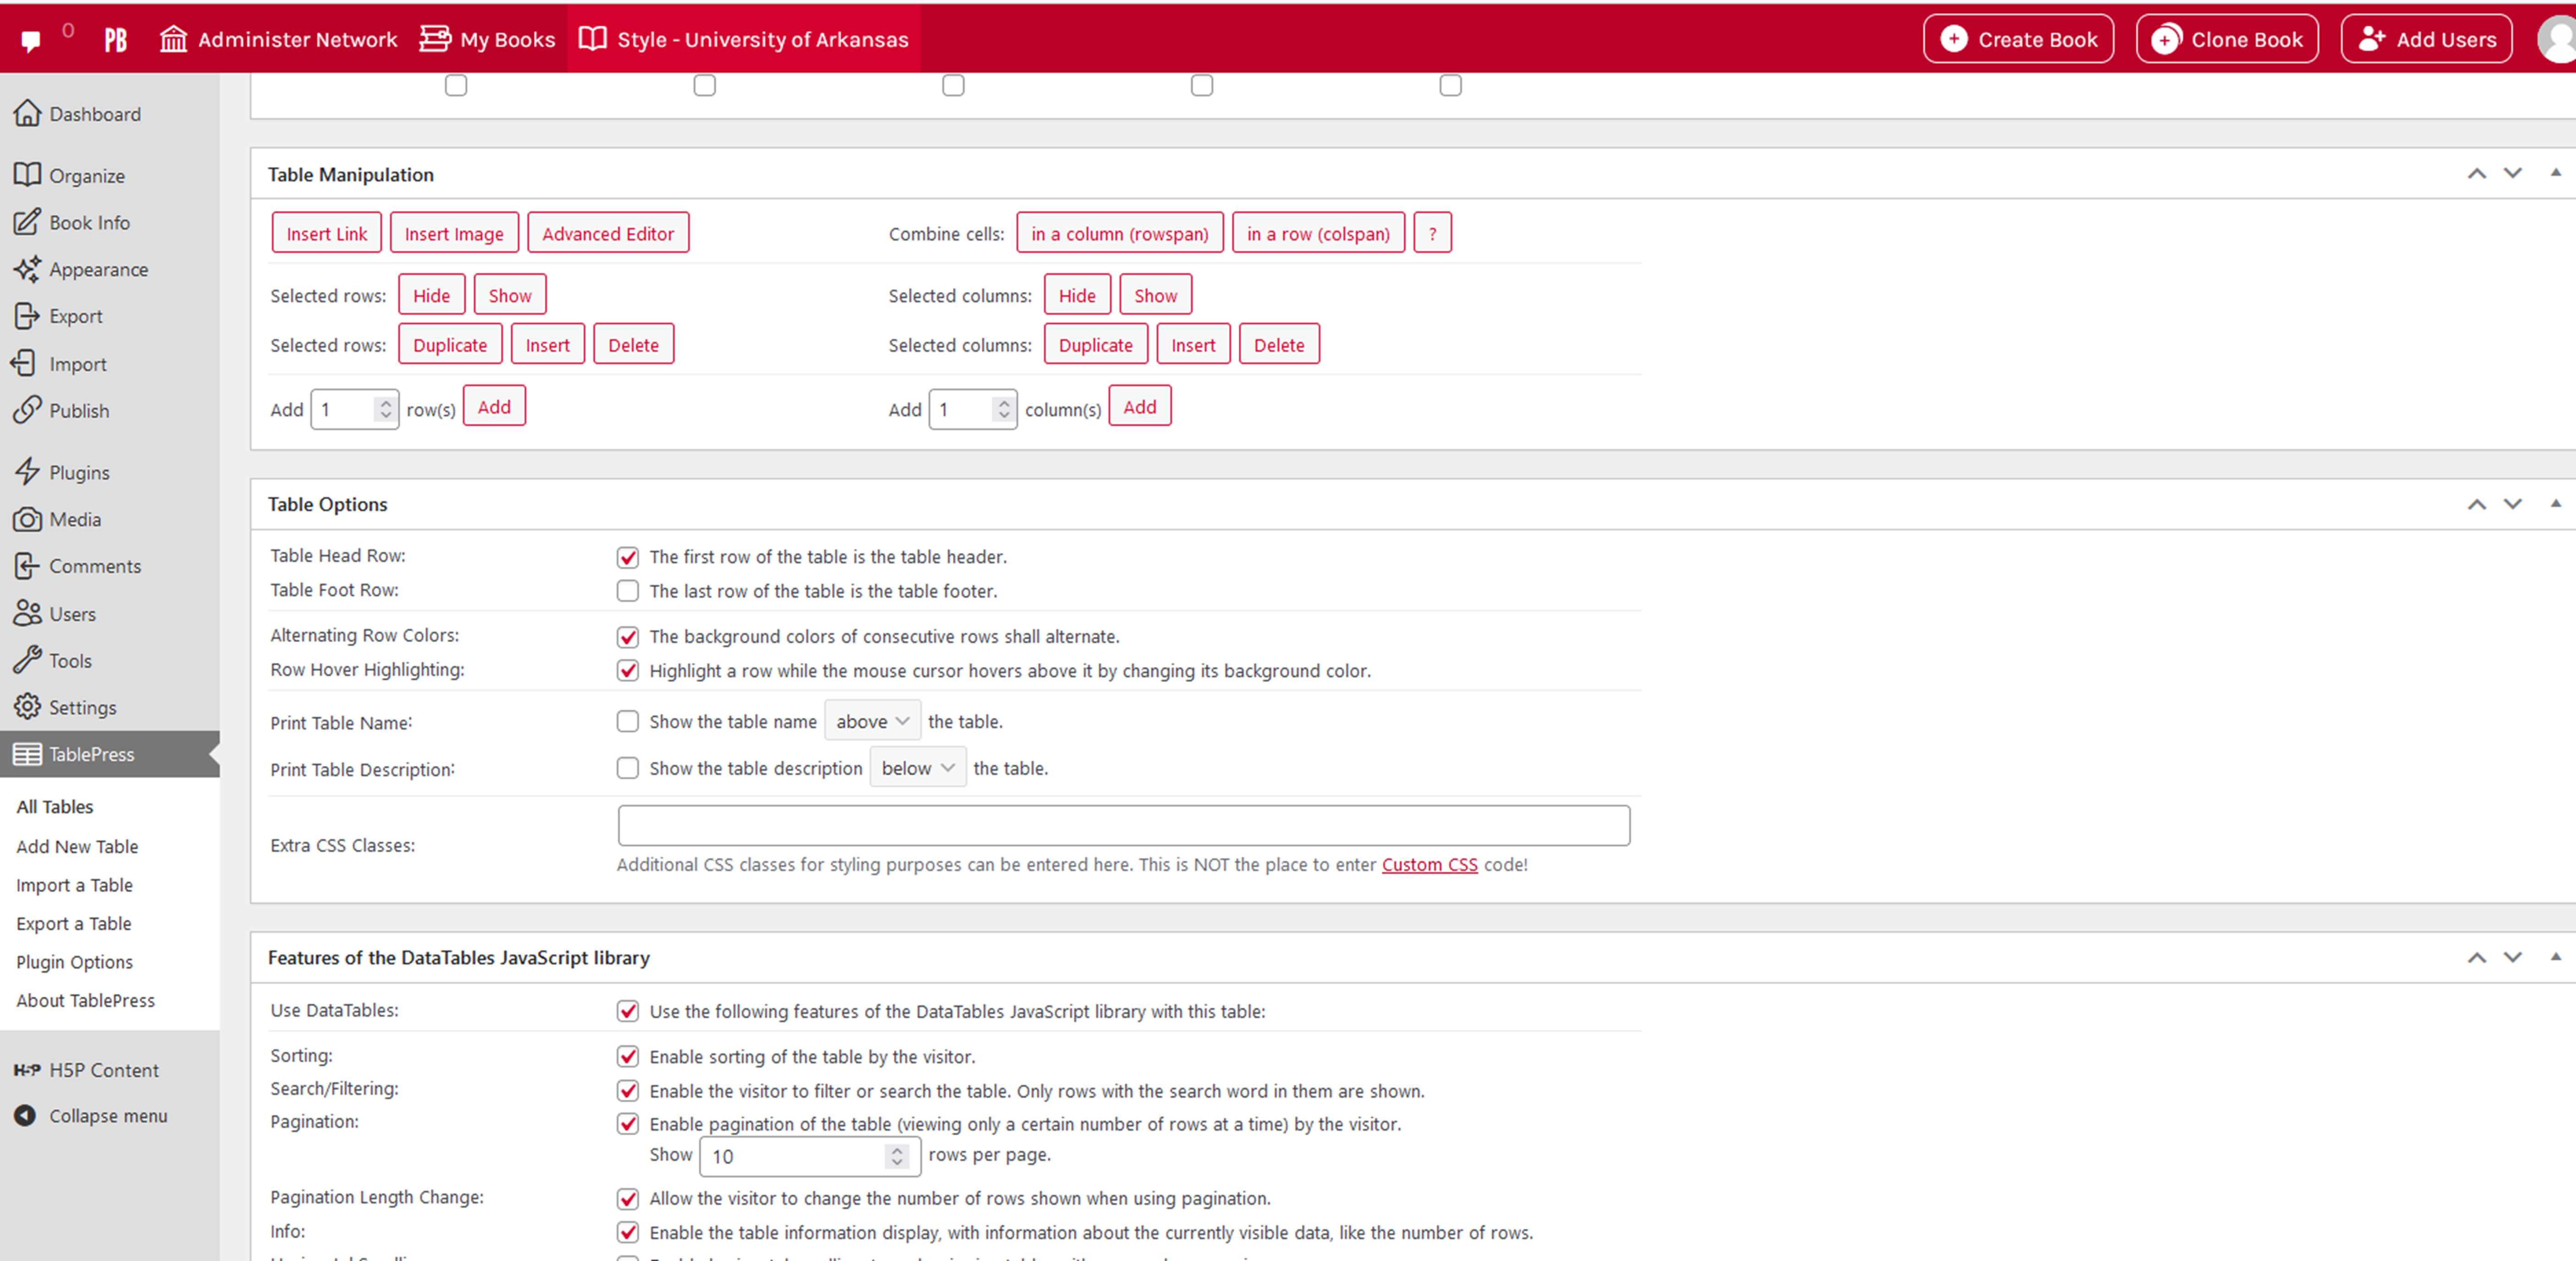
The TablePress plugin includes a plethora of settings to allow you to customize the table. Configure your table to the needs of your project using the Table Manipulation, Table, Table Options, and Features panels.
You can also choose to Copy Table, Export Table, or Delete Table using the tabs at the bottom of the page.
When your table is complete, click Save Changes at the top or bottom of the page. Saved tables will appear on the All Tables page.
Other Options
TablePress also allows you to perform a few other actions, available from the tabs at the top of the page:
- Import: Import tables in CSV, HTML, JSON, XLS, or XLSX format into TablePress to place them in your book
- Export: Export existing tables you’ve created in Pressbooks to your device as CSV, HTML, or JSON files
- Plugin Options: Add Custom CSS to style your tables
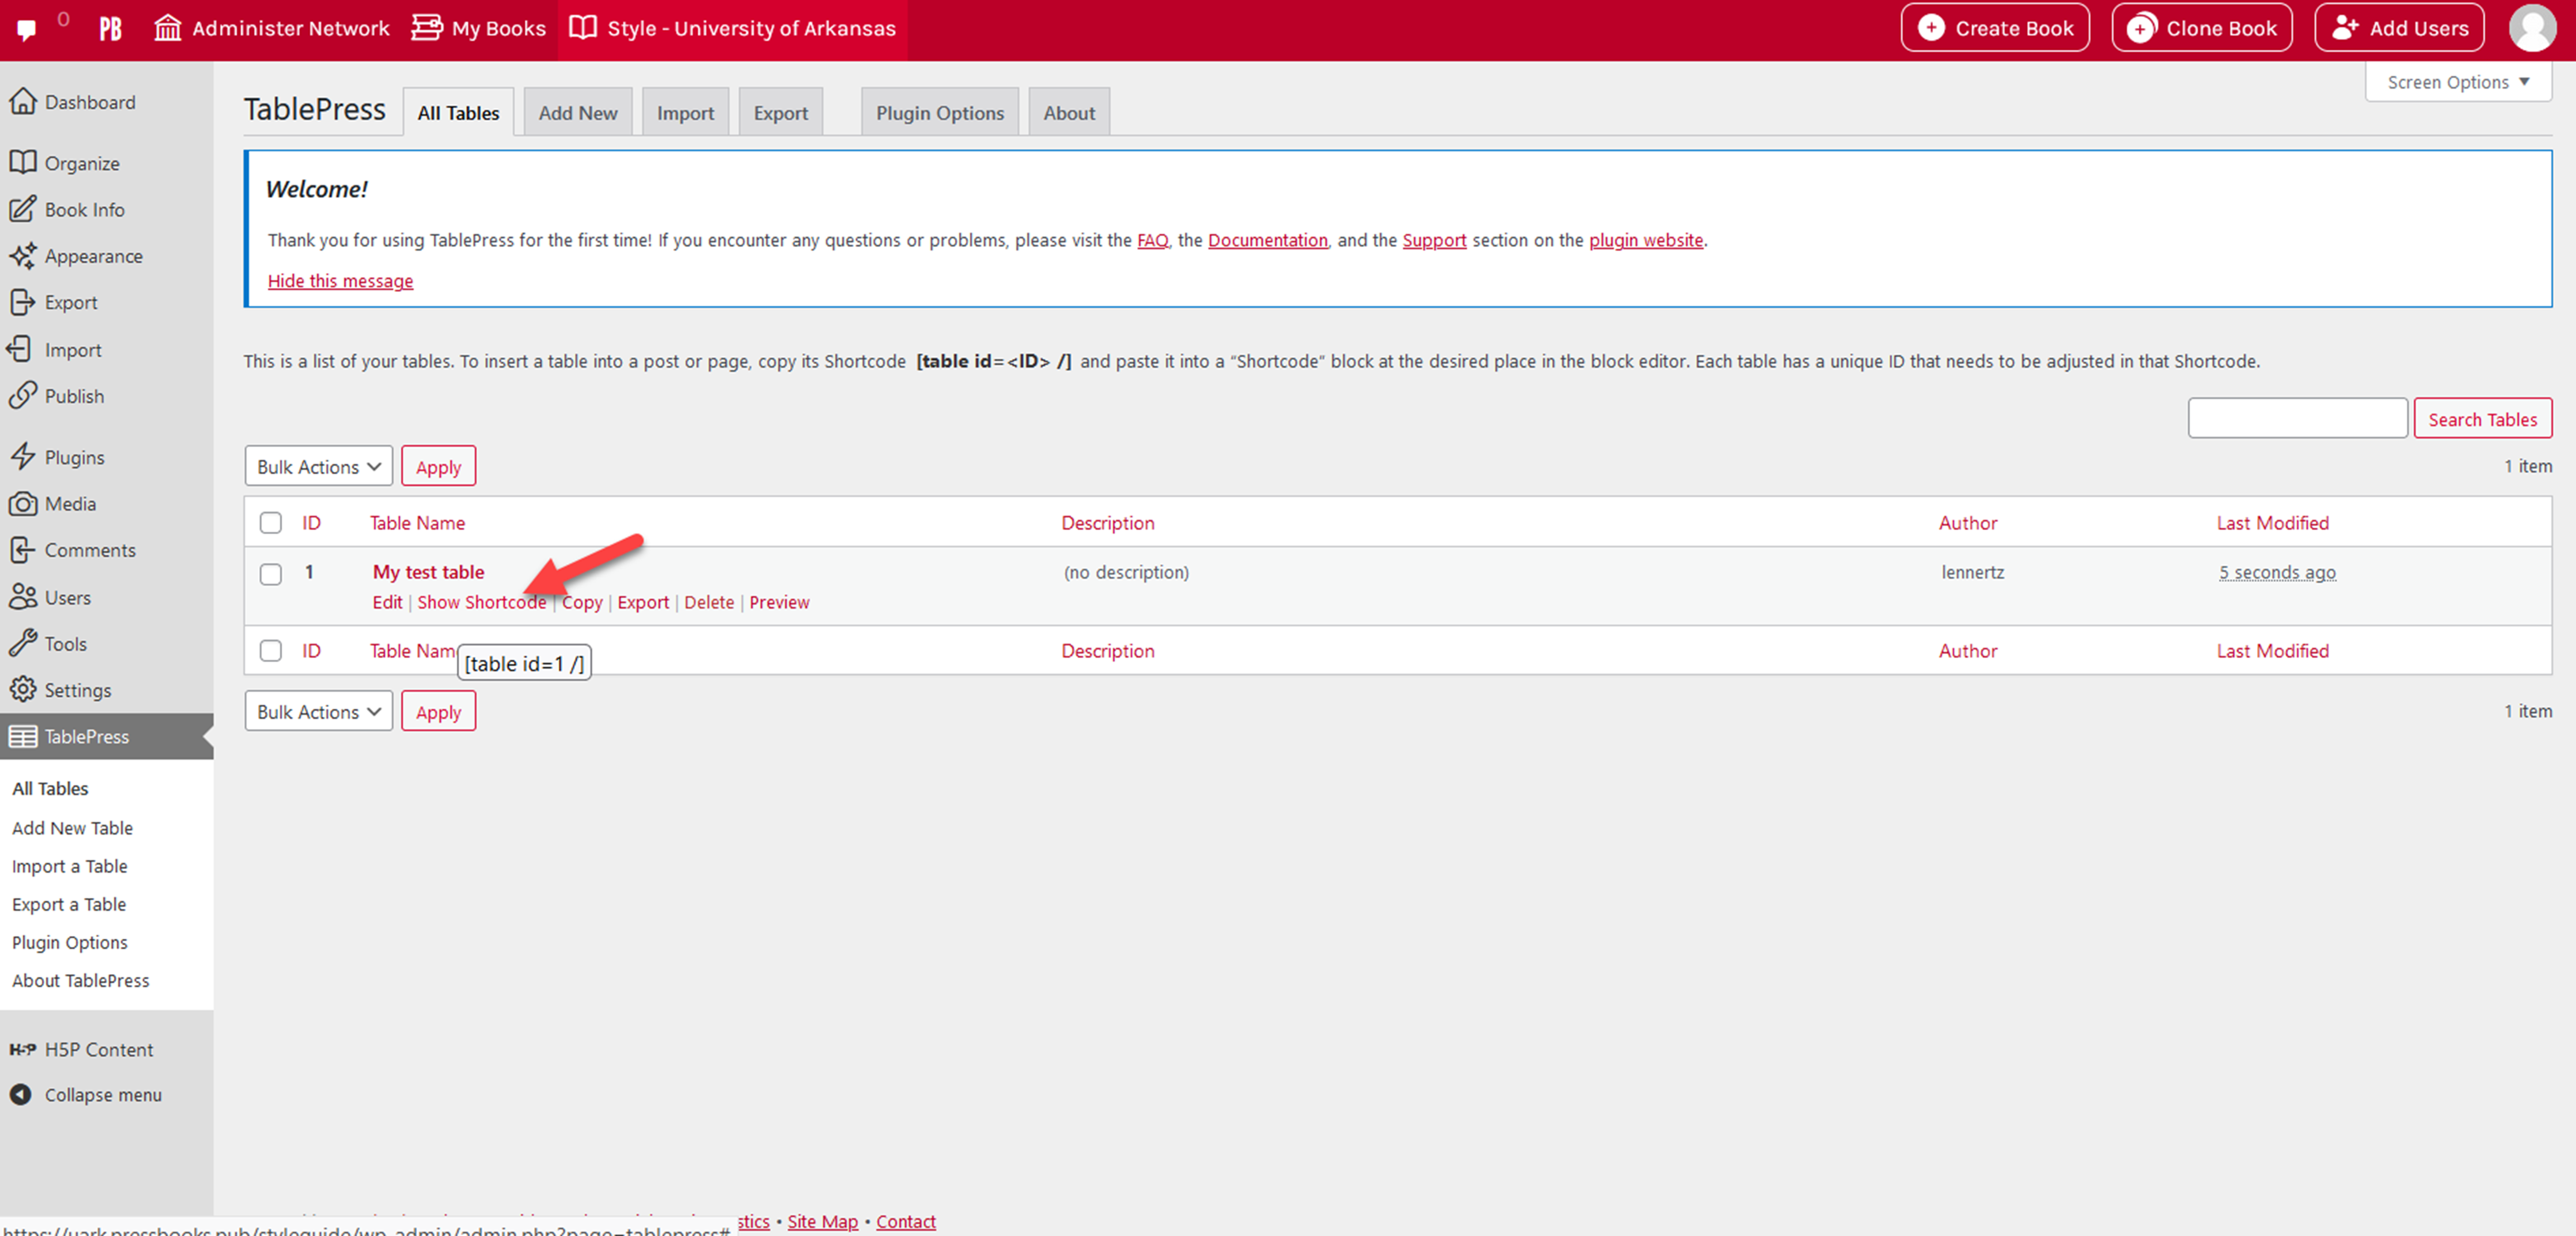
Adding TablePress Tables to a Chapter
Once you’ve activated TablePress and created your table, you can follow these steps to place it in your chapter:
- Go to All Tables and find the table you’d like to place in the chapter
- Hover over the title of your table, then click Show Shortcode
- Copy the shortcode and click OK
- Navigate to your chapter
- Paste the shortcode into visual editor where you want the table to appear
- Save the chapter
The table won’t display in your visual editor; you’ll just see the shortcode.
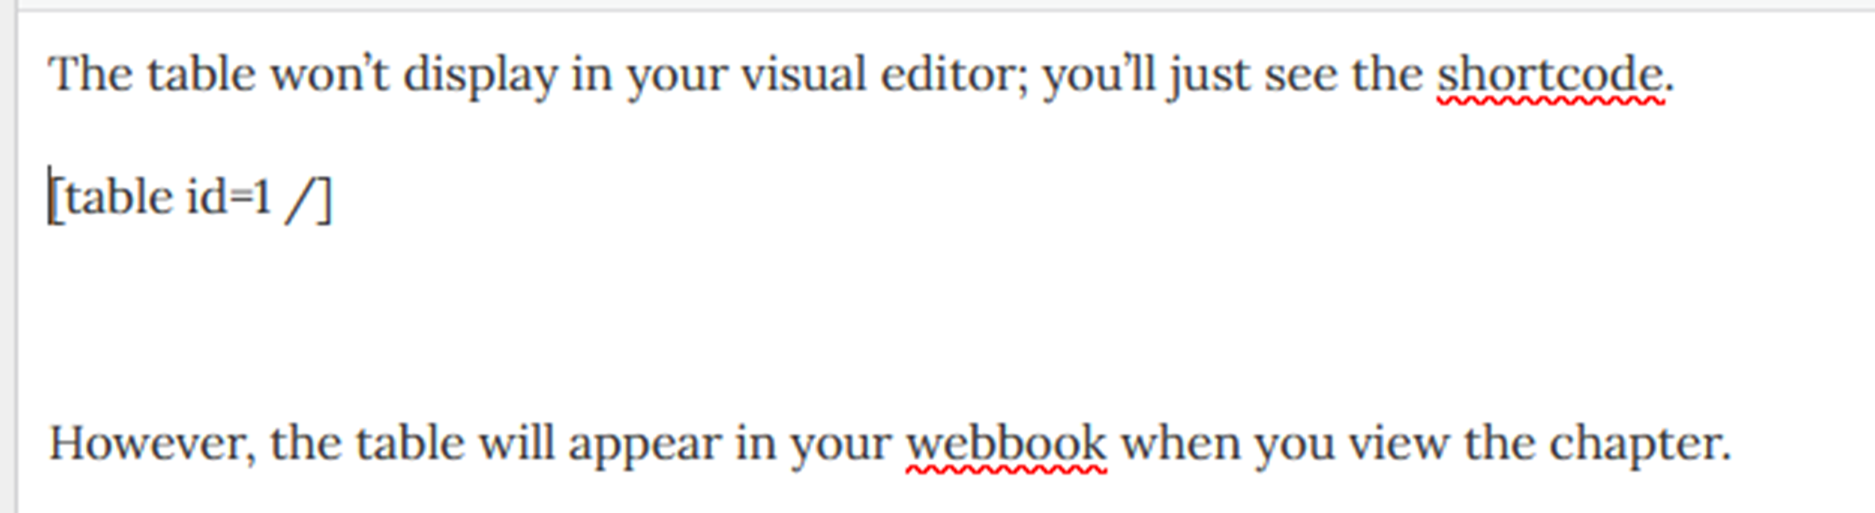
However, the interactive table will appear in your webbook when you view the chapter.
| Day 1 | Day 2 | Day 3 | Day 4 | Day 5 | |
|---|---|---|---|---|---|
| Patient 1 | 24 | 27 | 29 | 26 | 23 |
| Patient 2 | 44 | 44 | 43 | 45 | 44 |
| Patient 3 | 19 | 20 | 20 | 20 | 19 |
| Patient 4 | 20 | 26 | 28 | 28 | 22 |
TablePress tables also appear in PDF and ebook exports.
Using Math in TablePress
You can use MathML or QuickLaTeX to create equations and formulas in the tables you make in TablePress.
Using QuickLaTeX in TablePress
In order to create QuickLaTeX equations in TablePress tables, you must first check that:
- You have QuickLaTeX activated
- You have enabled the “Use LaTeX Syntax Sitewide” setting under Settings > QuickLaTeX > Advanced*
*This is recommended but not compulsory. The alternative is to add the shortcode to each individual cell of the table, or to follow the instructions for using LaTeX.
Once you’ve activated or enabled these settings, you can use any supported QuickLaTeX syntax to create your equation within the table’s cells. All content can be edited from within the TablePress interface.
Using MathML in TablePress
Write your MathML markup directly into the table cells in TablePress as you would in the text editor. Save the table, add it to your chapter, and you’re ready to go.
Other Solutions
If LaTeX is a bit much for you or you’d rather look at other options, you can always use special characters, symbols, and the sub/superscript buttons on the toolbar to compose your equations.
If you are fluent in HTML+CSS, you can also look at constructing and formatting your formulas that way.

Feedback/Errata