Media
Supported Media Upload Formats
Many types of media can be uploaded into your book. These files can be uploaded directly into the chapter using the Add Media feature or through your Media Library.
Supported media file types on Pressbooks are:
| Images | Audio | Video | Files |
|
|
|
|
When uploading media into Pressbooks, note the following:
- The maximum file size that you can upload is 48 MB. (Note that this upload-size limit is different from the import-size limit, which is much larger.)
- To give a reader access to a file without leaving Pressbooks, then upload the file to the Media Library before inserting it into the book. The file cannot be embedded into the book by linking to an external source.
- Embedded images must be one of the following: JPG, PNG, or GIF.
- File types that will not embed—such as PDFs, Word files, or PowerPoint slides—can still be provided. Instead of using an embedded image, readers can download these file types from the book through a hyperlink.
Pressbooks handles images well for web, EPUB and PDF outputs.
Adding Images
You may add images in two ways – outside of the editing process and during the editing process.
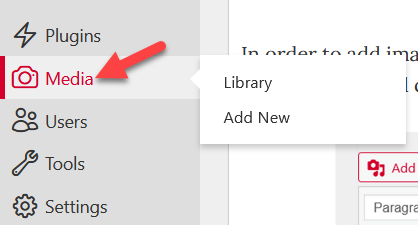
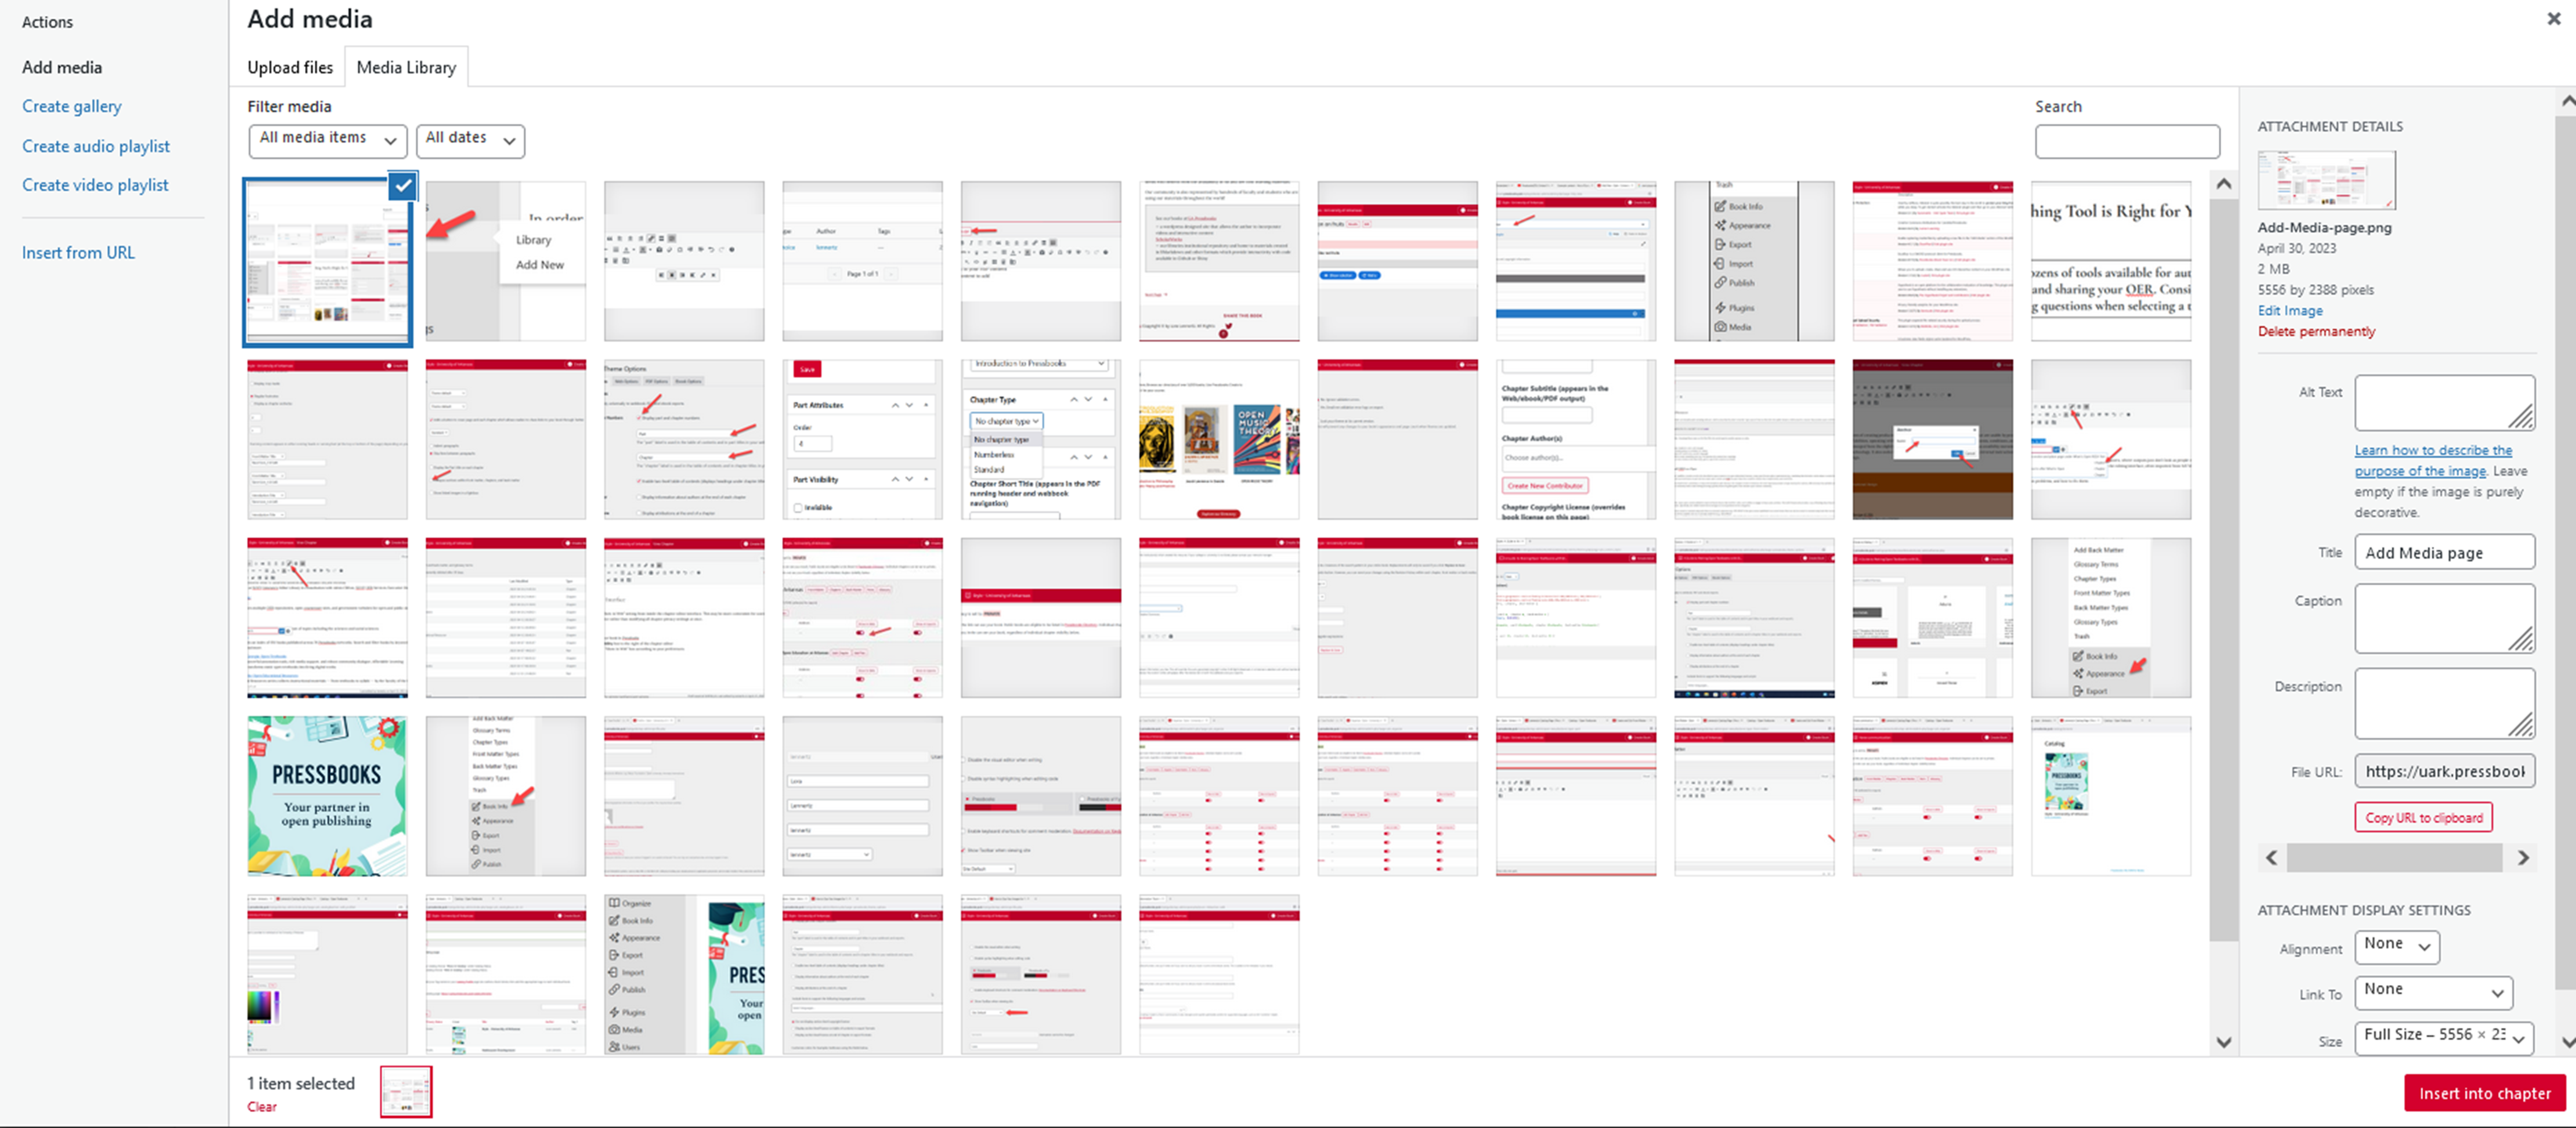
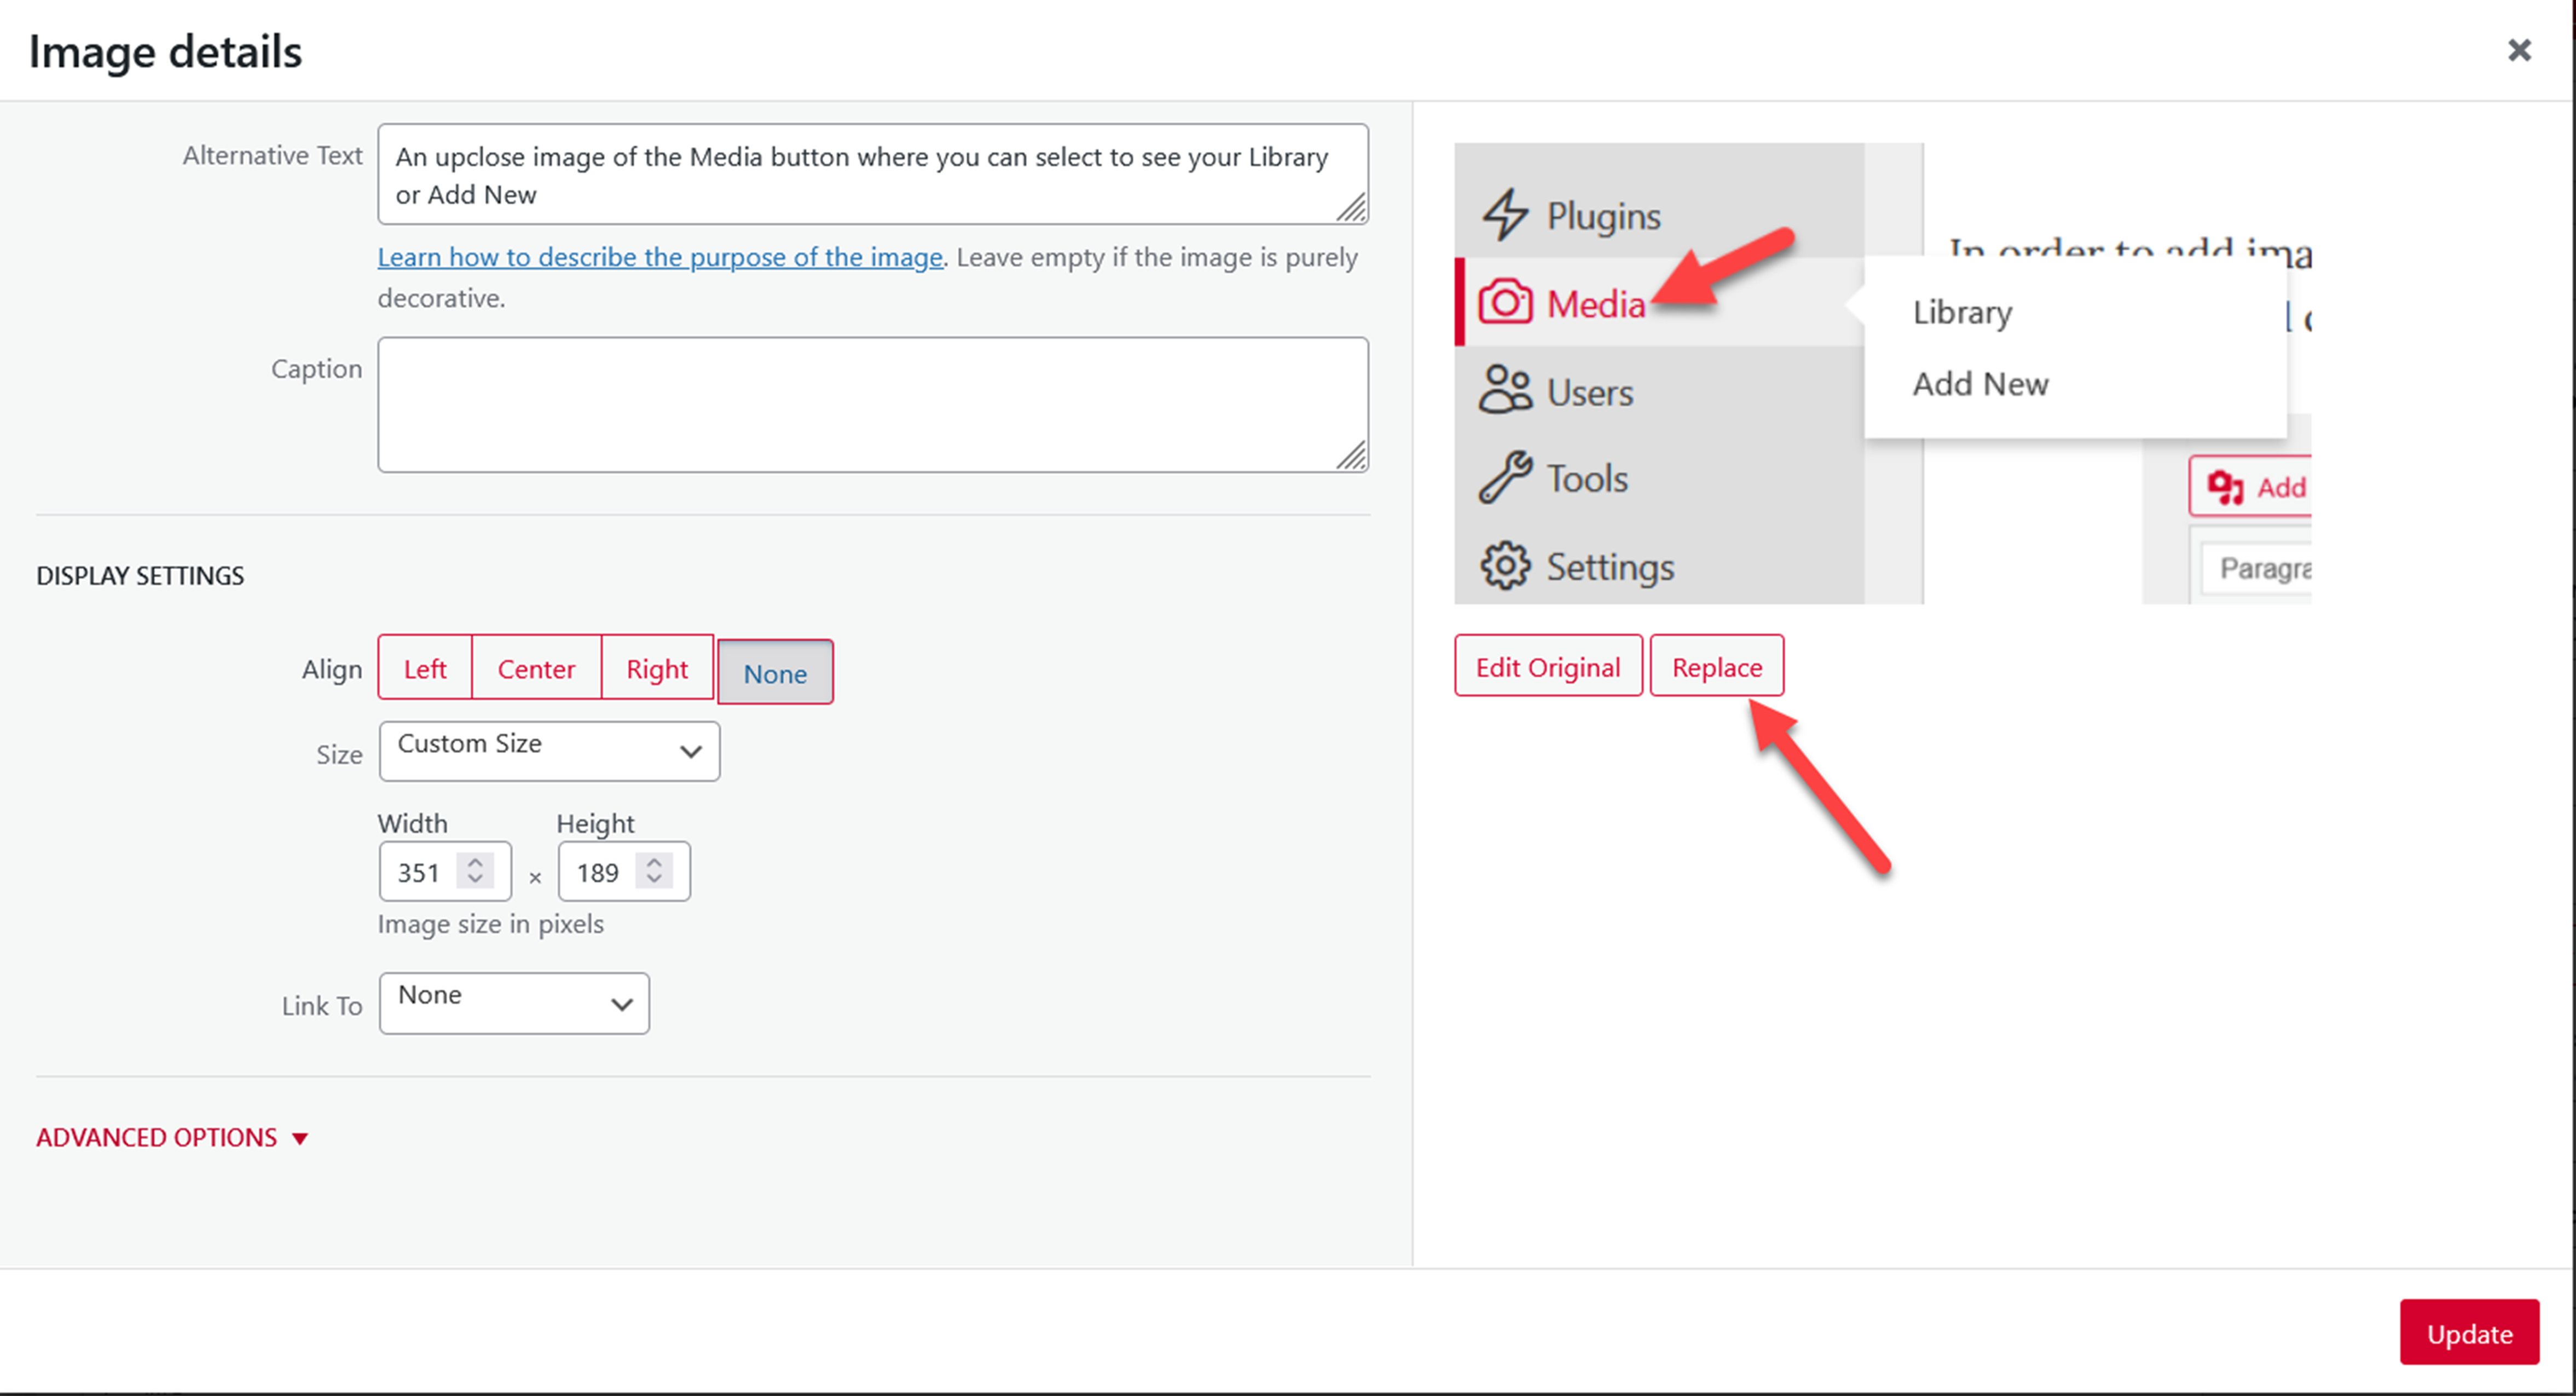
To add items outside of the editing process you can click on Media in the left sidebar.
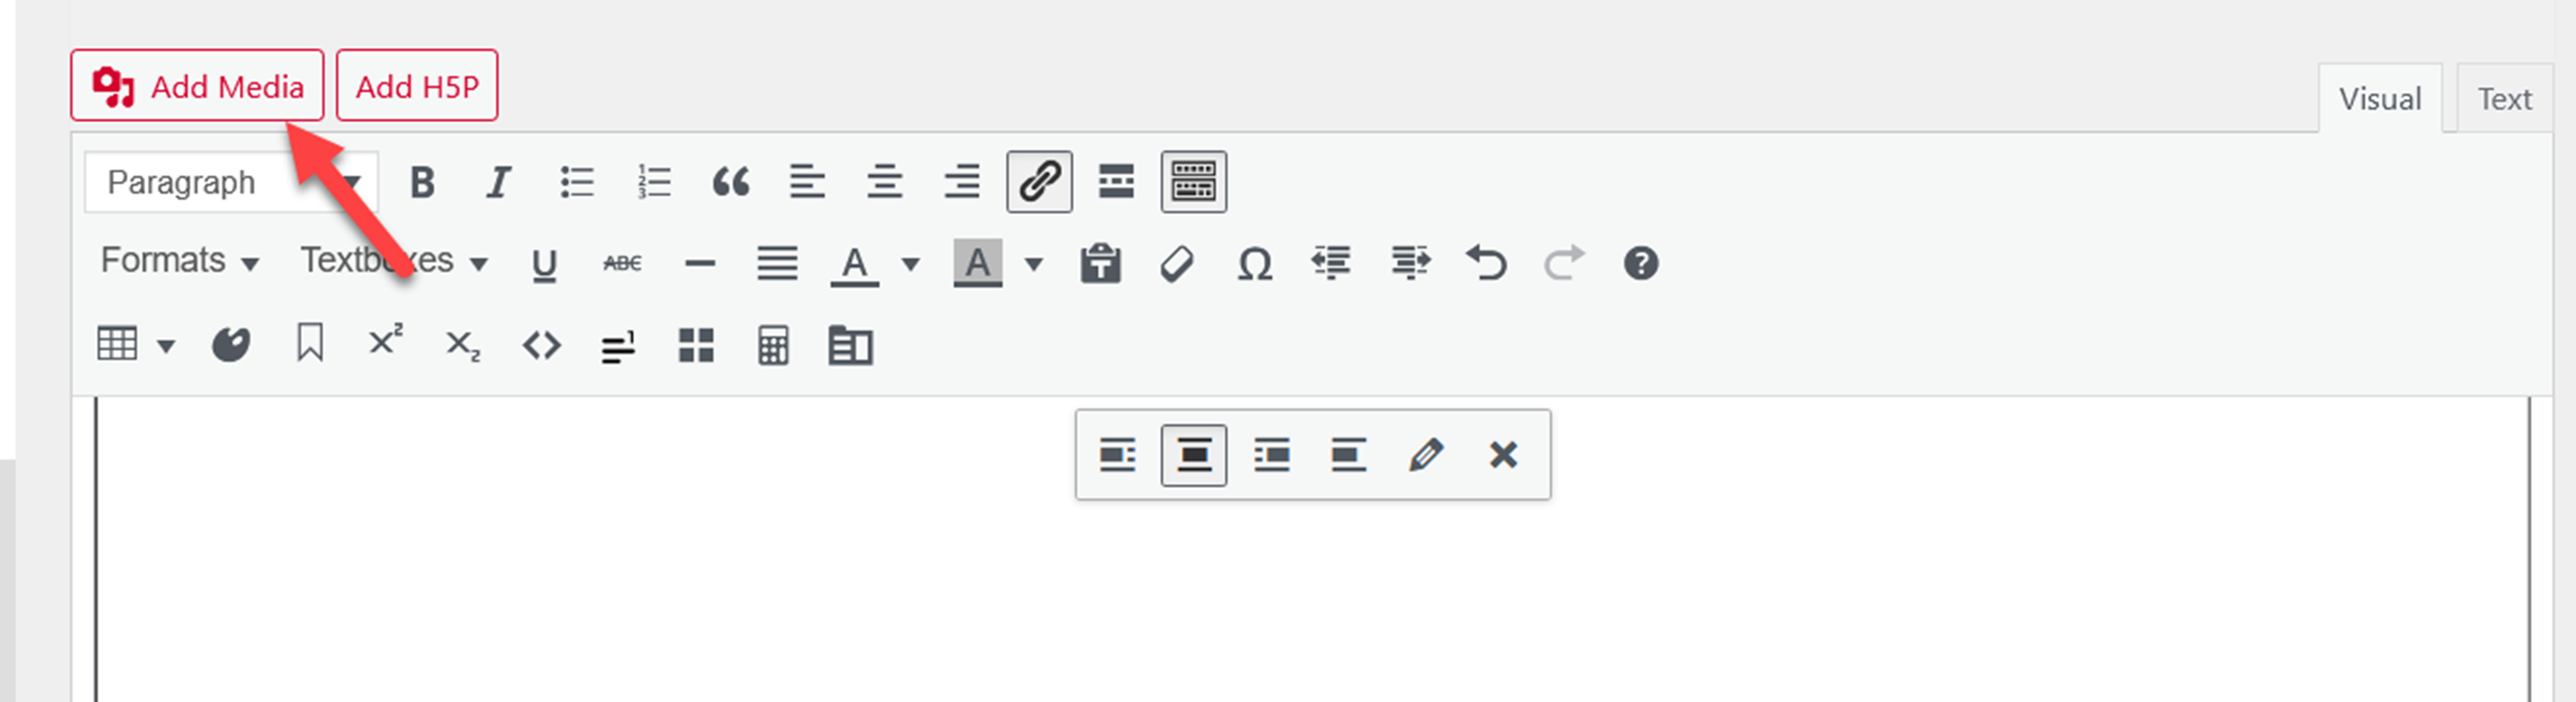
To add images while writing or editing your text, click on the Add Media button in your chapter editor:
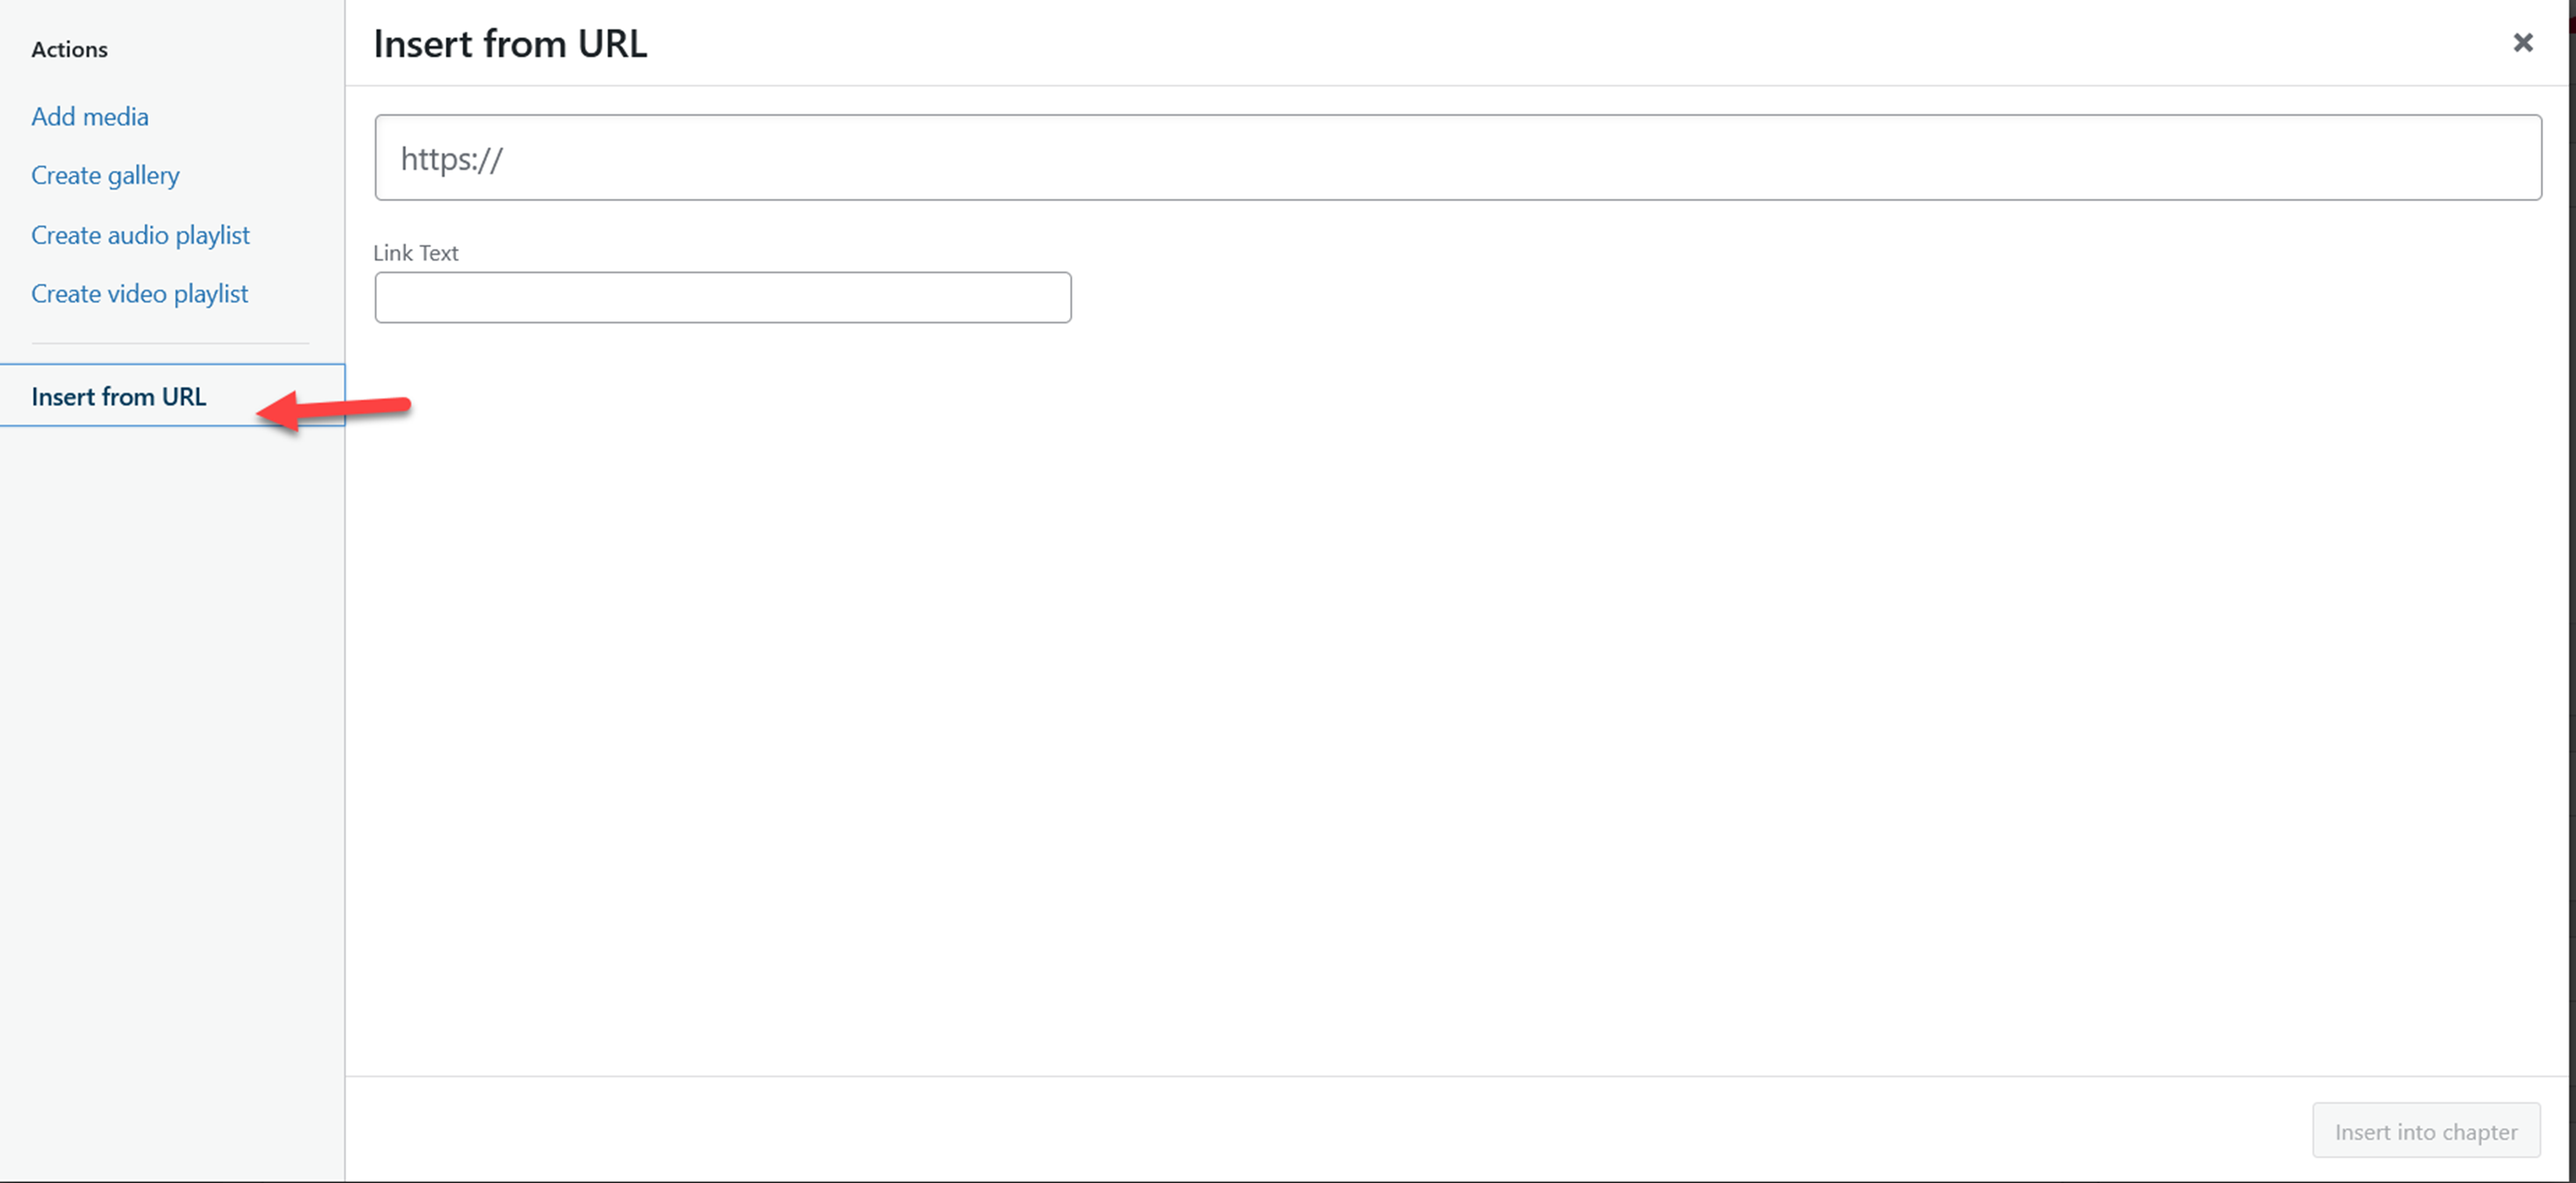
Uploading an Image from a URL
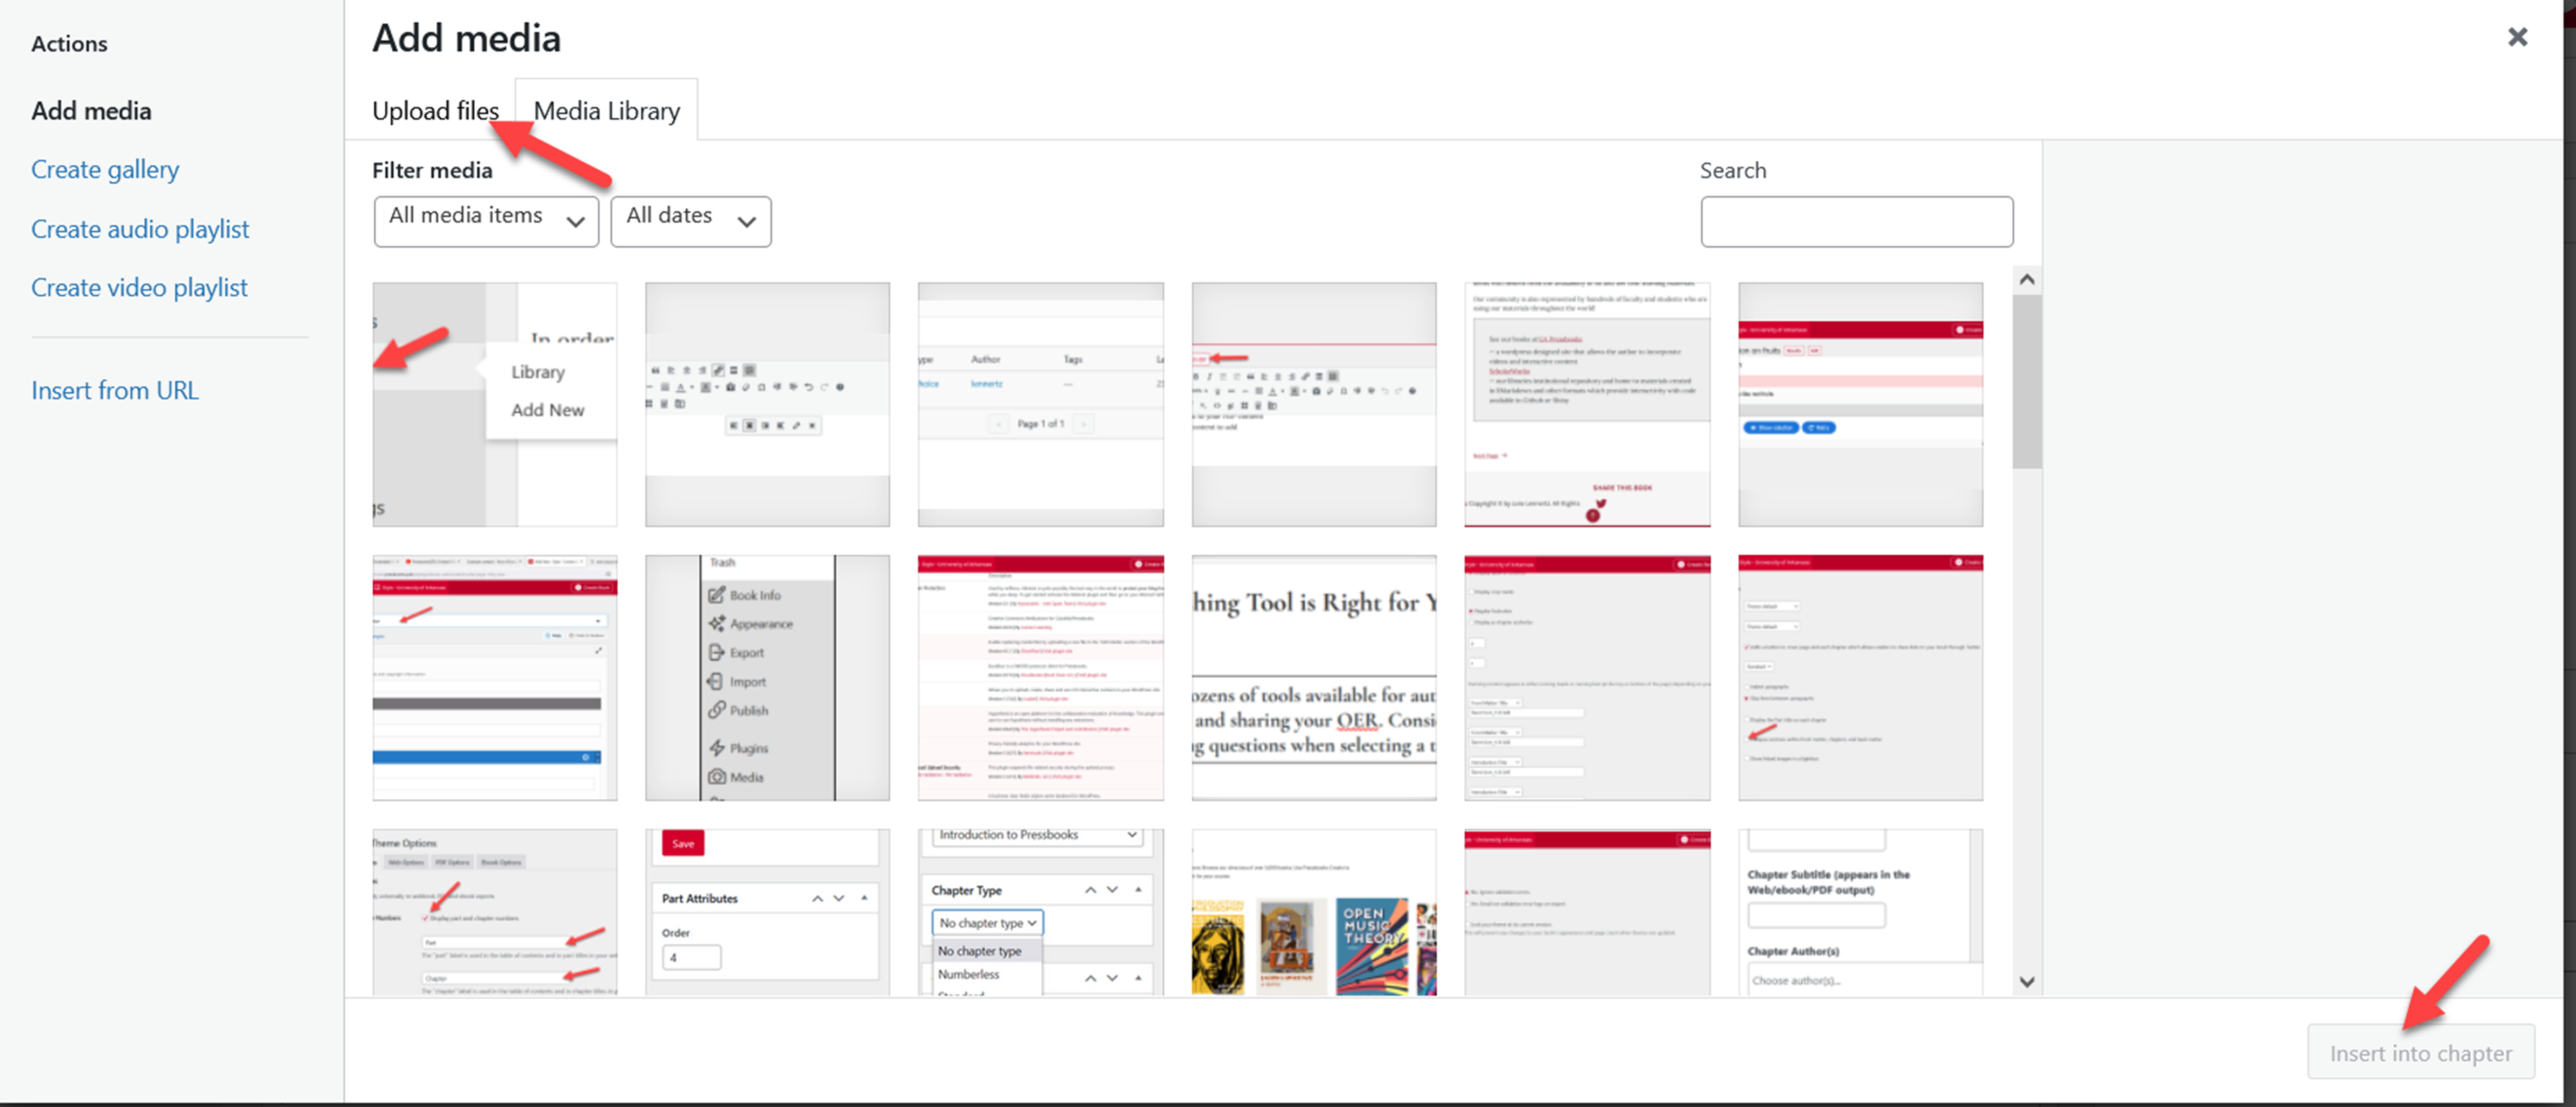
Uploading Images from Your Computer
Next, upload your image either by dragging and dropping the image file from your computer to the upload box, or by clicking “Select File” to find the file in your computer. You can also choose from existing files in your Media Library.
Settings, when Uploading an Image
You can create your image file metadata while you are importing your image. You can also change this metadata at anytime. This information includes:
- Alternate text (this is important for accessibility for visually impaired people using screen readers it is required for University of Arkansas books)
- Caption (note: this is important to include for ebooks especially as images without captions may not render properly in some e-readers)
- Image alignment
- Image size
- Linking preferences (you can link to the image file, an attachment page, a custom URL or have no link)
Changing Your Image Settings
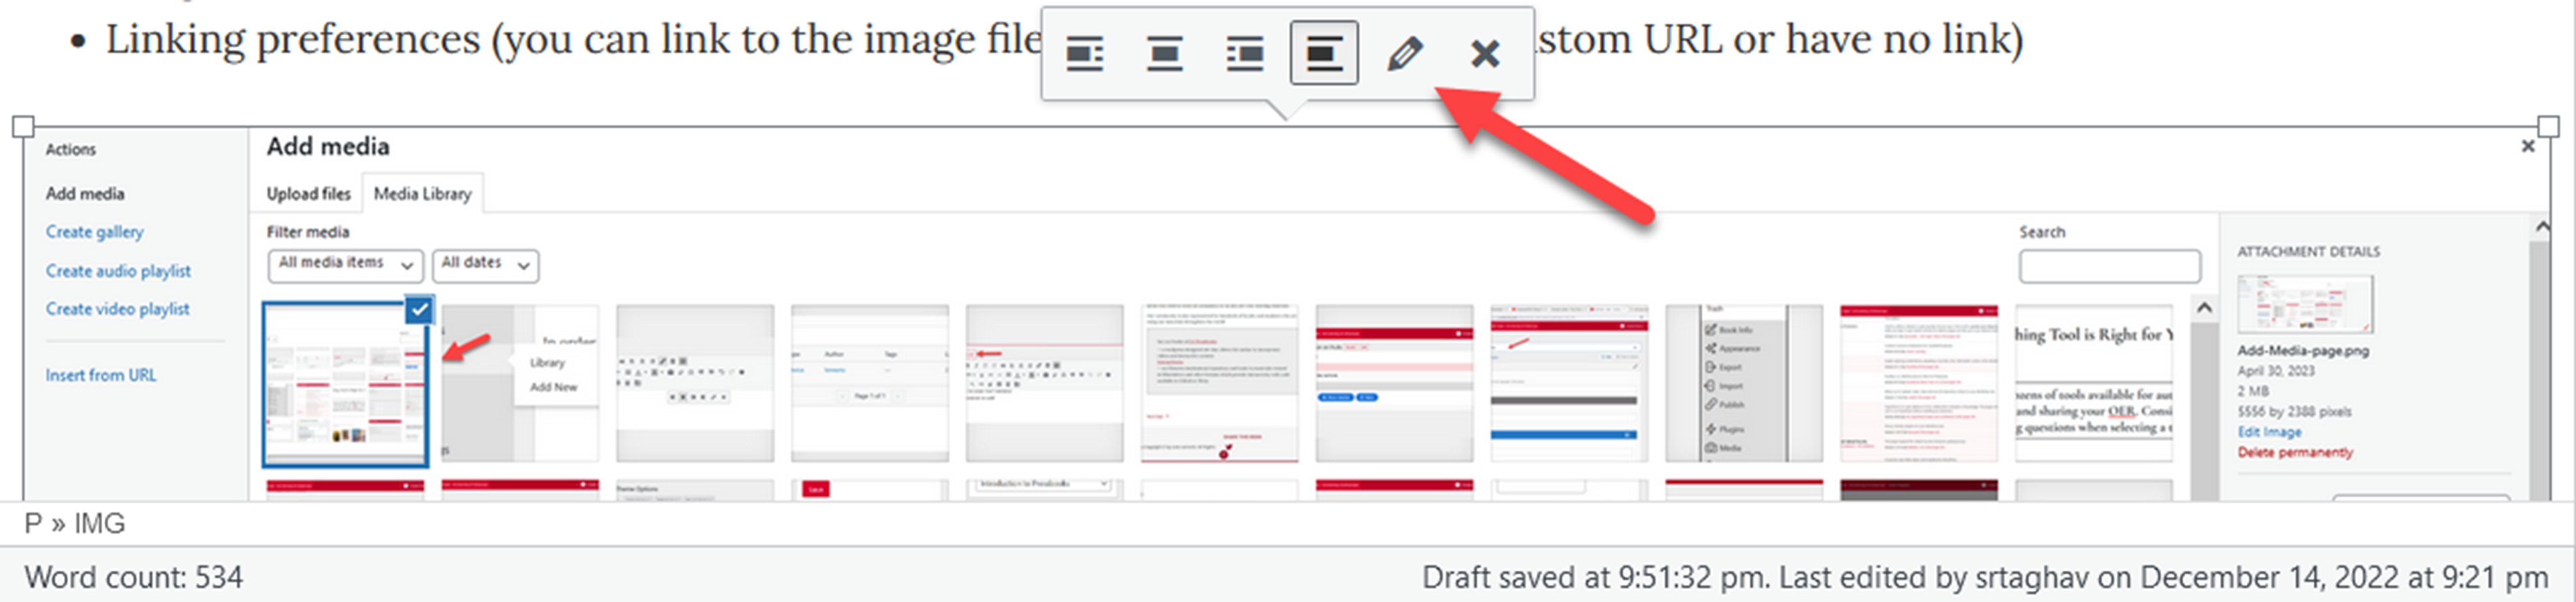
Finally, if you would like to change the settings on an image after it has been added to a post, go to the chapter editor and click on the image. You’ll see a few small icons appear:
- Click on the ‘X’ to delete the image
- Click on the pencil to open the editing screen (see below).
- Click on any of the other icons to change the image alignment.
You can also edit the image caption at any time without opening the clicking on the existing caption and typing as normal.
Editing Screen
By clicking on the pencil, you open the image editing screen. with the same elements that you could edit when uploading an image.
Basic Image Details
To edit an image that you have already upload into a chapter, follow these steps:
- Select the chapter containing the image you’d like to edit and access the visual editor
- Click the image so that the image toolbar appears
- Click the Edit pencil icon on the image toolbar
This will open up the Image details window, which includes a number of basic image settings.

In this window, you can:
- Add a caption
- Add alt text – Required for the University of Arkansas Pressbooks.
- Select an alignment for the image
- Set the image’s size
- Link the image to its attachment page, its media file, or a custom URL
- Set an image title attribute
- Set an image CSS class (see more in the Custom Styles section under Appearance and Themes)
- Edit image link settings
To access additional image editing options, select the Edit Original button beneath the image on the right side of the Image Details window. This will bring you to the Edit Image settings.
Editing Your Image
In addition to changing your image settings, the editing screen also allows you some basic editing options for the image itself. By clicking on Edit Original you will see a new window with several options for physically editing your image.
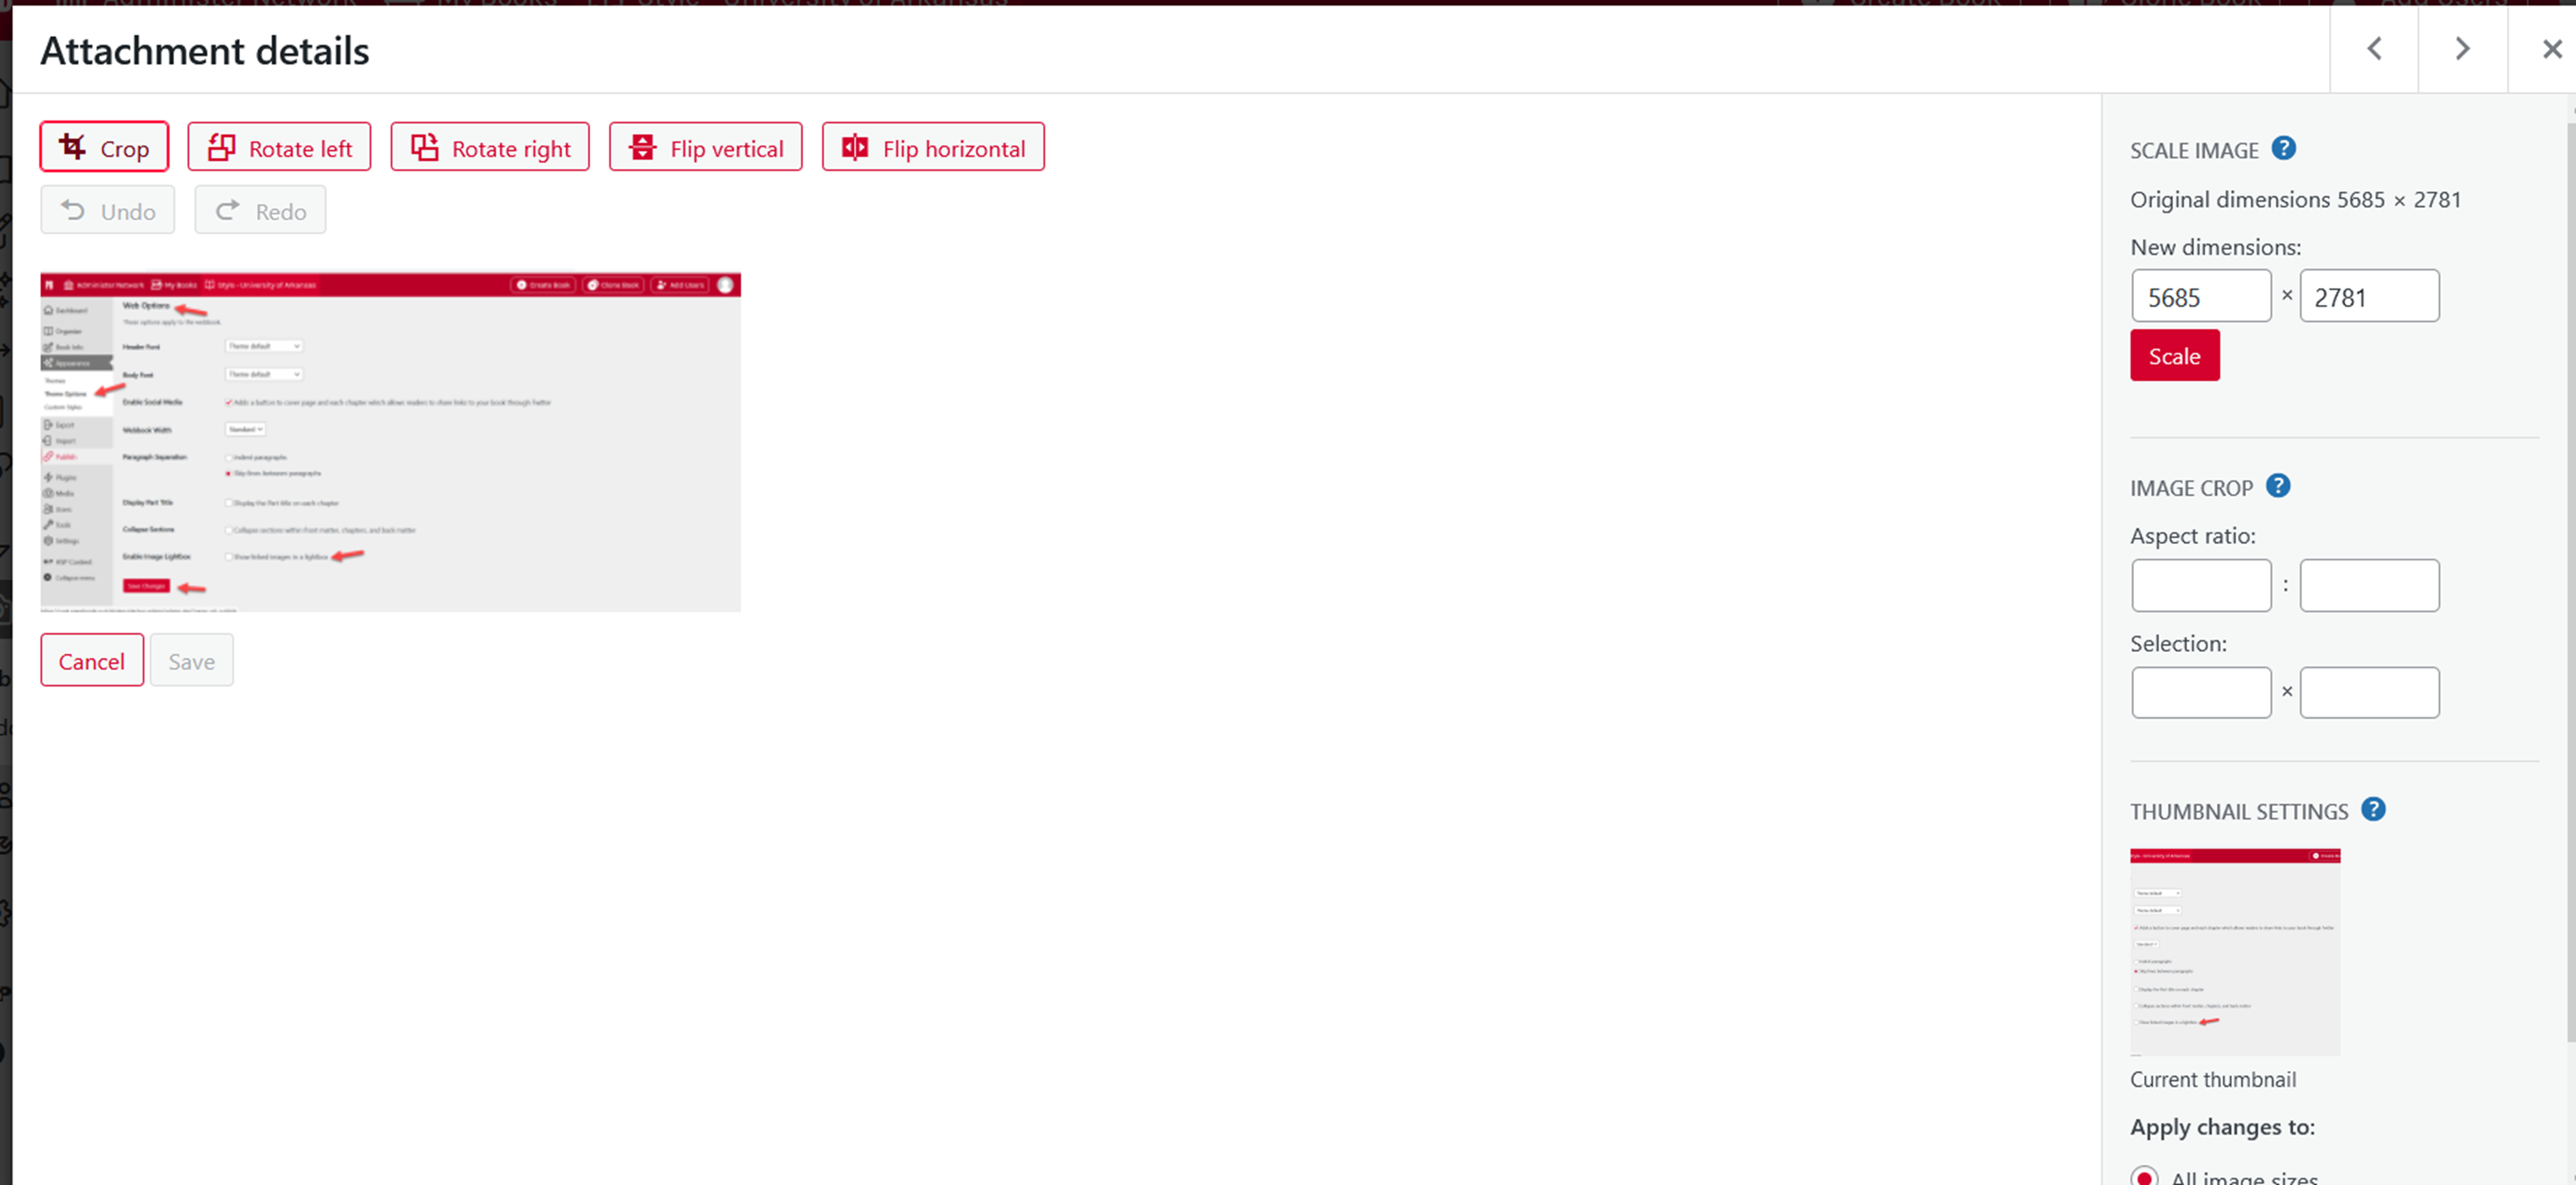
Available image editing options include the ability to:
- Crop
- Rotate an image left or right
- Flip an image vertically
- Flip an image horizontally
- Scale an image to your custom pixel dimensions
- Crop an image to custom pixel dimensions and aspect ratio
- Select whether customized image settings apply to the thumbnail version of an image
When you’ve finished changing your image’s settings, click Save. This will return you to the Image Details window, where you can click Update. You’ll then be taken back to the chapter’s visual editor.
Replacing Images
If you’d like to replace a single image in your chapter, follow these steps:
- Click the Edit pencil icon to open up the Image Details window
- Click Replace underneath the image on the right side of the panel to be brought to the Replace Image screen
- Choose the replacement image from your Media Library or switch to the Upload Files tab to upload a new image in the original’s place
- Click Replace
You’ll be returned to the visual editor with the image replaced.
Note that the method previously described only replaces the image in the one specific location you’ve changed. If you’ve used one image repeatedly throughout your book and you would like to replace all of those images at once, follow these steps instead:
- Click the Edit pencil icon to open up the Image Details window
- Click Replace underneath the image on the right side of the panel to be brought to the Replace Image screen
- Scroll down the Attachment Details panel on the right side of the window until you reach the Replace Media section
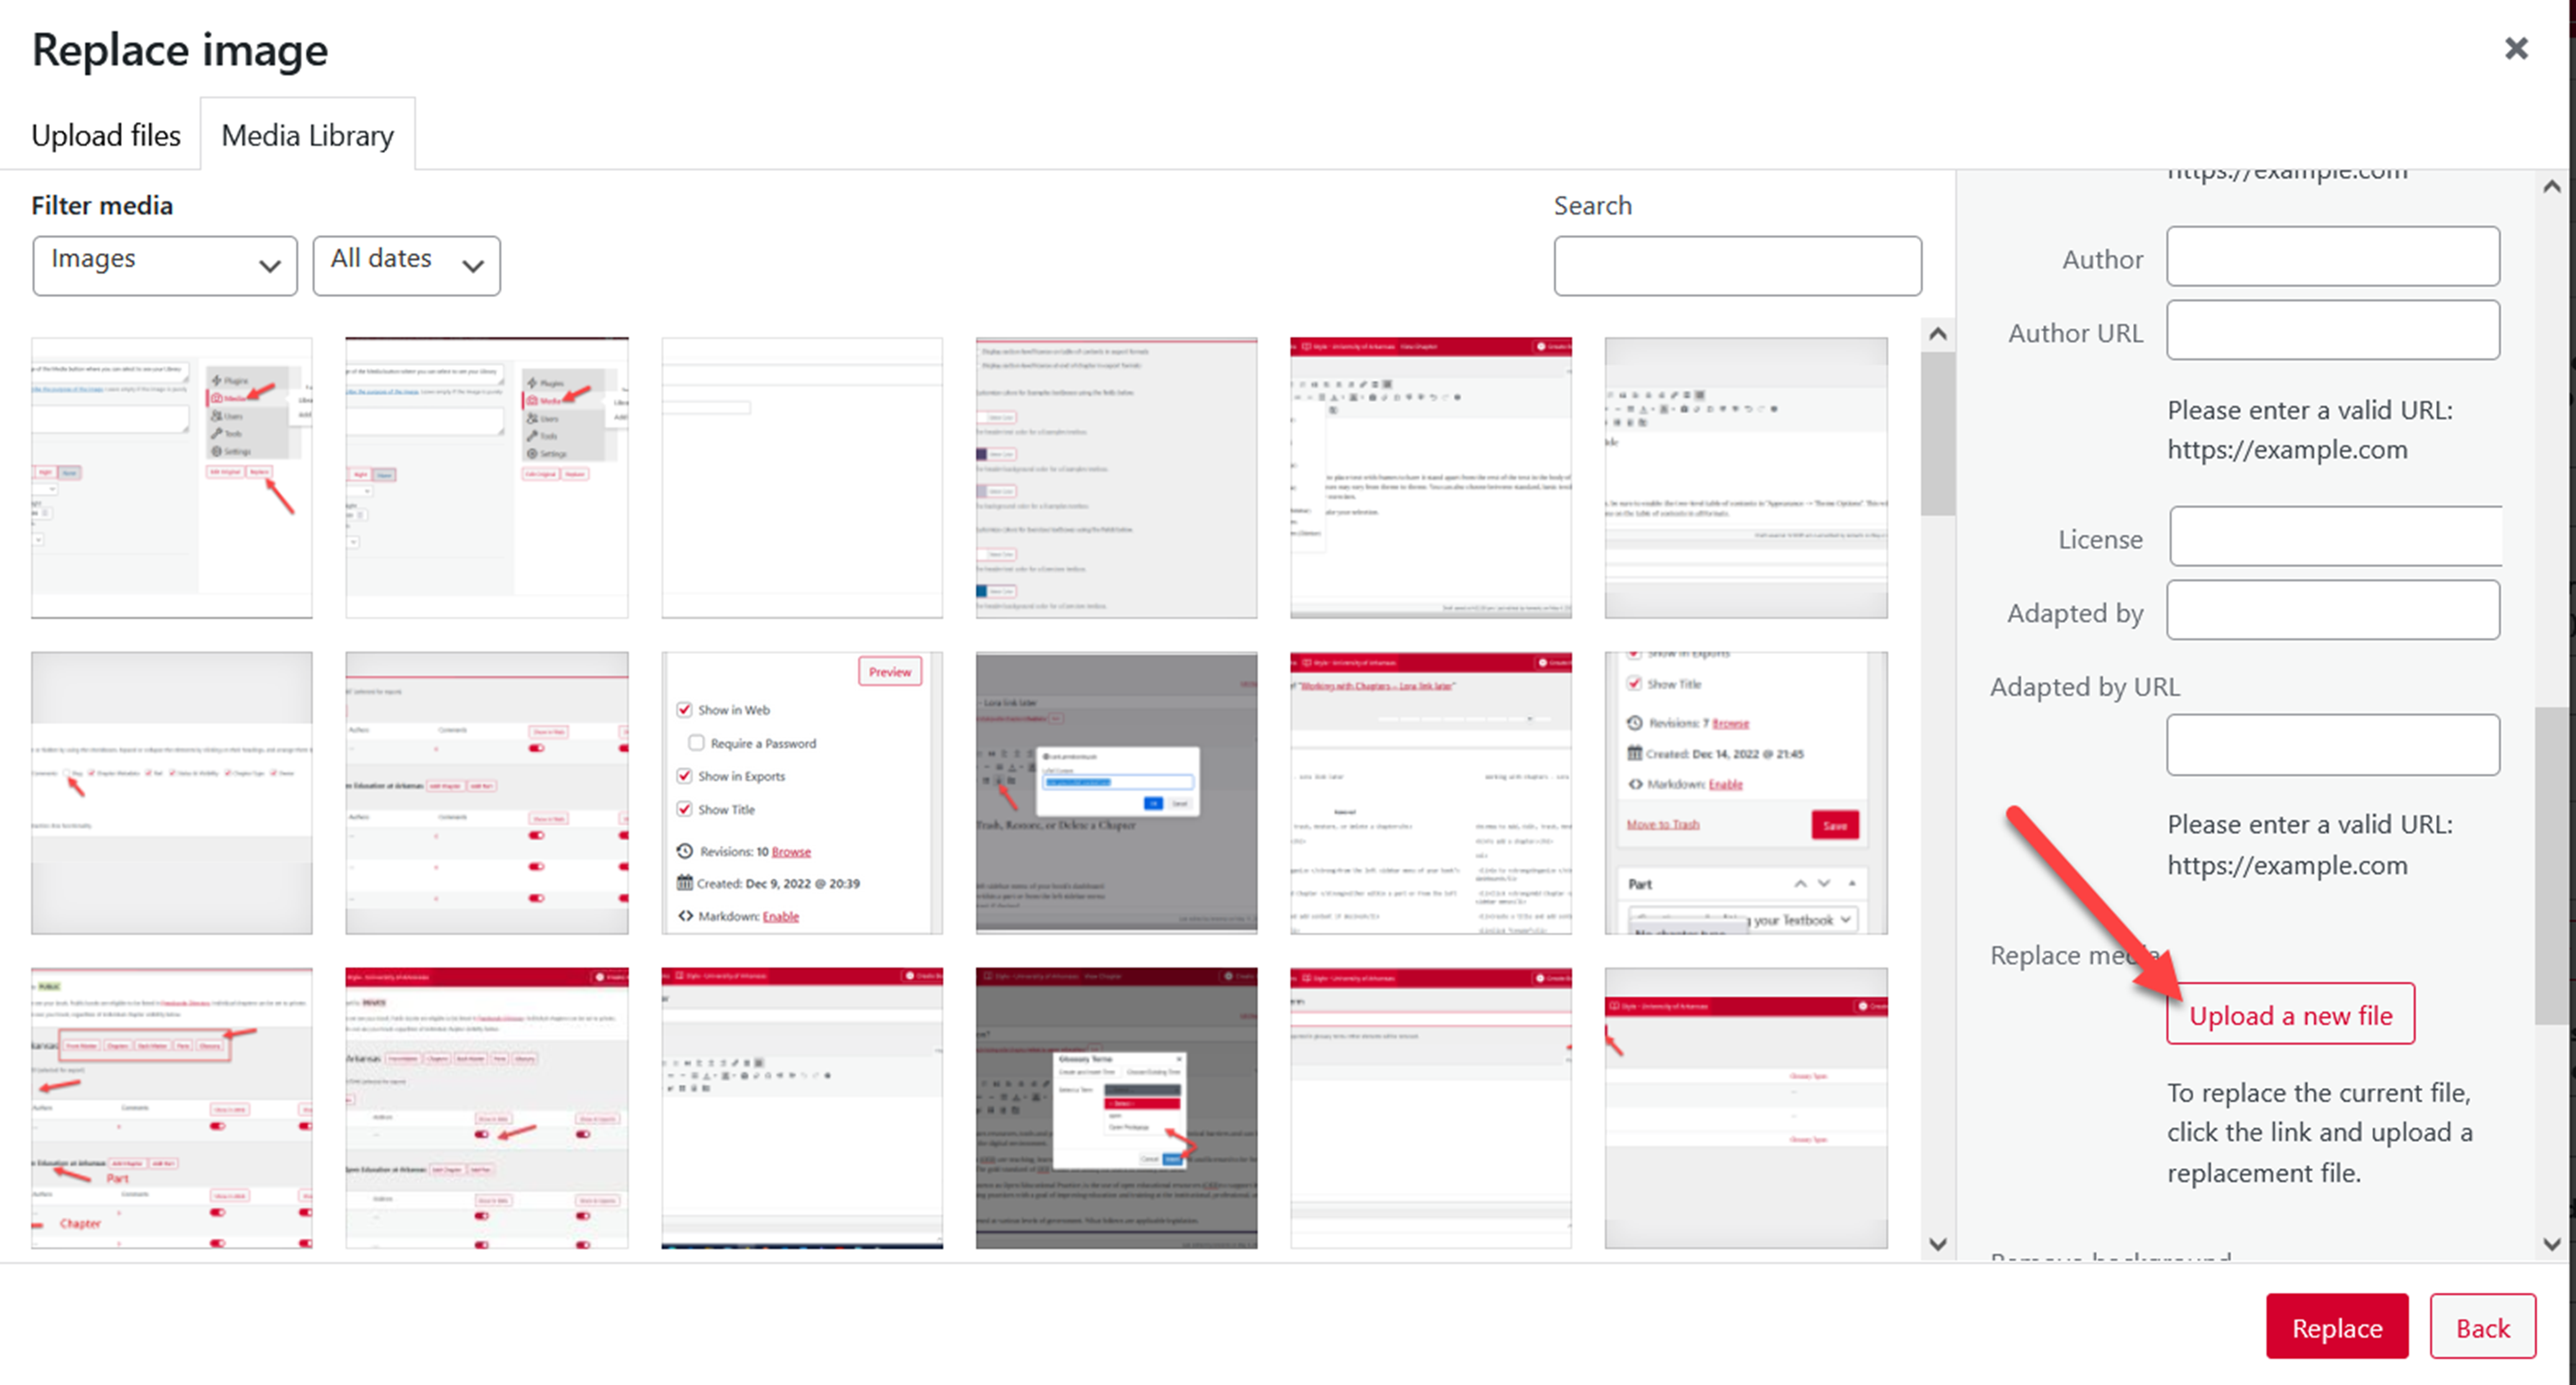
- Click the Upload a new file button to be taken to the Replace Media Upload page
- On the Replace Media Upload page, adjust your Replacement Options and Date Options as needed
- Click the Choose File button and upload the new image
- Click Upload at the bottom of the page
After the replacement image is uploaded, you’ll be brought to the Media Attachment page for the replacement image. Navigate back to your chapter via the left sidebar menu if necessary.
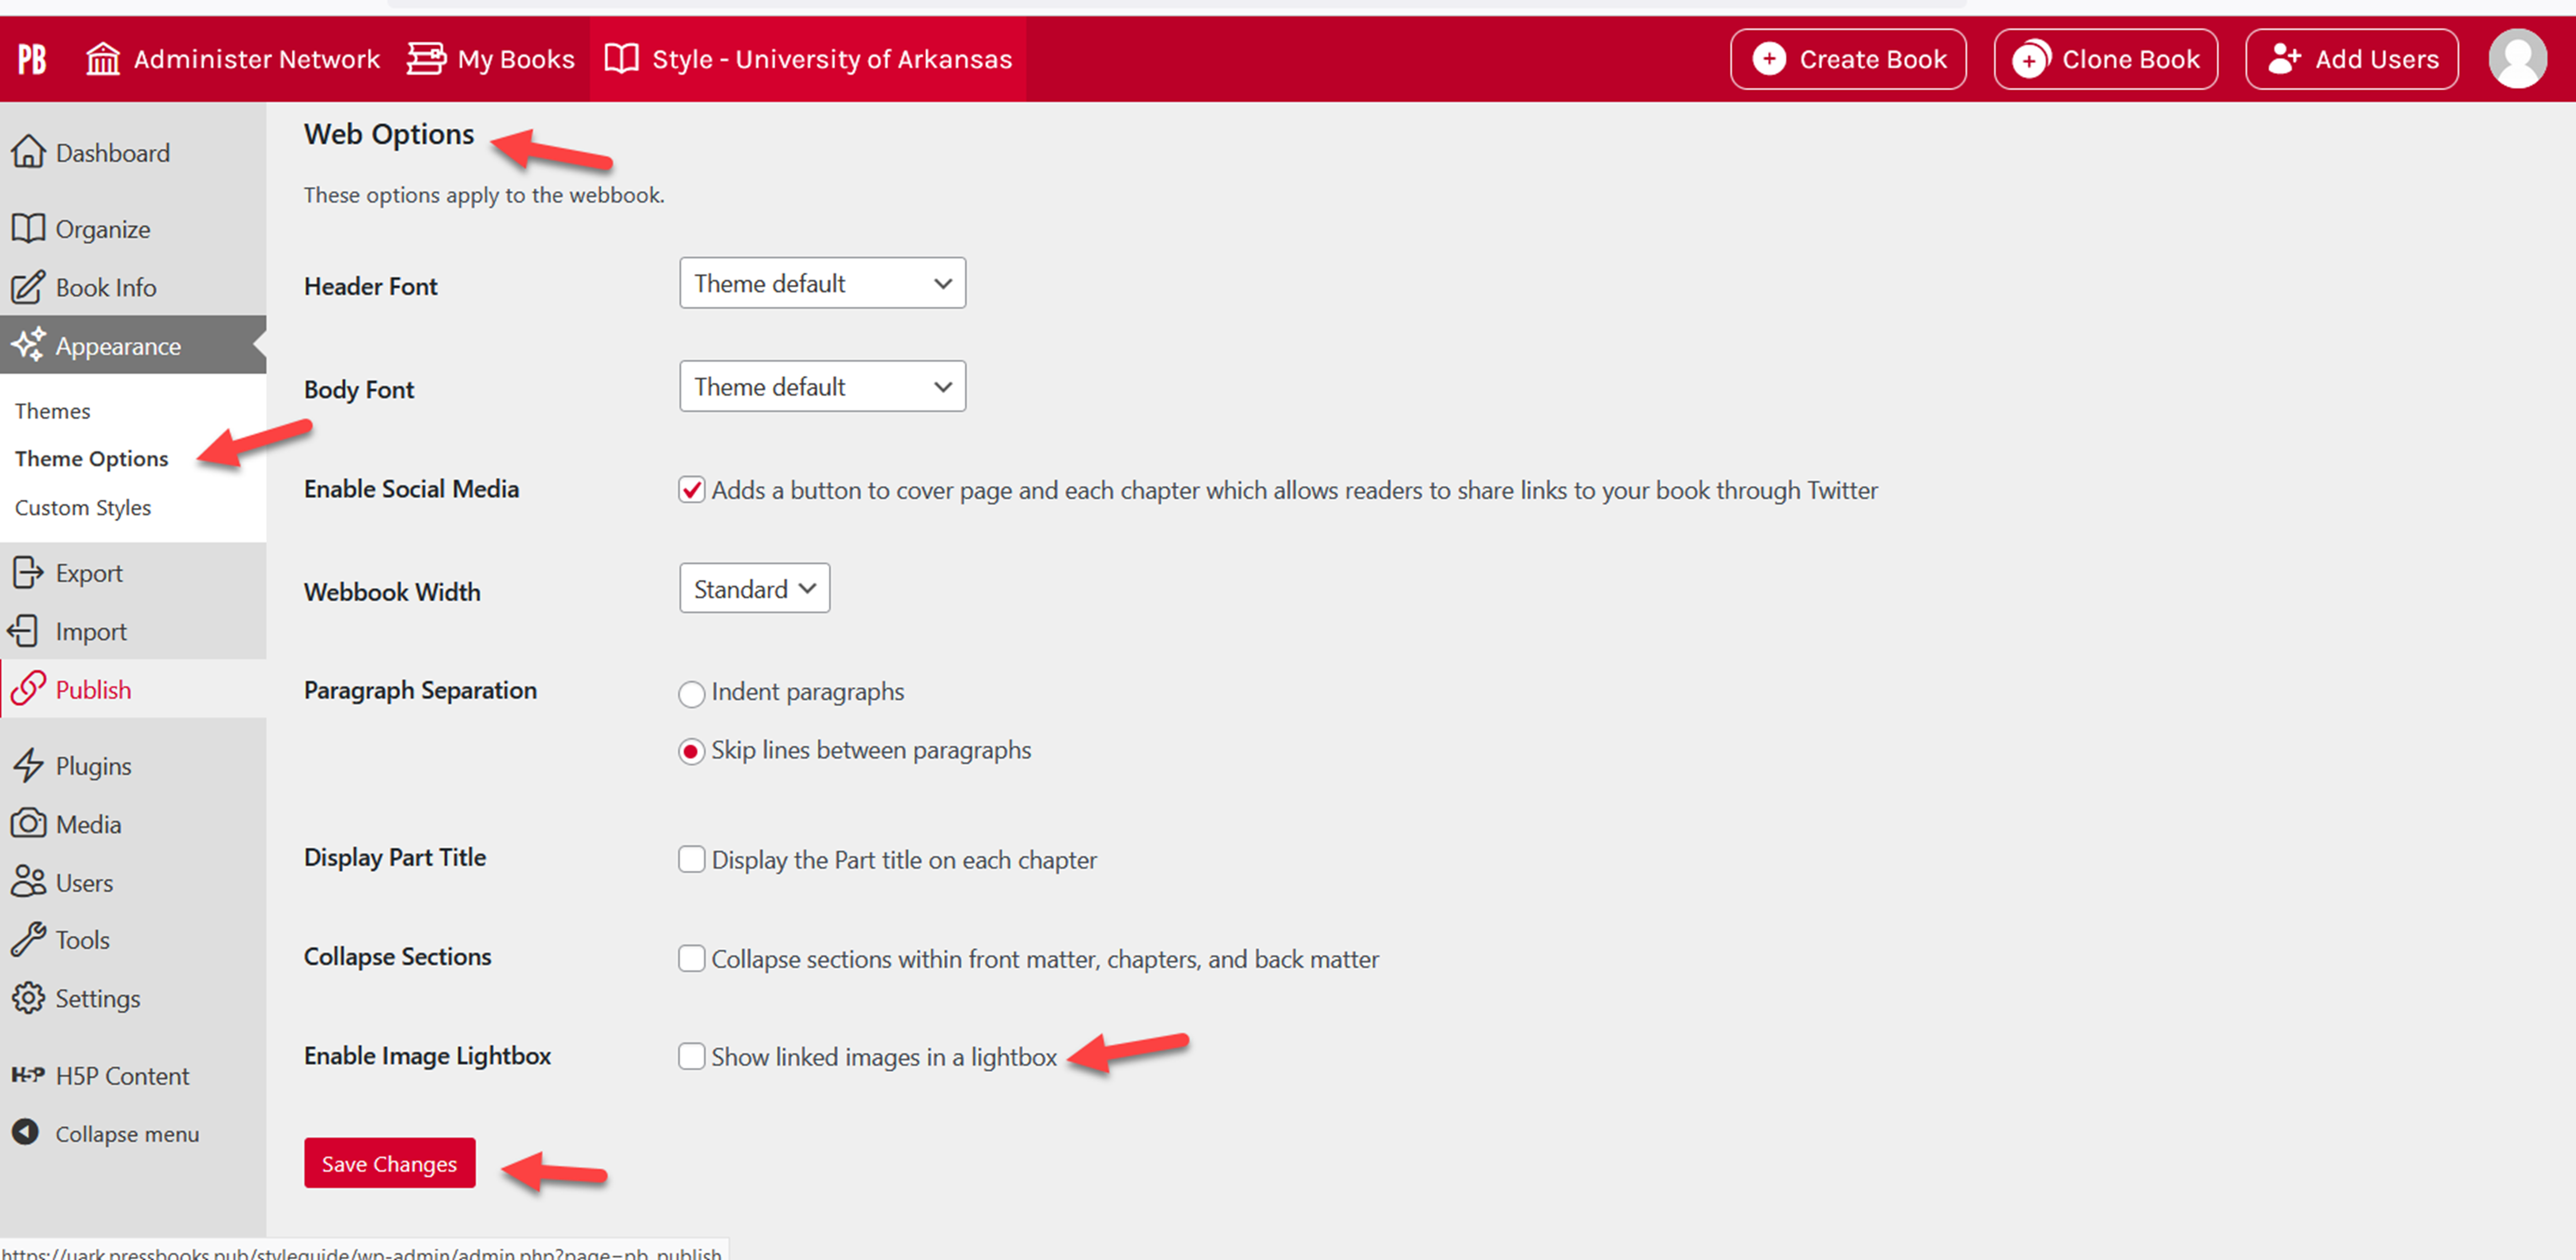
Enabling Thumbnails and Using Lightbox for Images
Using Lightbox, you can set the linked images in your webbook to open within a chapter webpage as a pop-up. When Lightbox is enabled, all images linked from your book will open in a lightbox. This applies to thumbnail images linking to larger versions of themselves, as well as text hyperlinks linking to images.
- Click Appearance
- Click Theme Options
- Click Web Options
- Check the box next to Enable Image Lightbox
- Click Save Changes
Make a Thumbnail Open as a Larger Image in a Webbook
To have a thumbnail image open into a larger image in a lightbox, follow these steps:
- Open your chapter
- Click Add Media to choose from existing images in your media library or upload a new image file
- Choose Thumbnail from the drop down menu under Attachment Display Settings > Size in the Add Media window
- Click Insert into chapter

Your image will appear in your Visual Editor.
- Click the image, then click the Edit icon

This will open up the Image Details window.

- Click the drop down menu next to Link To and choose Media File
- Click Update
- Click Save on your chapter
Your image will appear as a thumbnail in your webbook, but open as a larger image once clicked.
Create a Gallery
When uploading media from within a post, you also have the option to create a gallery. This allows for several images to be inserted into a post simultaneously, and to be formatted together.
- Click “Add Media”, then “Create Gallery”
- Select images for gallery from media library, or upload new files as detailed above
- Click “Create New Gallery”
- Reorder and delete media files as needed
- Customize gallery settings on right hand menu (Link to, columns, order, image size)
- Insert gallery into post
Media Attribution
Users can format media attributions in an automated, standardized way by enabling the Media Attributions setting in their theme options. With the Media Attributions setting on, you can display the attribution metadata of your media files at the end of each chapter of your book.
This is helpful for users who, for example, are creating textbooks and may be using a large quantity of images from different sources.
This setting allows attribution information to be displayed at the end of each chapter after your body text and before your footnotes.
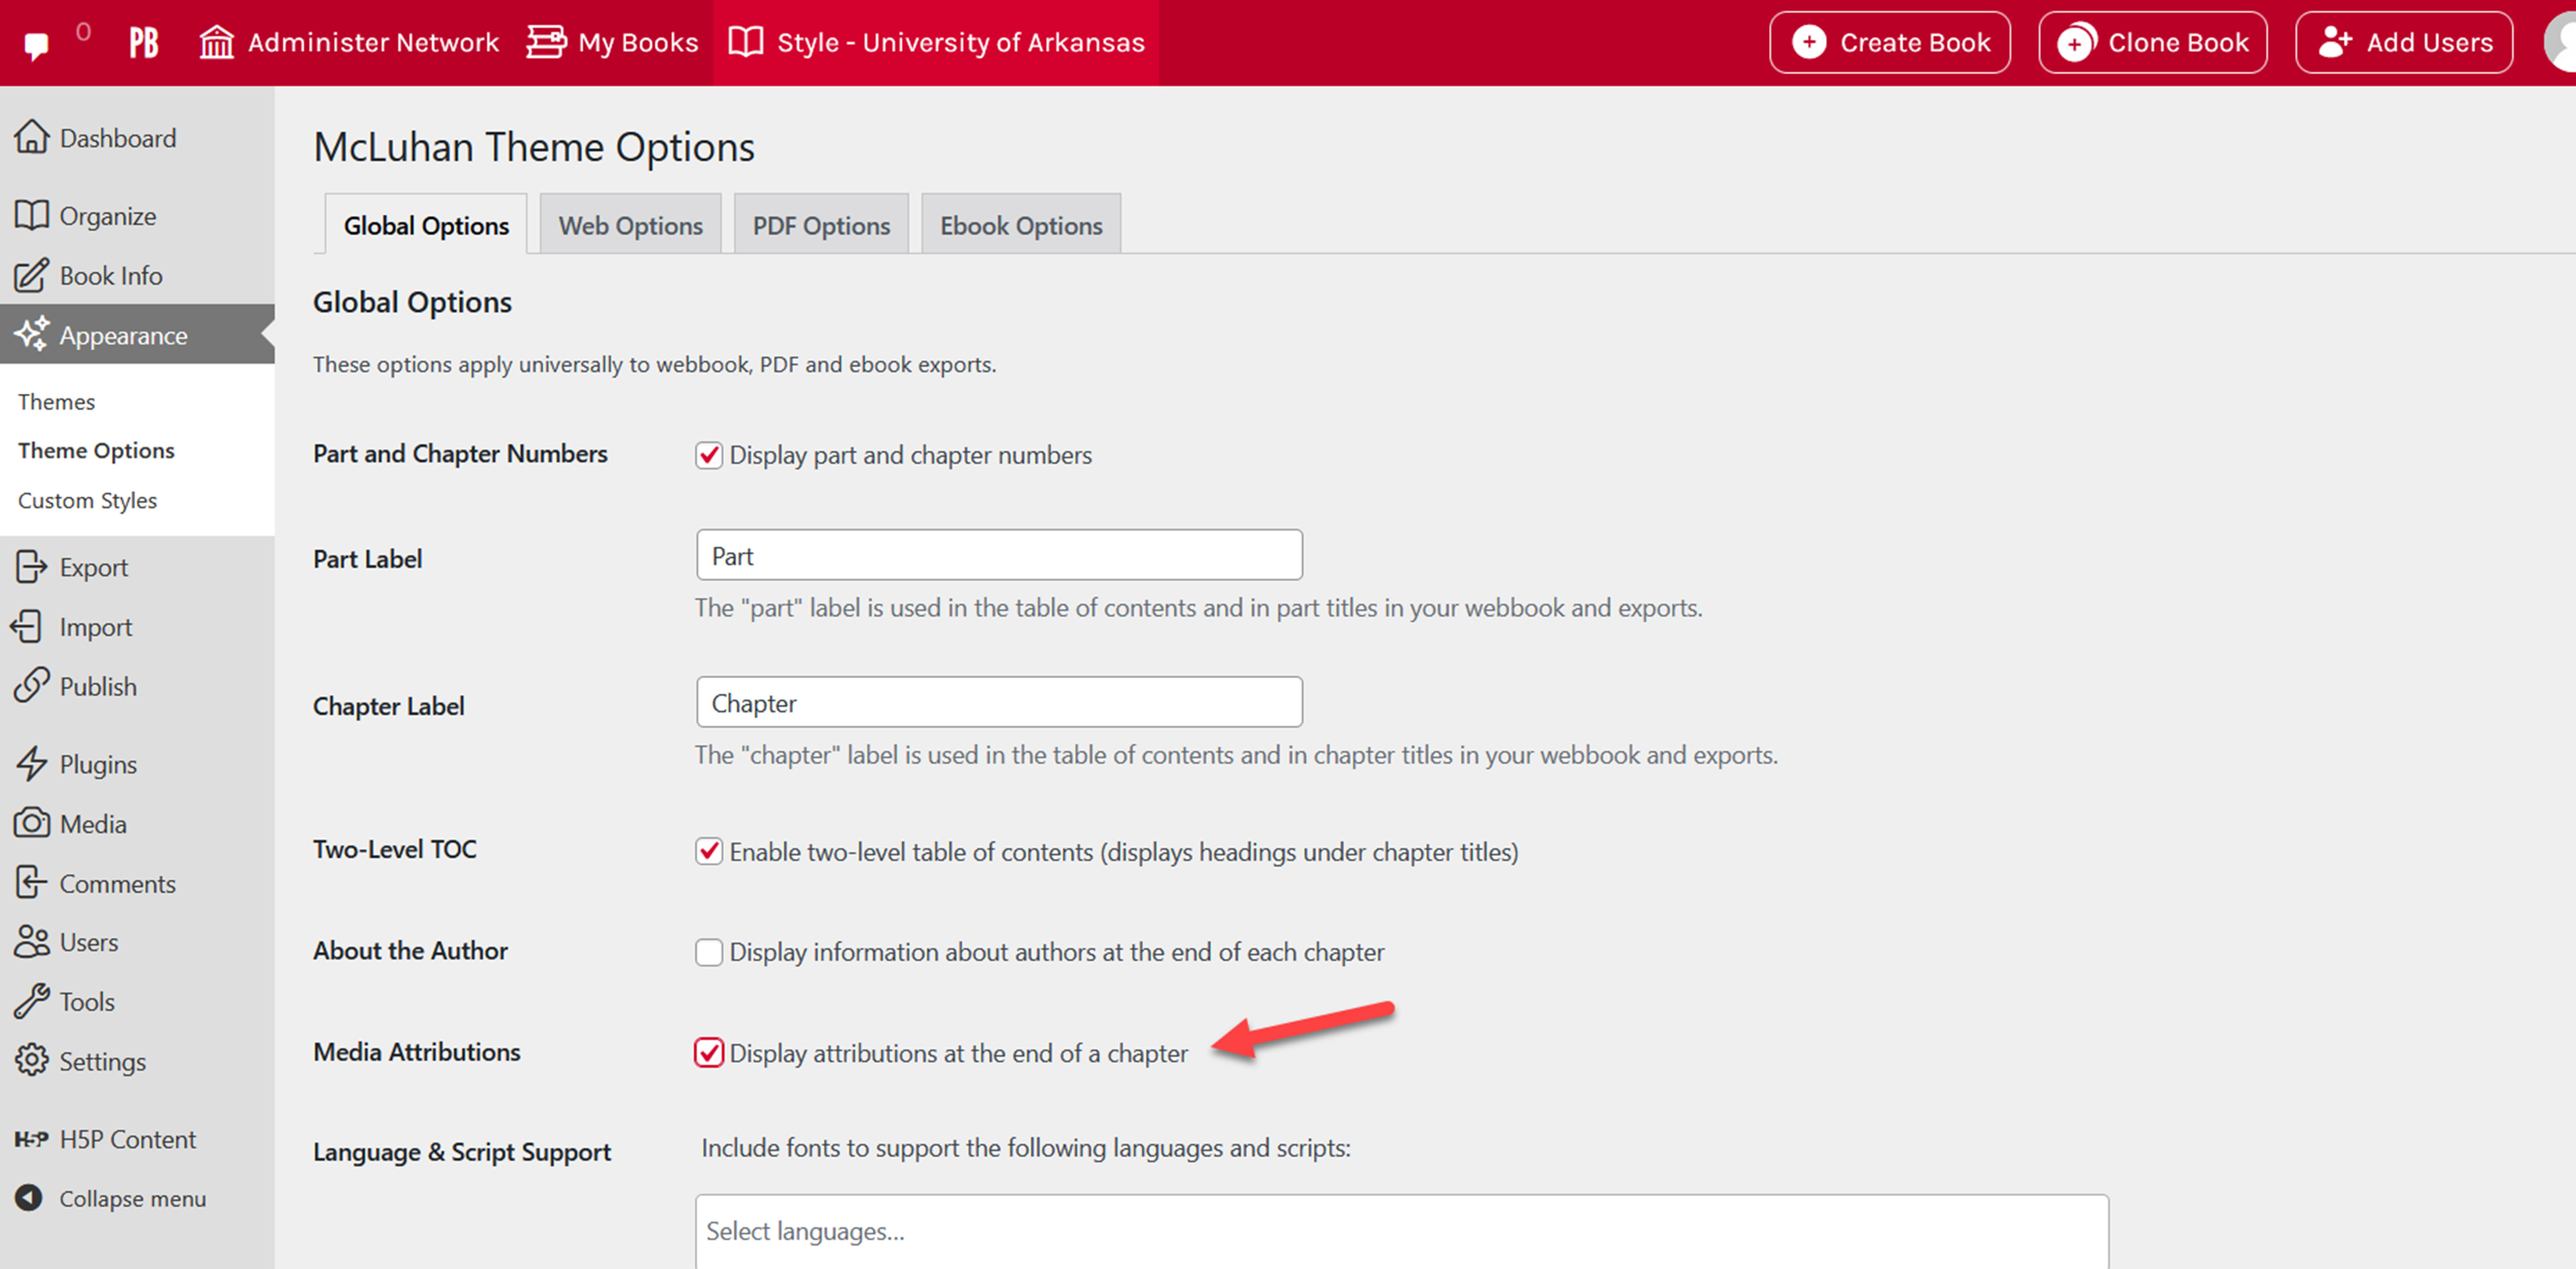
Enabling the Media Attribution Setting
To enable the Media Attributions setting on your book, follow these steps:
- Click Appearance on the left-hand menu of your book’s dashboard
- Click Theme Options
- In the Global Options tab, scroll to Media Attributions
- Check the box next to “Display attributions at the end of a chapter”
- Click Save Changes at the bottom of the page
Now, you can add your attribution information to each image in your media library.
Adding Attribution Metadata
There are two places where you could choose to input your attribution data.
Through the Media Library
If you upload your media to your media library before placing the image in a chapter, or if you’re entering attribution data for images that you’ve already placed throughout your book, it’s best to edit image attribution data in the Media Library page.
Find your book’s Media Library by going to Media > Library from the left-hand menu of your book’s dashboard.
All media items, including audio, video, and images, will be listed on the Media Library page. To add attribution data to a media file, follow these steps:
- In your Media Library, click on a media file
- Scroll down to Attributions on the right-hand side of the Attachment Details window
- Enter your attribution metadata (such as Source URL, Author, Author URL, License, and more)
- Exit the Attachment Details window by clicking the X in the corner
Follow these steps for each image that you’d like attribution information included in your book for.
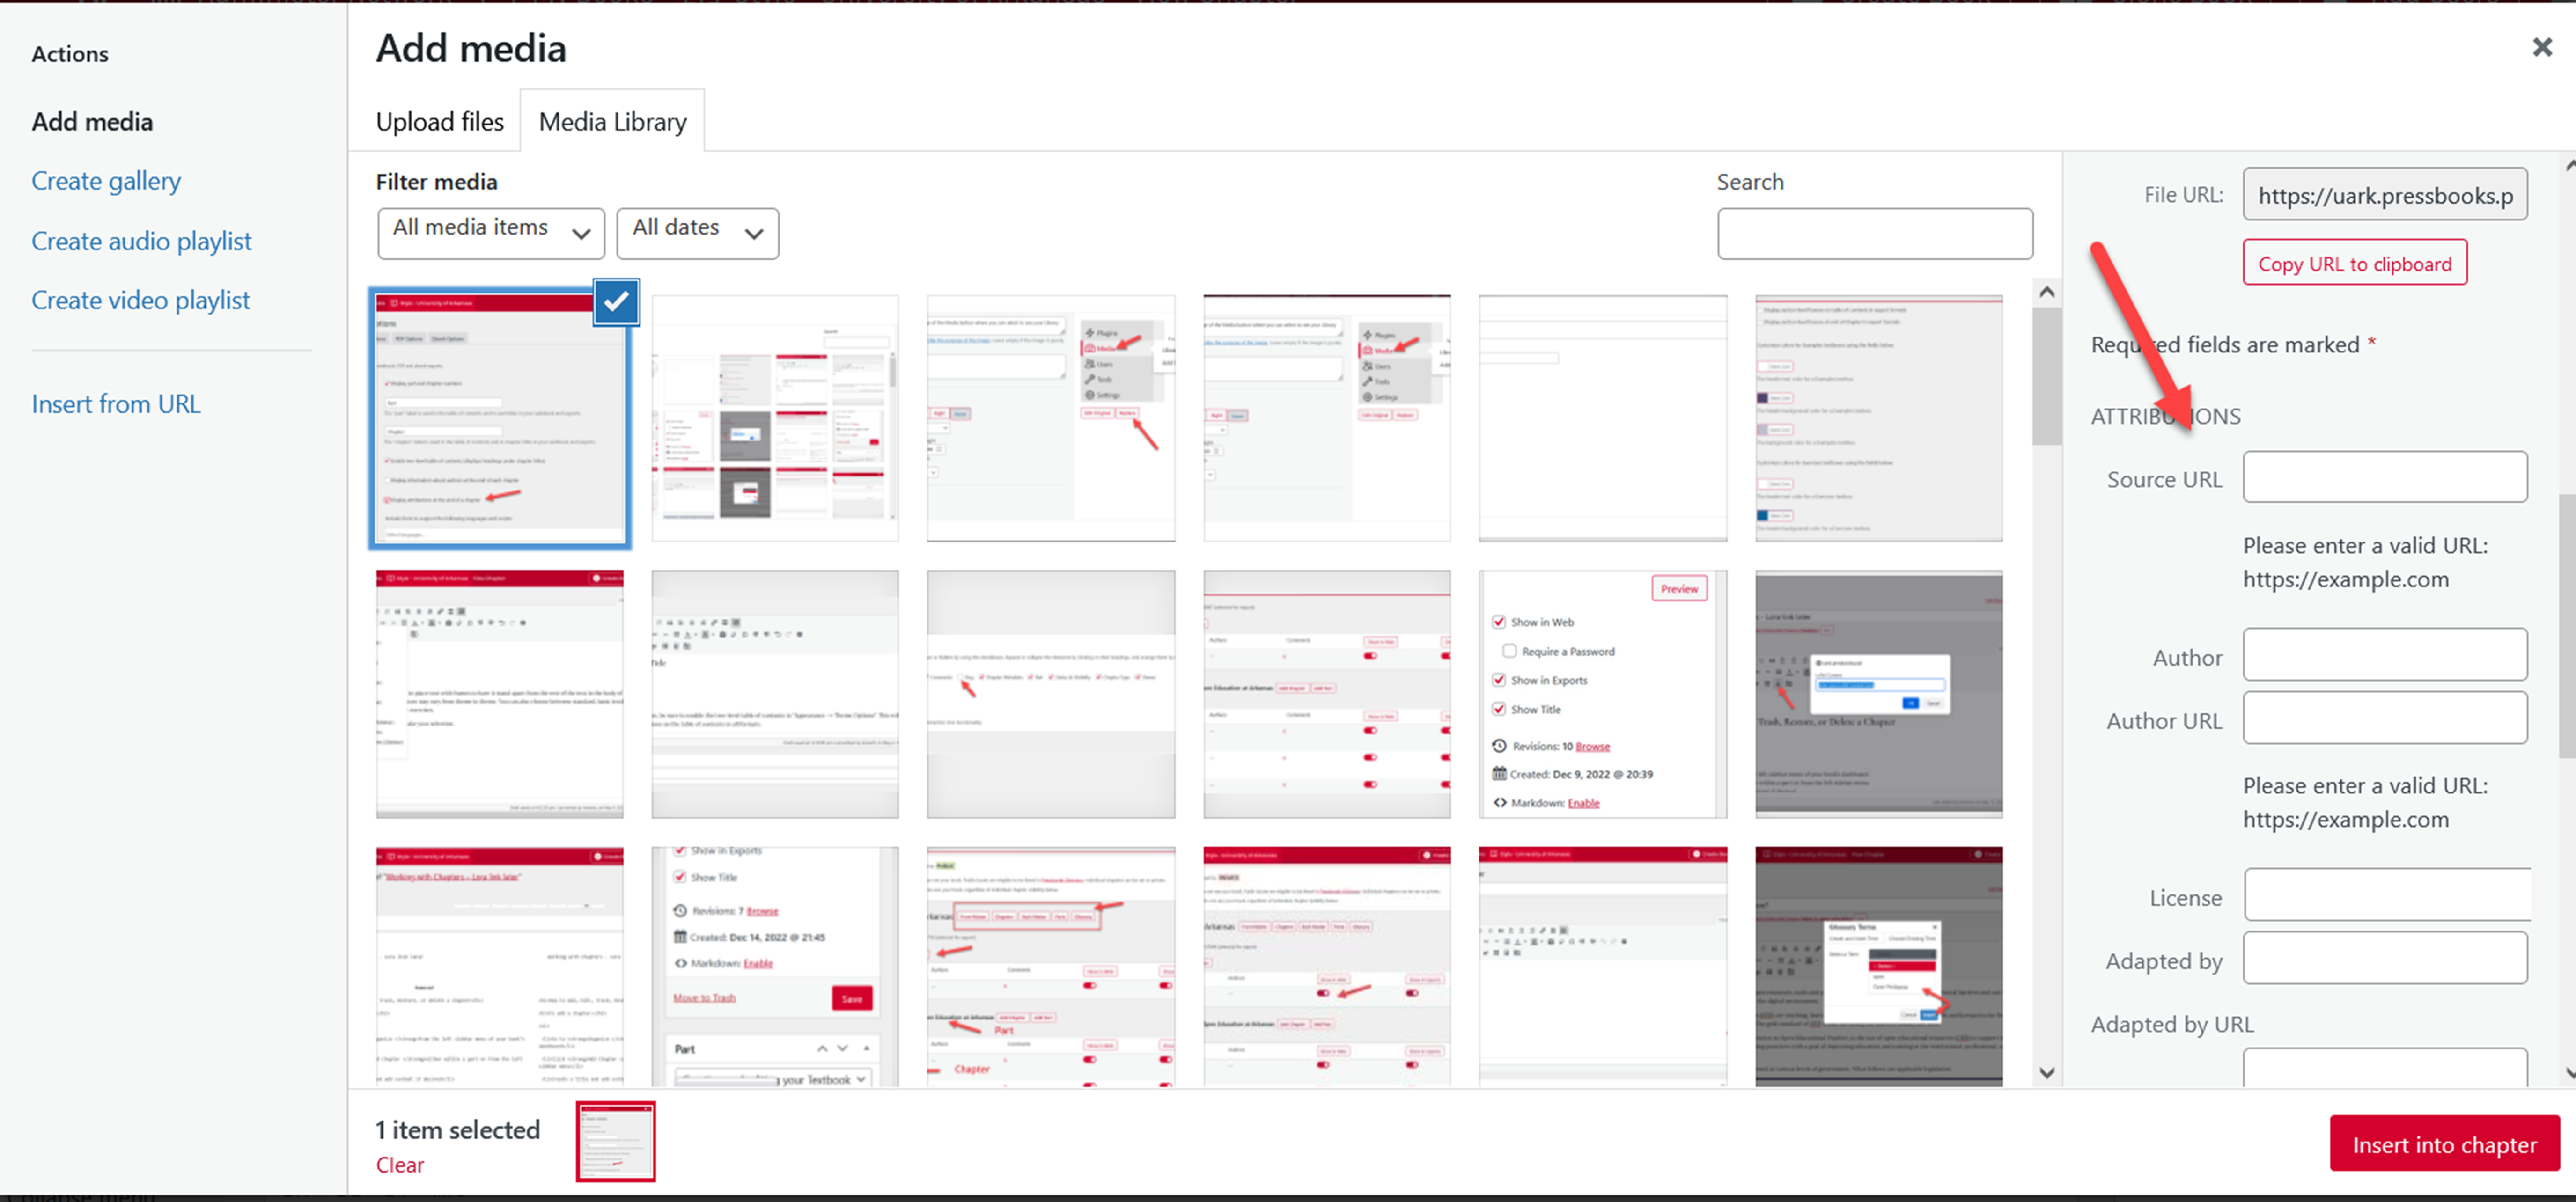
In the Chapter
If you’re entering images directly into a chapter instead of the media library, you can edit the image attribution inside the Add Media interface in the chapter editor. Follow these steps:
- Click Add Media
- Upload your file
Once the file is uploaded, you’ll be redirected to Media Library screen in the dialog box.
- Scroll down to Attributions on the right hand side of the screen
- Enter your attribution metadata (such as Source URL, Author, Author URL, License, and more)
- Click Insert Into Chapter
Repeat this process for each new image you insert.
What is Embedded Media and Interactive Content?
Embedded media is media that is hosted outside of Pressbooks and linked through your webbook. You will have encountered this kind of content all over the web – YouTube videos in blog posts, for example, or social media posts in news articles. This same kind of media can be dropped into the editor of your webbook on Pressbooks. Your readers can watch videos, take quizzes, view interactive maps, and more without ever leaving the book.
Supported Content
Pressbooks supports a wide variety of media and interactive content.
Some content is prohibited for the safety of readers and content creators.
A Word about iFrames and oEmbeds
One type of embedded content we restrict is iframes. WordPress, the software Pressbooks is built on, blacklists all iframes for server security. If you attempt to embed an iframe into the Pressbooks editor, it will automatically be converted into oEmbed format instead – a safer standard for media embedding that limits the possibility of malicious use. If the media host isn’t compatible with oEmbed, your iframe may be stripped entirely.
The good news is that a lot of media sources already support oEmbed, which means that all you need to do is paste the link from the media source into your editor and the content will appear.
Here is the list of tools from which you can embed media. Several tools have some specialized recommendations for embedding. they are indicated with an * in the below list.
Animoto
Cloudup
Crowdsiqnal
DailyMotion
Flickr
Instaqram *
Issuu
Kickstarter
Mixcloud
Photobucket
Pocket Casts
ReverbNation
Screencast
Scribd
SlideShare
SmuqMuq
SoundCloud
Speaker Deck
Spotify
TED
TikTok
Tumblr
VideoPress
Vimeo
Wolfram
WordPress
WordPress.tv
YouTube *
There are also some exceptional cases in which Pressbooks will allow iframes. It is possible to embed an iframe from any of the following sources:
- PhET Interactive Simulations
- knight lab Timeline
- Brightcove
- Google Forms
- Google Maps
How to Embed Content
There are a few different methods to embed media in Pressbooks:
- Copy/paste the URL
- Use a shortcode
- Use the iframe embed code supplied by the content provider
Read on for details about when to use each of these methods.
Copy/Paste the URL into the Visual Editor
The copy/paste method of embedding content is the easiest, and in most cases it’s the method we recommend. Here’s how to do it:
- Copy the URL of the video, audio, or other media
- Paste the URL into the Visual editor
- Click Save
Your media should automatically appear in the visual editor. After you save the chapter or post, the content will display in the webbook and can be seen by readers if the book is made public. In export formats, a placeholder note with be inserted in place of the omitted content to let readers know a media or interactive element is available to view in the webbook format of their book. They’ll be given a link where they can view the content when they’re next able to access the web.
This method of embedding media will only work for content that’s compatible with oEmbed.
Re-sizing Manually Embedded content iFrame content
If you want to re-size the content of a manually embedded iFrame, you will have to add those parameters manually to the iFrame tag for the content. To do this, you will need to edit or modify the iFrame embed tag used in Pressbooks. See the example below for a sample video from YouTube:
<iframe width="560" height="315"

src="https://www.youtube-nocookie.com/embed/7tqL-9z_fFA" frameborder="0"

allowfullscreen></iframe>
The important values here are the width and height values, which will be expressed in pixels. Note that manually providing values in the iFrame tag itself will give the embedded element fixed dimensions, so that it will not resize as browser width changes.
Embed and Media Shortcodes
Pressbooks has built in compatibility with a number of shortcodes that you can use to format your books either within the editor or before you import your work. Two of these shortcodes, Embed and Media, can be used to embed media in your book.
Embed Shortcode
Generally, the embed shortcode is most useful when you’re drafting your content outside of Pressbooks. Using the embed shortcode signals to Pressbooks that there’s an embedded video and not just a regular link in your book. Many content creators use shortcodes to build their content in Microsoft Word or Google Docs and then import to that work to Pressbooks.
- Start your shortcode with:
[embed]
- Copy/paste the URL in after
- End your shortcode with
[/embed] - Save your changes
Example: [embed]URL_of_the_video[/embed]Media Shortcode
The media shortcode has the same benefits as the embed shortcode when it comes to importing content from other platforms like Microsoft Word. Is also has an additional benefit: you can add a caption which appears below the embedded media element. Here’s how:
- Start your shortcode:
Your caption text goes here
Iframes
As described above, use of iframes in Pressbooks is restricted for security purposes. However, if you are embedding an iframe from a source that has been whitelisted for your network, you can follow these steps:
- Copy the <iframe> embed code of the video, audio, or other media – this is usually available in the sharing options of the media on its source website
- Paste the iframe code into the Text editor
- Click Save
If the source is whitelisted on Pressbooks, the video should then appear in your visual editor and all supported outputs.
Your Media is Still not working
Sometimes it is necessary to link to a media source in lieu of embedding it into your book. If you are having difficulties, please contact the OER department for assistance.
describes the appearance or function of an image on a page
a digital configuration akin to a photographic lightbox in which images are visible in a small, unobtrusive display
media that is hosted outside of Pressbooks and linked to through your webbook
small blocks of square-bracketed code which Pressbooks recognizes and handles in special ways in the webbook and export files. Shortcodes can be used both in the Visual Editor and in the Text editor.

Feedback/Errata