Front and Back Matter
How to Add Content
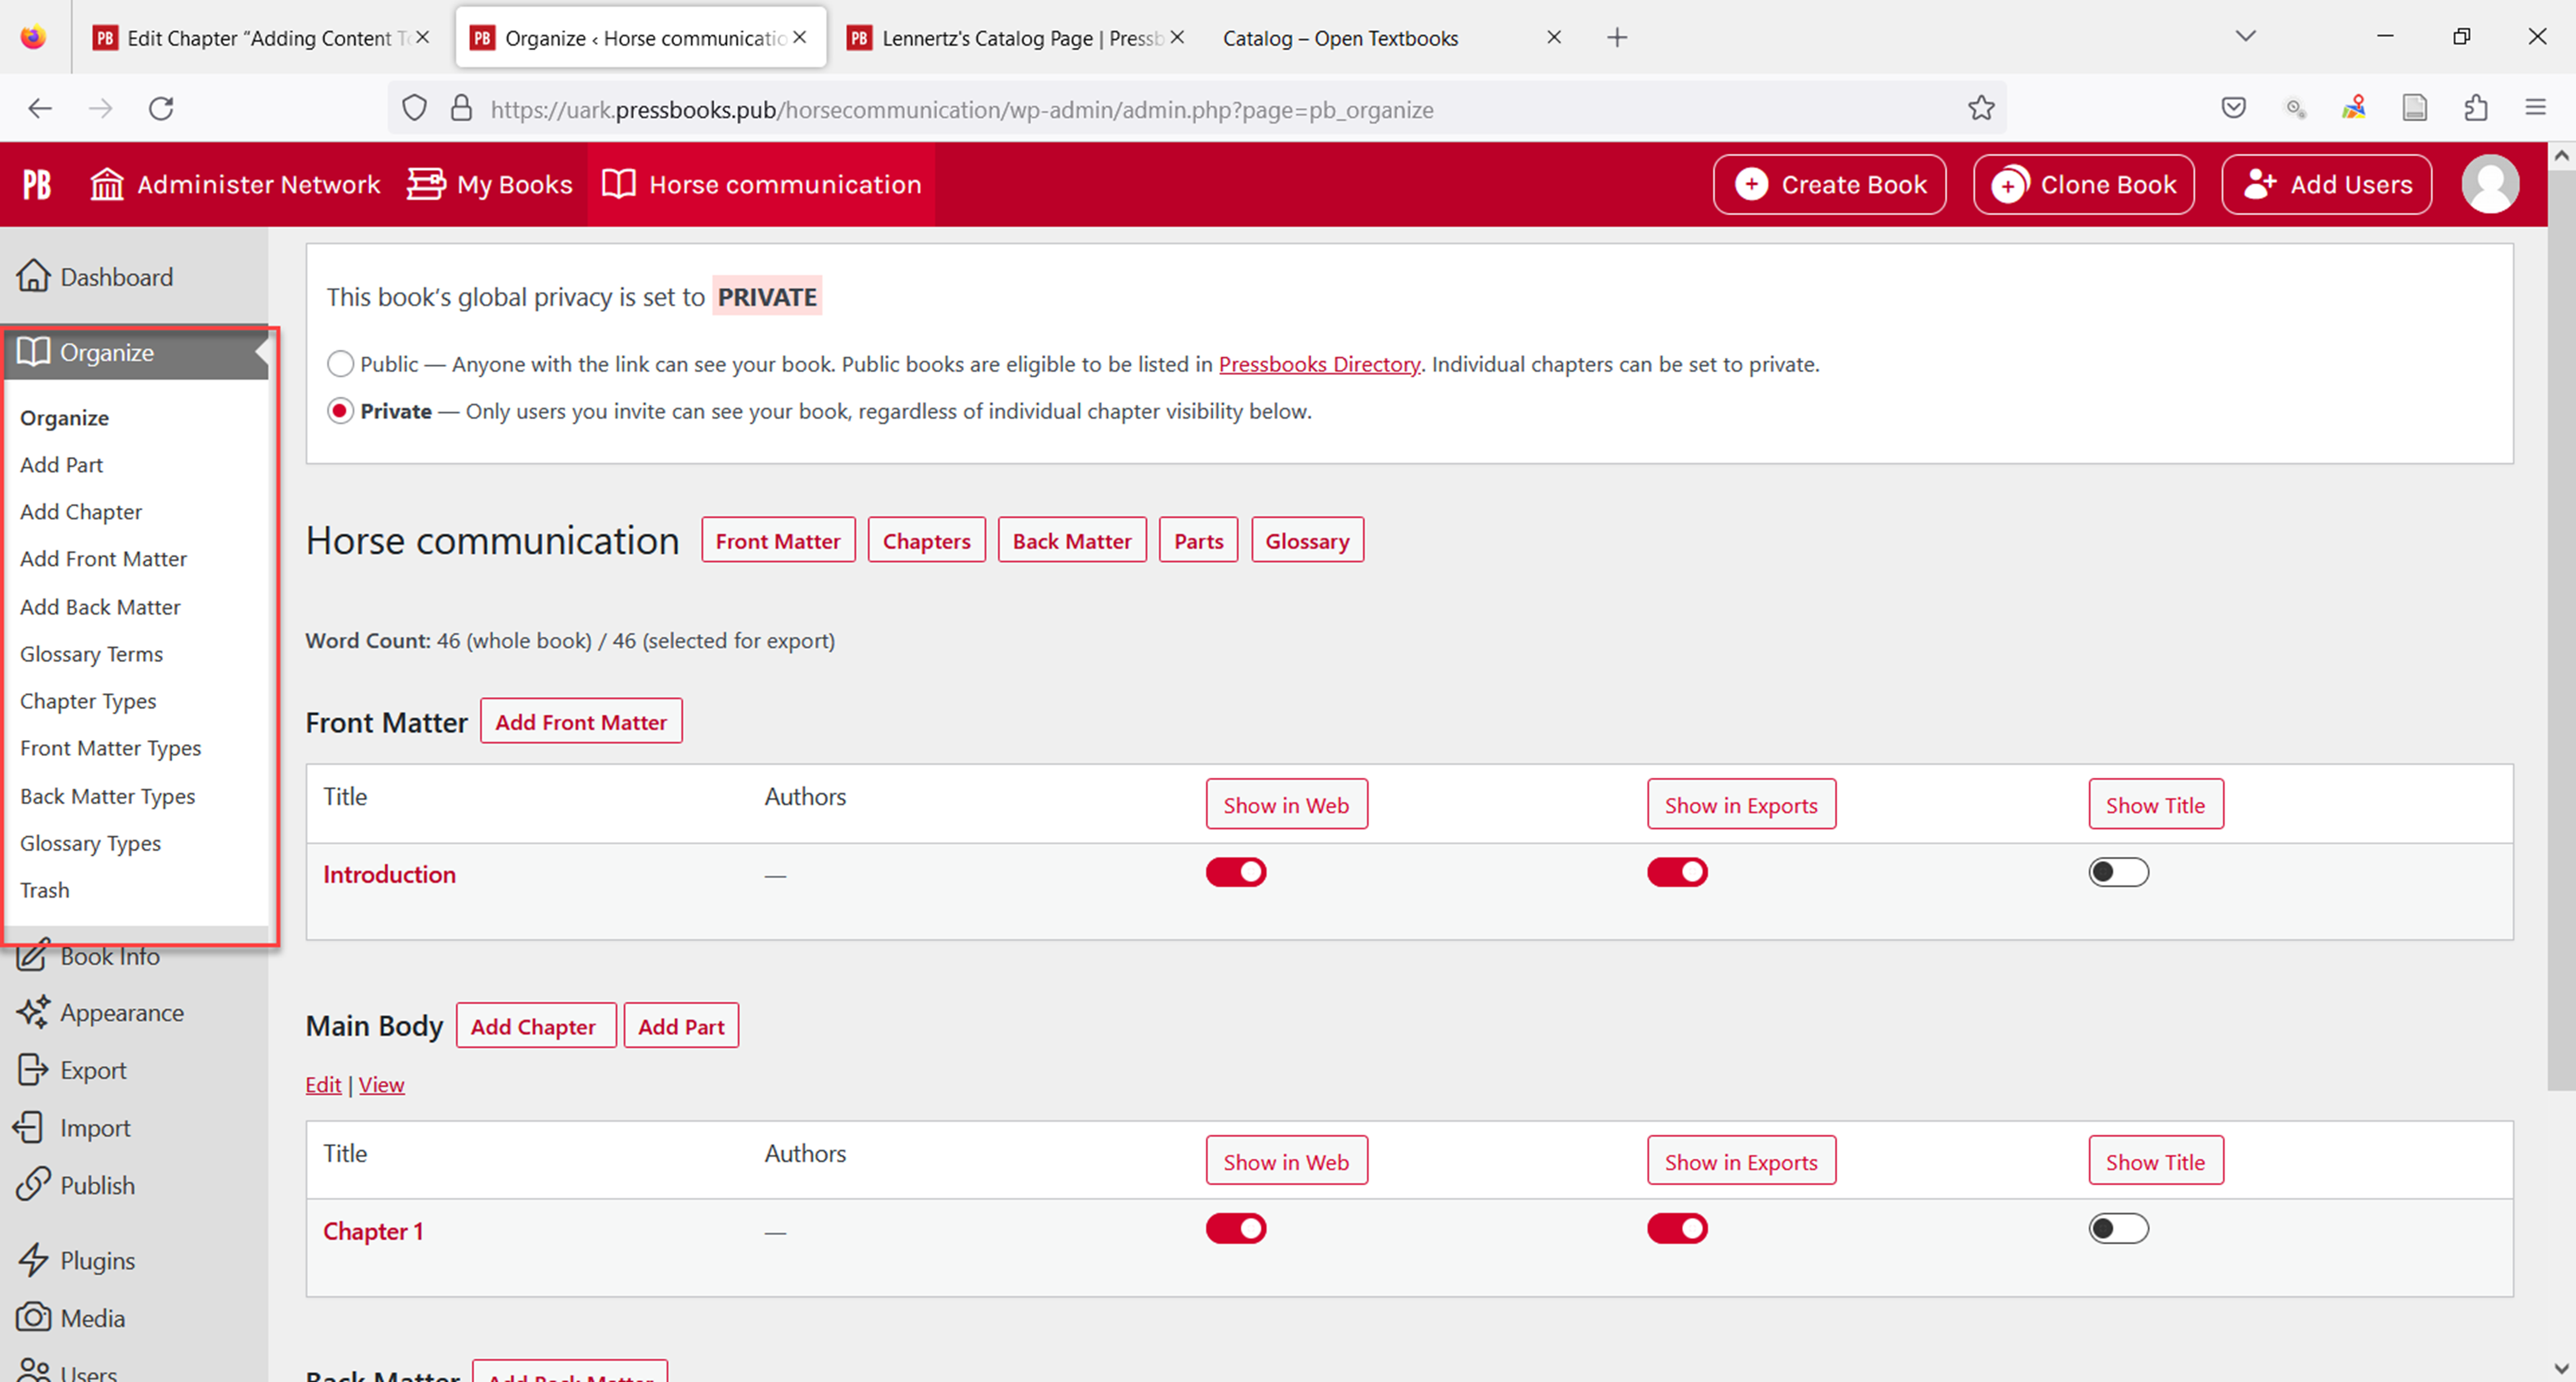
Go to the Organize page in the sidebar menu to start adding content. As you can see below, there are three main parts of the book to which you can add content: the front matter section, the main body, and the back matter section.

Your primary content will go in the Main Body section. To add content here click Add Chapter in the content area in the center of the screen. The Organize page provides multiple options for adding chapters, front matter, and back matter, but the left sidebar menu above is one of the easiest to locate.
The Editing pane
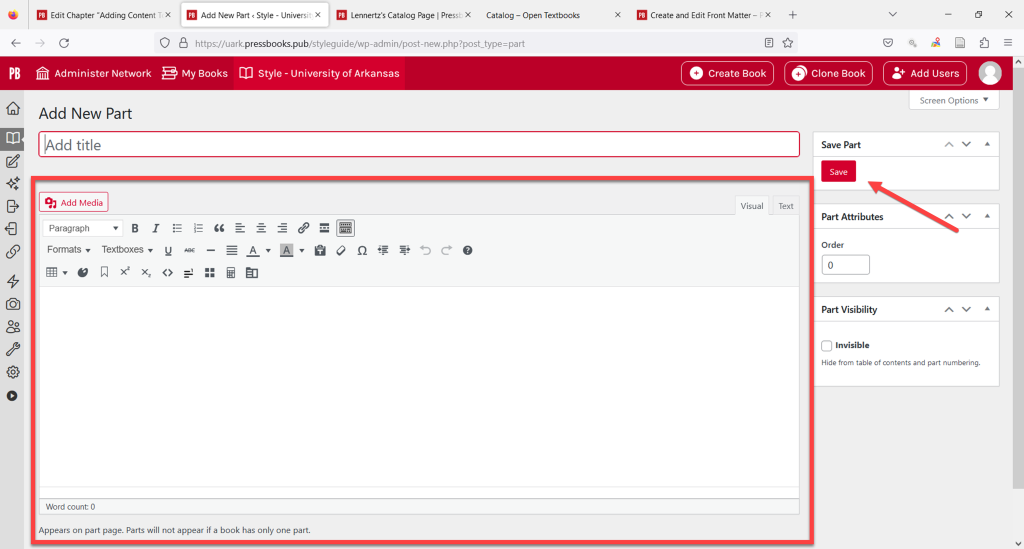
The editing page allows the writer to create content either using the Visual Editor elements or coding using html.
The Visual Editor is the primary way to add and format content for your book. Below you can see an image of the Visual Editor’s tool bar, formatting buttons, and writing/editing space.

You will likely be familiar with most of the formatting buttons in the visual editor. If you are not familiar, hovering over a button will describe the tool.
The text editor also offers an option for those with HTML coding skills.
How Front Matter Works
Front matter is the stuff that goes at the beginning of the book — before you get into the meat and potatoes. Front matter can include such things as: Preface, Dedication, Foreword, as well as the Title Page and Copyright page.
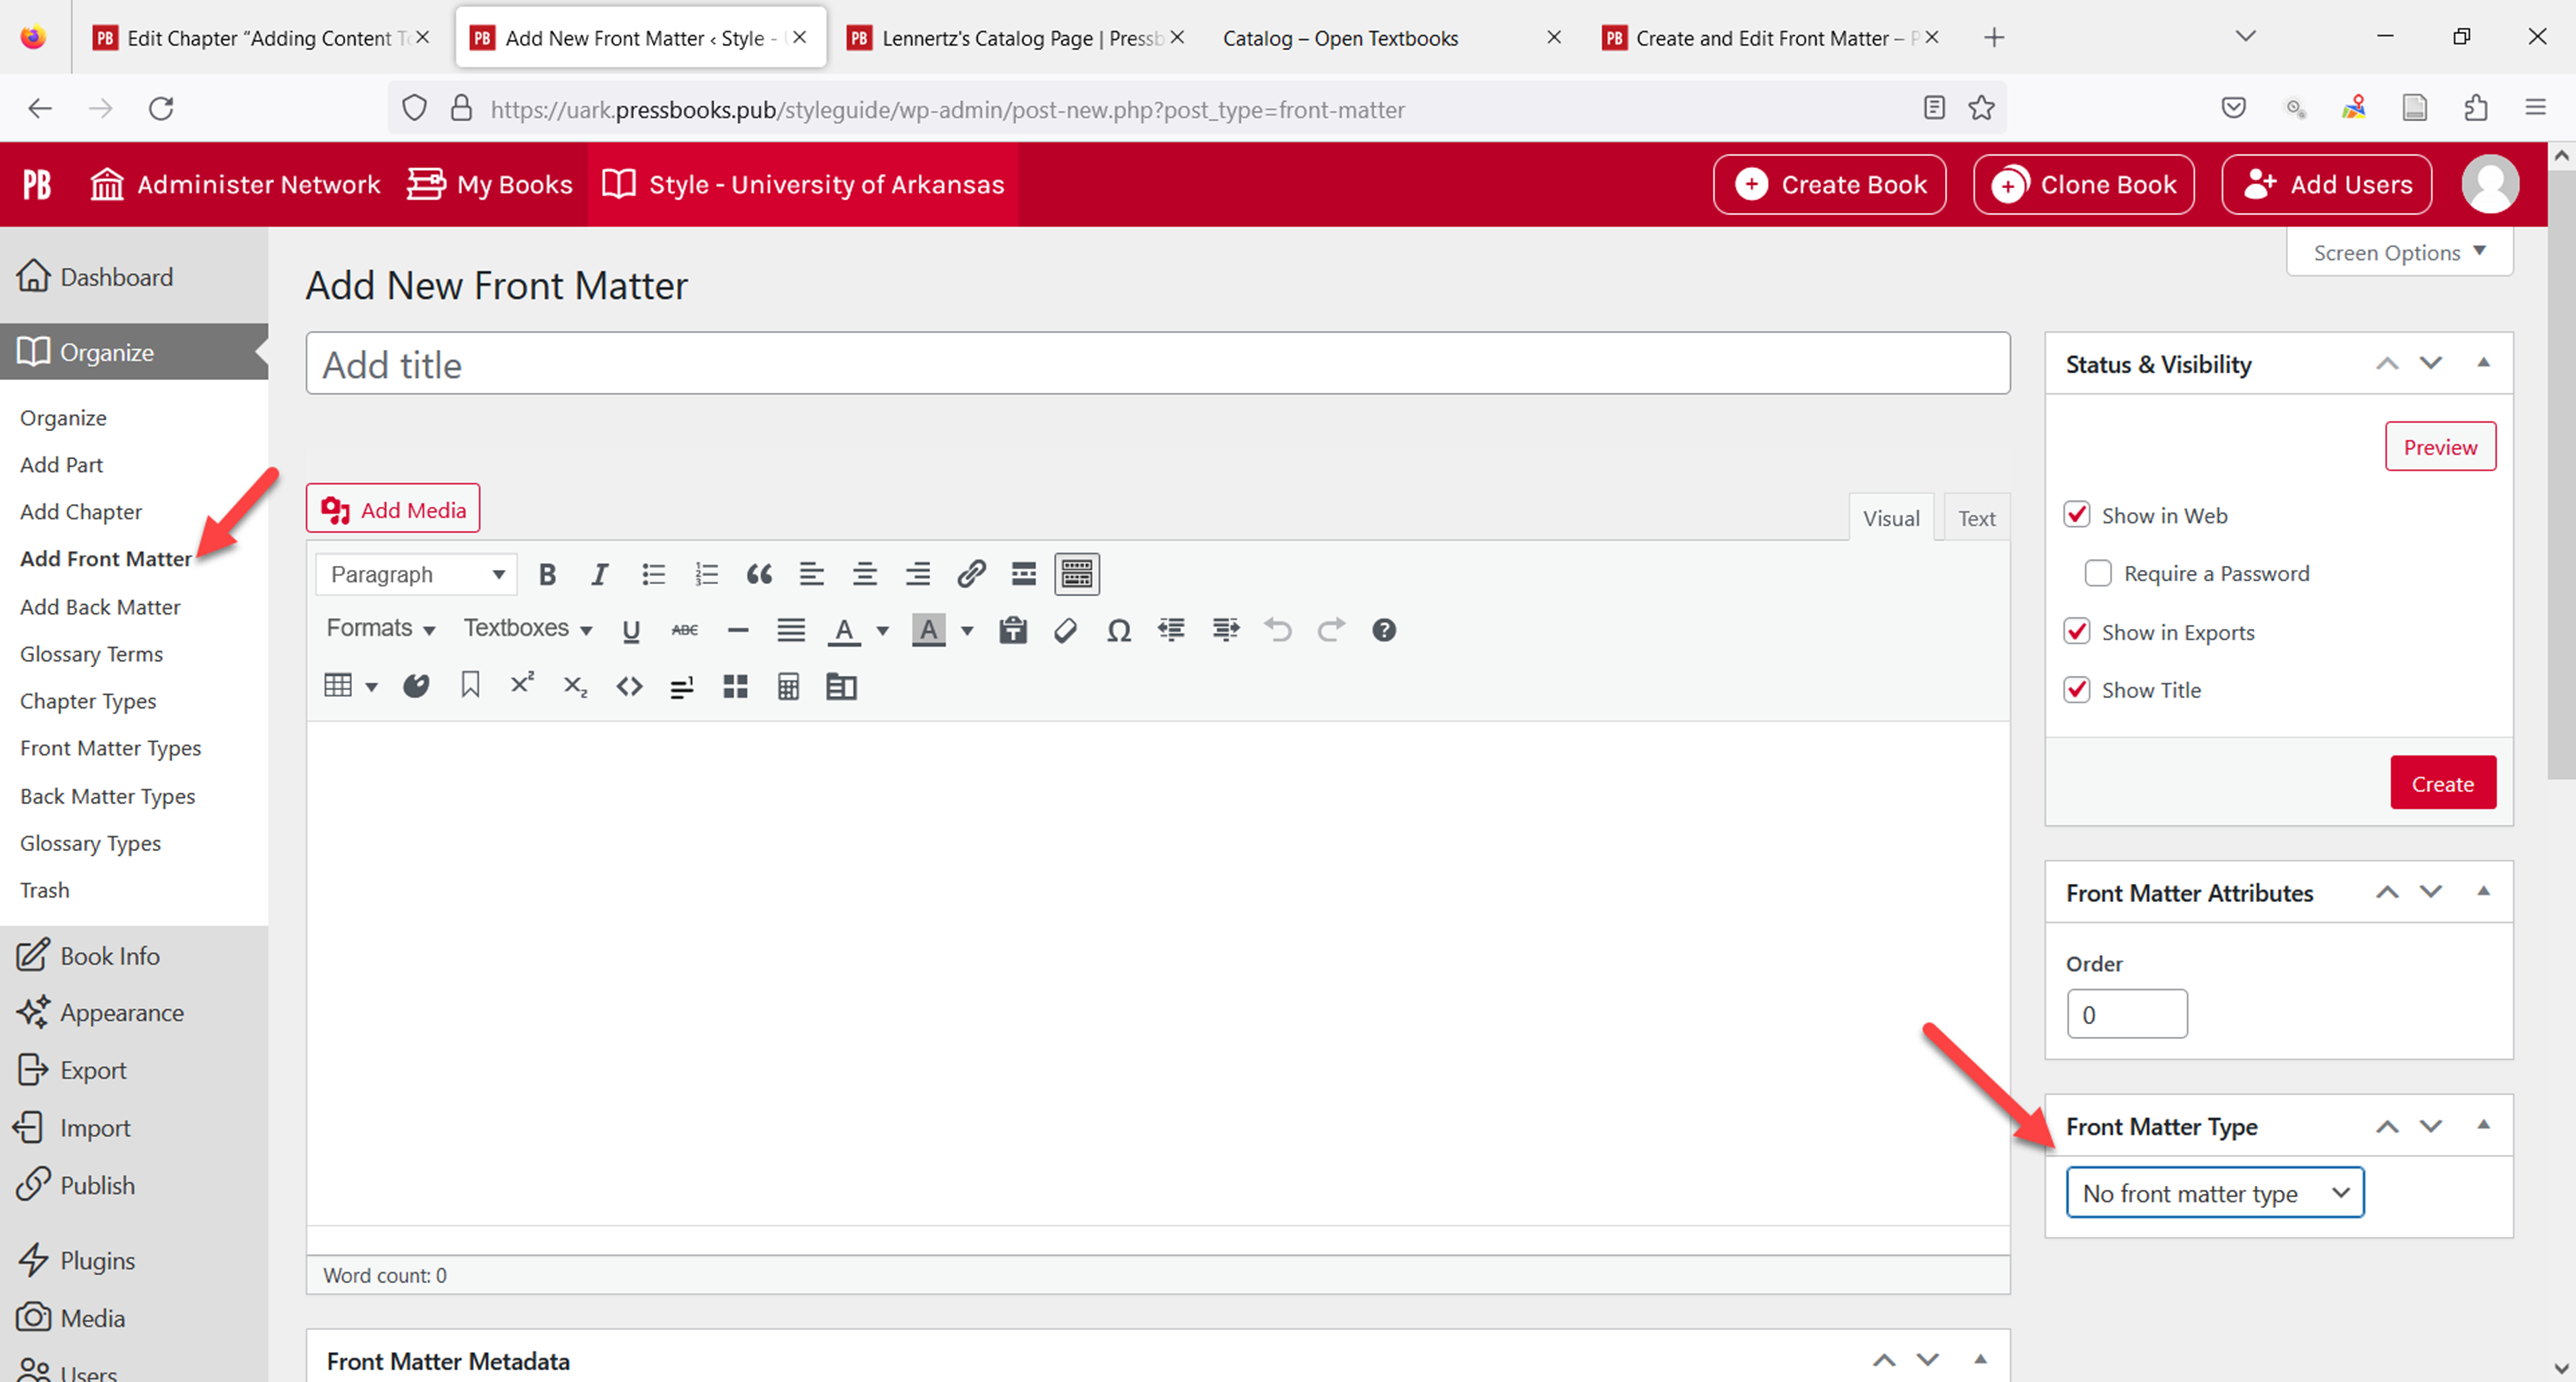
Front matter items function similarly to chapters. You can create, edit, delete, rename or reorder front matter items the same way that you would with chapters, with one additional option.
The Front Matter Types menu lets you indicate an item’s type – which may change how it is styled in outputs.
Types of Front Matter
Pressbooks lets you specify 21 types of front matter, including Miscellaneous.
These types are:
- Abstract
- Acknowledgements
- Before Title Page
- Chronology, Timeline
- Dedication
- Disclaimer
- Epigraph
- Foreword
- Genealogy, Family Tree
- Image Credits
- Introduction
- List of Abbreviations
- List of Characters
- List of Illustrations
- List of Tables
- Miscellaneous
- Other Books by Author
- Preface
- Prologue
- Recommended Citation
- Title Page
How Back Matter Works in Pressbooks
Back matter is the stuff at the end of your book, after the main sections of the book are finished. Some common items in Back matter include: Epilogue, Index, Bibliography.
Back matter items are essentially chapters within a part, with one additional option to customize.
The Back Matter Types menu lets you indicate an item’s type.
Types of Back Matter
Pressbooks lets you specify 24 types of back matter, including Miscellaneous.
These types are:
- About the Author
- About the Publisher
- Acknowledgements
- Afterword
- Appendix
- Author’s Note
- Back of Book Ad
- Bibliography
- Biographical Note
- Colophon
- Conclusion
- Credits
- Dedication
- Epilogue
- Glossary
- Index
- Miscellaneous
- Notes
- Other Books by Author
- Permissions
- Reading Group Guide
- Resources
- Sources
- Suggested Reading
Adding Front Matter and Back Matter
To add different types of Front Matter or Back Matter, just click “Add Front Matter” or “Add Back Matter.” Once you click on one of these options, you will be able to choose templates for different types of front and back matter. You will find a menu with a long list of pre-formatted types of front and back matter to choose from, and you can edit these as necessary to fit your content.

Indexes and Notes
Currently, Pressbooks is not able to automatically create these pages with links to the corresponding locations in the body of your book. However, it is possible to create these manually using anchor links. To do so:
- Create your back matter section and add your content
- Create an anchor link next to each term/entry/endnote by clicking the “Anchor” button on the toolbar and entering a unique identifier
- Go to the corresponding chapter and find the term you wish to link to the back matter
- EITHER:
- Highlight the text, click on the “Link” icon and enter ‘/back-matter/[your-section-title]/#unique-identifier‘ OR
- Insert a number marker using the supercript button on the toolbar (like this1), highlight the number and create a link as above.
This will create a link to the back matter section, but to also link back to the body text, repeat the same process in reverse, placing the anchor in the body text and the link in the back matter section.
For more on adding end-of-book endnotes, click here. For more on internal links and anchors, see our guide chapter on hyperlinks.


Feedback/Errata