34 Pockets
Sheri Deaton
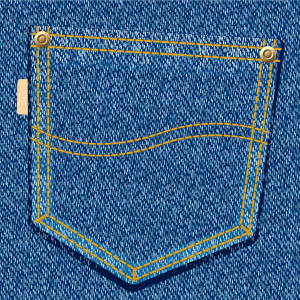
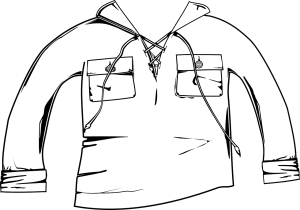
Pockets
Pockets here, pockets there, look around and you will find pockets everywhere! Jeans, shirts, skirts, dresses, aprons, and handbags are just a few of the many places you will see pockets. Some pockets are for decoration, yet many are for function. Pockets come in all sizes, shapes, and applications.
Knowing how to properly create and install a pocket is an essential skill for every fashionista to work through so they can accomplish this skill which is found in a variety of projects.
There are over thirteen categories for pockets outlined by Treasurie in their blog Types of Pockets: Best Style Guide. Check it out!

Perfect Patch Pockets
Just like there are many different styles, applications, and functions of pockets, there are many different techniques to use when installing pockets or altering a garment to include pockets. Always follow the pattern instruction sheet developed by the manufacturer of the pattern you are using. The following guidelines can be followed to create a simple patch pocket.
- Make the pattern. Figure out the size and shape of the pocket you would like to add and draw it on a piece of paper.
TIP: For a symmetrical pattern, consider folding the paper in ½ and then tracing the design. Keep the paper in ½ as you add the seam allowance and as you cut the pattern. Use heavy-weight paper such as construction paper or cardboard to assist those new to pattern creation.
- Add a seam allowance. I prefer to add ½” seam allowance to allow for extra room for sewing corners or curves.
- Cut out the pattern.
- Pin the pattern to two pieces of fabric. Consider using natural fibers or natural fiber blends due to their ability to withstand high heat when pressed or ironed.
TIP: For extra stability, consider using a layer of fusible interfacing. This will not only add stability and structure to your pocket, but it will bulk up thin fabrics making them more durable.
- After cutting out the patterns, transfer the stitching lines to the wrong sides of the fabric to ensure you have the correct shape and width of seam allowances.
TIP: This step can be skipped if you are confident in your abilities to sew a straight and consistent seam allowance. Use tailor’s chalk or a fabric pencil or marker that will be easily laundered out of the fabric you are using.
- Placing the two right sides together, stitch the pocket pieces together all around, leaving a gap wide enough for two of your fingers to fit through (approximately 1 ½ to 2”). Leave this opening on one of the straight sides of the pocket, on the side, or the bottom of the pocket.
- Clip the corners and the curves as needed. Clipping is where you cut slits equal distance apart and equal depths into the seam allowance. This is done on all seams with an inside or concave curve to prevent bunching and promote a smooth finish. Clipping allows the concave curve to stretch out and adjust when it is matched up with its convex counterpart. Clipping is an essential step when sewing a collar, inserting a sleeve, or sewing any curved edge (Deaton, 2021).
For more insights on clipping and notching, explore the “Clipping and Notching” chapter embedded in this text in Unit 9: Finishing Touches.
- After clipping, turn the pocket the right way out and press this very well. Ensure that corners are poked out and curves are smooth.
- Pin the pocket in place on the right side of the garment or project you are creating. Ensure that it is straight, even, and placed appropriately.
- Stitch around the sides and bottom of the pocket with a topstitch that is close to the edge. This seam will not only secure the pocket to the garment but will also close the gap on the bottom or side that was left in the previous step.
TIP: Consider using a similarly colored thread if you would like the topstitch to blend in with the fabric. Use a complementary thread color that will pop or complement the fabric if you would like the topstitch to be more prominently seen.

If you are looking for a resource related to how to alter a garment to add in a side seam pocket, check out this step-by-step tutorial posted by Julia Gara (2023) on how to sew a simple side seam pocket into any garment.


Hemming it Up
Pockets can seem quite daunting, and some installations of pockets are more complicated than others. Regardless of the type of pocket you install, consistency with measuring and stitching seam allowances is critical. Ensure that you are working with fabric that is smooth and can be pressed, as pressing the fabrics is one strategy for ensuring even cuts and smooth application.
As you teach these skills to others, be sure to practice patience with yourself and your students. Apparel production abilities will be gained one stitch at a time. Confidence will grow with opportunities to practice and with a supportive environment that encourages growth from healthy mistakes.

Resources
| Resources | QR Codes |
| How to Sew a Pocket |  |
| How to Sew a Pocket: Pockets the Easy Way |  |
| How to Sew a Simple Side Seam Pocket into Any Garment |  |
| Sample patch pockets |  |
| Types of Pockets: Best Style Guide |  |
References
Deaton, S. (2021). Teaching Apparel Production. Presentation.
