21 Buttons
Sheri Deaton
Buttons are used on many different types of clothing to temporarily hold two pieces of fabric together. They can be found on dress shirts, skirts, jeans, flannels, and almost any garment. Buttons can be applied for both functional and design.
Learning how to sew a button is an excellent skill which can save you time and money. Buttons can have two holes, four holes, or a shank. The approach used for buttons varies depending on the style of the button, so learning how to put on all types of buttons is important (Deaton, 2021).
TIP: There is more than one way to approach this process, so embrace the concept of creativity and multi-modal approaches to demonstrating proficiency in this skill. Instruct students using a variety of teaching strategies including, but not limited to demonstration, written directions, video tutorials, and direct instruction.
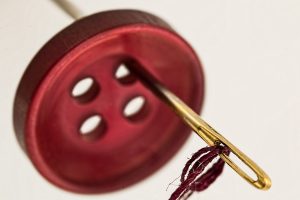
Two-Hole and Four-Hole Button Steps
- Double-thread a needle and tie a knot at the end.
- Bring the needle up through the ugly side of the fabric and ONE hole of the button.
- Leave a loop.
- Add the space (a pin) between the thread and the button.
- Bring the needle back down through an opposite hole.
- Repeat roughly 6-8 times with the same two holes.
NOTE: If you are sewing a four-hole button, move on to the next pair, forming an X pattern.
- Tie a secure knot.
- Put a needle through the stitches on the wrong side of the fabric.
- Pull the thread through, stopping short to form a loop. Take your needle through the loop and pull tight then repeat once.
TIP: If you are replacing a button on a garment, note how the other buttons are secured to the fabric. If the garment has buttons with parallel lines on the buttons, create this image using these same steps, but create parallel lines rather than an X with the threads. Match the garment’s other buttons to create consistency in appearance and to reduce the chances of noticing the new button placement.
Watch this video to see step-by-step how to apply these concepts when sewing on buttons.
Shank Buttons
- Double-thread a needle and tie a knot at the end.
- Pull the needle AND thread through the button and back through the fabric.
- Repeat this 6-8 times.
- Tie a secure knot
- Put a needle through the stitches on the wrong side of the fabric.
- Pull the thread through, stopping short to form a loop. Take your needle through the loop and pull tight then repeat once.

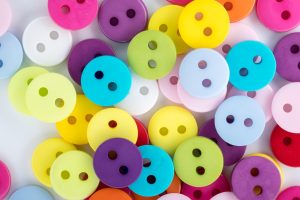
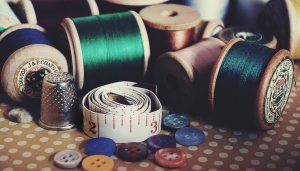
Image by PublicDomainPictures from Pixabay
Watch this video to see step-by-step how to apply these concepts when sewing on buttons.
Tightening Loose Buttons or Altering Clothing
Sometimes the buttons are on the garment, but they have gotten too loose. Perhaps you want to add buttons to a garment as a decorative piece, or you need to move buttons to alter a garment for a better fit. In these situations, what should you do and what do you need to accomplish these skills?
Gather items (as necessary) for your project so that you can work efficiently. Items might include small scissors, chalk, measuring tape or seam gauge, sewing pins, a needle, and thread matching the color used on the garment.
Watch this video to see how to simply and securely repair loose buttons.
Watch this video to see how to sew on a button like a master tailor.
Hemming it Up
Buttons will fall off or get loose on clothing or home furnishings. Learning how to sew on a button is a worthwhile skill that should be taught in apparel production classrooms. Regardless of the style of the button, all students should be able to sew a button on with ease. Threads should be secured on the back of the garment, and threads should be neatly snipped.
Opportunities to practice these skills will increase students’ confidence and abilities in demonstrating this essential skill. Consider using a variety of resources or techniques to allow students to engage in the demonstration of these skills.
Resources
| Resources | QR Codes |
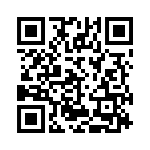
| Bubba Bookmark |  |
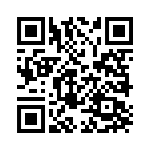
| BUBBA Bookmark Rubric |  |
References
Deaton, S. (2021). Teaching Apparel Production. Presentation.
