33 Ruffles
Sheri Deaton
Ruffles
What do German soldiers, Jerry Seinfeld, and Marie Antionette all have in common? Ruffles. Ruffles have been in fashion since the 1500s when German soldiers began the trend of slashing the outer layer of clothing to reveal a wrinkled layer of clothing. These wrinkled layers caught on and have seen the ebb and flow of implementation in fashion ever since (Deaton, 2021).
For more information on the history of ruffles, check out Nicole Livey’s (2019) article Charting the Unlikely History of Ruffles and the Fashion History Timeline Ruffles.
| Charting the Unlikely History of Ruffles | Fashion History Timeline: Ruffles |
 |
 |

Ruffles, which were once unisex, have now been integrated into clothing and home goods as a flirty and feminine accent. Dresses, skirts, home décor, and craft projects are likely to integrate this apparel production skill. Ruffles can be used to distract or disguise larger areas of the body, accentuating most body types when implemented effectively.
Ruffle applications are as varied as their history. Different types of ruffles include cascading, center, circle, fold-over, straight-cut, and tube. Check out the resources located at the end of this chapter to continue exploring the various styles of ruffles and their applications.

Ruffle Recommendations
Always follow the guidelines in the pattern instruction sheet when creating a ruffle from a pattern. The following guidelines are helpful when making any type of ruffle and can be followed when creating sample ruffles for a portfolio or when you are learning these new skills.
- Generally, a ruffle fabric piece is going to be 2-3 times longer than the edge it is sewn to. The longer it is, the more full the ruffle will be. For practice, consider using a ruffle fabric that is two times longer than the fabric you will be sewing the ruffle to. Example: If one piece of fabric is 10”, the ruffle fabric piece would be 20”.
- Before sewing the ruffle, clean the finished edge or hem the ruffle’s edge. This can be accomplished through a variety of measures, including using a serger, magic tape, hand stitching the hem, or using a clean finish hem.
To remind yourself of hemming techniques, check out the “Hemming Stitch” chapter embedded in Unit 5: Hand Sewing of this text, or see the “Hemming Techniques” chapter located in Unit 9: Finishing Touches.
- After finishing the hem of the ruffle, you are ready to start with the basting stitches. We will be following the same steps we used for gathering located in the “Gathering and Easing” chapter found in this text in Unit 8: Apparel Construction.
- Adjust the stitch length on your machine to make it a longer stitch. (3.0 – 4.0)
- Sew one row of basting stitches ⅛” from the edge of the fabric across the area to be gathered. Do not backtack. Leave tails of thread at the end of the seam.
- Sew a parallel line ⅛” from this first basting stitch, following the same method.
- Grab the top strings from both seams and pull the fabric toward you. You should start to see the seam gather.
TIP: Some people find it valuable to wrap the remaining strings around a pin to ensure they stay in place as they gather. Consider using this technique to see if it works well for you!
- Pull the top strings from both sides, ensuring the gathers are even and the fabric is the length you desire.
- Once you have the fabric gathered so that it is the size of the other piece of fabric, tie all four strings together on both ends of the fabric to ensure the gathers do not come out when you adjust and sew.
- Pin the gathered ruffle fabric to the other piece of fabric using pins placed parallel to the seam. This will help keep the gathering in place as you sew.
- Adjust your machine back to a normal sewing stitch length. Sew a normal straight seam just below the lower gathering seam. Sew slowly and guide the fabric to ensure a straight stitch and that the gathers are evenly spaced. Backtack at the beginning and end of the seam.
- Use a serger to clean and finish the edge of the ruffle, or use the zig-zag stitch on a sewing machine to finish the edge of the ruffle and ensure that the fabric does not fray.
- Iron the ruffle seam with the seam allowance pointed away from the gathering. Do not iron the gathers.

Hemming it Up
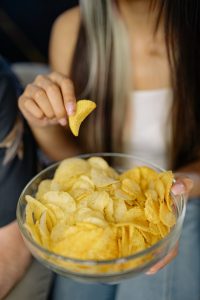
“Ruffles have ridges.” Perhaps you have heard this expression used before in a potato chip commercial. Clothing ruffles are similar to potato chips in that once you start trying them, you may have a hard time stopping!
You can have your chips and eat them too, just do not try to eat while creating ruffles. Give this task your undivided attention and you will be pleased with the results. Try not to get your feathers ruffled when things do not go your way. Keep at it, and keep working to accomplish this skill, one stitch at a time.
Resources
| Resources | QR Codes |
| How to Sew a Ruffle Video |  |
| How to Sew and Attach a Ruffle Tutorial |  |
| Ruffle 101: 7 Ways to Make a Ruffle |  |
References
Deaton, S. (2021). Teaching Apparel Production. Presentation.
