36 Clipping and Notching
Sheri Deaton
Clipping and Notching
What is Clipping?
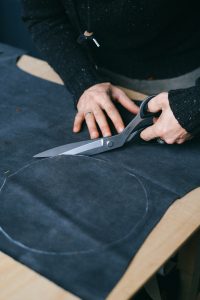
Clipping is where you cut slits equal distance apart and equal depths into the seam allowance. This is done on all seams with an inside or concave curve to prevent bunching and promote a smooth finish. Clipping allows the concave curve to stretch out and adjust when it is matched up with its convex counterpart. Clipping is essential when sewing a collar, inserting a sleeve, or sewing any curved edge (Deaton, 2021).
Word Associations: Concave… go INSIDE a cave… clip your toenails at home (inside).
TIP: Teach students how to sew curved seams on paper first. Find an online worksheet with curved lines and have them sew the lines to the best of their abilities, staying on the line. Practice first on paper, then on fabric. Encourage the growth mindset when students encounter difficulties. Perhaps they do not have the skill down, YET. But there is power in the word YET.
Practice makes permanent, so keep practicing on paper or scraps of fabric. Once they have this skill mastered, teach them about the importance of clipping. Once again, encourage them to practice this skill on scraps before practicing on a final project or garment. One error students make is in clipping too close to the seam allowance resulting in a clipped seam.

What is Notching?
Notching is cutting wedges an equal distance apart into the seam allowance. This is often done by cutting a V-shaped notch in the seam allowance when you have a convex curve. Notching should be utilized on seams with an outside or convex curve. Knowing how to do this is important when you are sewing a collar, inserting a sleeve, or sewing any curved edge.
Word Associations: Convex… go outside to see a t-rex… notch your wood into a V in the tree… trees grow outside of the house.
TIP: Notching is a great skill to teach students through demonstration techniques. Many times students ask “How far apart are my notches supposed to be?” I like to demonstrate how you can use the width of your thumb to create a visual guide for how far apart to make the notches. The key behind this finishing technique is consistency in spacing and depth of notches. Remind students to be careful as they notch close to the seam allowance, not cutting into the seam at any point.
Safety First
Teachers must ensure that their students are practicing safety in the apparel laboratory. Establishing policies, procedures, and norms for behavior with supplies is critical, not only for the safety of the classroom but also for the teachers’ abilities to manage the classroom effectively. As a review, consider these concepts to promote shear and scissor safety (Deaton, 2021). Teach, model, and reinforce these concepts.
- Respect the equipment in the laboratory. Always use scissors/shears with care. Do not run with, throw, or use these items for tasks other than their intended purpose.
- Use designated fabric shears/scissors to ONLY cut fabric. Cutting other materials with these items will dull the edges over time, resulting in inconsistent cuts and tears in the fabric.
- Sharp shears/scissors are safer for students than dull shears/scissors. Keep items sharp, maintaining equipment to ensure items are at peak performance for students.
- Retrieve items from their assigned places and put them back in the same designated area. Small equipment should not be left out in the classroom for students to trip over, nor should it be strewn around the room. This will result in a lack of productivity as students struggle to find the items they need to accomplish the task. To promote an organized and productive lab, remember that “there is a place for everything and everything has a place.”
- Pay attention. Students should devote their time and full attention to the task at hand, especially when using items that could cut, burn, or harm a person if used incorrectly.
Hemming it Up
Learning a new skill takes time, concentration, and practice. Mistakes are par for the course. Sometimes a new technique is a “swing and a miss.”
Some students have greater eye-hand coordination than others. Allow students opportunities to practice clipping and notching and encourage the use of problem-solving if (or when) they clip the seam. Embrace the concept of being a life-long learner and create the type of classroom where students feel supported to do the same. Practice silly word association techniques and allow students to develop their own. You never know what might help a concept stick to a student’s brain and be stored in their long-term memory.
Resources
| Resources | QR Codes |
| Sewing Bias Binding onto Curved Seams |  |
| Sewing Concave and Convex Seams |  |
References
Deaton, S. (2021). Teaching Apparel Production. Presentation.
