25 Straight Seam
Sheri Deaton
Straight Seam
Apparel and home furnishings are created through the use of a variety of seams, with the straight seam being the easiest one to master and the one most frequently used. The straight seam, also called a simple seam, is a straightforward application of sewing two pieces of fabric together. Do not be confused by the name… a straight seam can be curved, straight, or at an angle. The fact that it is a simple application is what gives it the name “straight seam” (Deaton, 2021).
TIP: Have students practice sewing straight seams together on scraps of fabric. Ensure that they backtack at the beginning and the end of the seam. Show them how to sew various seam allowance depths, including 5/8″, 1/2″, and 1/4″ or presser foot distance.

When two pieces of fabric are stitched together, this is a seam. Below are some general expectations for seam creation, with a few exceptions along the way.
Seams Straight Forward
- Seams are created by putting two pieces of fabric together, with the right sides facing each other. Some fabrics do not have a true right or wrong side, yet most do. The “right” side of the fabric is the side that has the print or bright and pretty colors on it. The wrong side of the fabric is the underside of the fabric. This “ugly” side is the wrong side of the fabric and is hidden when the project is completed. There are a few exceptions to this rule, one of which is the creation of the French seam.
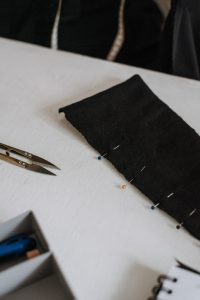
TIP: Use as many pins as you feel necessary for pinning the fabric together. I like to use as few pins as possible. If you do use pins, be sure to take them out before you get to them to ensure you do not break your needle!
- Seams are held together with a knot at the beginning and the end of the seam. This is created through backtacking at the beginning and the end. Without a knot at one or both ends, the seam would split wide open.
Simple Process
- Line up the needle creating the appropriate seam allowance. Most patterns call for a 5/8″ seam allowance. Always read and follow the pattern envelope.
- Put the presser foot down. Sew forward 2-3 stitches.
- Hold the reverse button (or reverse switch) and sew backward over the stitches you just made. This is called “backtacking” and is how you make a knot at the beginning of the seam.
- Release the reverse button or switch. Sew forward, back over the same stitches you just made, sewing down to the end of the length of fabric, or wherever the seam is marked to end. Keep the fabric straight, ensuring you are sewing a straight seam and creating a straight seam allowance.
TIP: If you are sewing with a slippery fabric like velvet or satin, you may consider using a rubber band on your throat plate on the designated seam allowance line. As you sew, keep your eyes on the fabric to ensure that it stays on the edge of the rubber band. This strategy can help not only with certain fabrics, but also with those who are new to sewing, those who are visually impaired, or those who lack confidence in their abilities.
- At the end of the fabric, or where the seam is supposed to end, stop. Use the reverse button (or switch) and sew backward 2-3 stitches over the stitches you just made.
- Release the reverse button or switch and sew forward to the end, sewing again over the stitches you just made. This is called “backtacking,” and this is how you make a knot at the end of the seam you just created.

Hemming it Up
The straight seam is one that is simple, straightforward, and should be easy for students to master. It is a good idea to introduce this seam application to students first as students’ mastery of this skill will build their self-efficacy, skills, and problem-solving abilities. Remind students of the importance of backtacking to ensure their hard work does not unravel.
To ensure the appropriate fit of garments and sizes of items for home furnishings, reinforce the concept of reading the pattern envelope to ensure the seam allowances are created appropriately. A pattern that calls for a 5/8″ seam allowance will not be properly constructed if it is sewn at a 1/4″ or 3/8″ seam allowance.
Regardless of the seam application, it is essential to read and follow the directions. Allow students opportunities to make healthy mistakes and to use “Sally the seam ripper” when they mess up. Sewing is a process that takes time to master, one stitch at a time.

Resources
| Resource | QR Codes |
| HOW TO SEW A STRAIGHT STITCH |  |
| Plain Seams |  |
References
Deaton, S. (2021). Teaching Apparel Production. Presentation.
