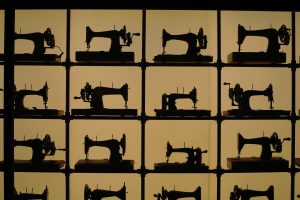
14 Sewing Machine Problem Solving
Sheri Deaton
Sewing Machine Problem Solving
Those who have been sewing for any amount of time can probably relate to sewing machine issues. Some problems are easy to fix, while others require some thought, adjustments, and perhaps an outside expert. Proper use and maintenance of a sewing machine will result in happier days in the laboratory and better products created by those who use the machines.
Before we unpack the problems, let’s uncover the tips and tricks for how to operate a machine most efficiently. Regardless of the machine you are using, learning these simple steps will save you many frustrating moments in the future.

- Maintain your machines. Proper maintenance is the key to lengthening the life and productivity of your sewing machine. Read the owner’s manual for your machine and follow the guidelines suggested by the manufacturer.
Check out this video on Sewing Machine Maintenance. Proper sewing machine maintenance is one of the most important things you can do for your machine!

TIP: At the end of the semester, teach your students how to service the sewing machines. Show them how to properly dust and oil their machines. Show them how to take out the needle and replace it with a fresh needle. This practice will teach students how to service machines and will ensure all machines are serviced and ready to go for the next group of students. If you teach students how to accomplish this skill on the machines in the classroom, this will increase their confidence and abilities to transfer this knowledge to other machines outside of the classroom (Deaton, 2021).
- Change the Needle. When sewing with the sewing machine, it is important to choose the appropriate needle size for the weight of the fabric you are using. Changing the needle to reflect the fabric that you are using will assist in the ease of creating this product. Additionally, remember that needles get dull over time. This can cause tears, rips, or holes in the fabric. At the end of each semester, we change the sewing machine needles out as part of our regular maintenance. Consider how often your machine is used, and change the needle as needed (Deaton, 2021).
- To change the needle, unscrew the needle clamp and release the old needle. When you insert the new needle, ensure that the flat part of the needle faces the back of the machine and place the needle securely in the machine, as high as possible in the needle clamp. Tighten the screw but do not overtighten.

Check out this video on How to Change Needles and how to Choose the Right one. Every person operating a sewing machine should understand how to select and install sewing machine needles.

TIP: Properly dispose of used and broken needles. Consider double bagging the trash and leaving a note for the custodial staff to prevent their injury. Do your part to keep your students safe, and to keep those who work with you safe as well.
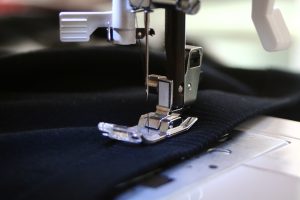
- Check the Feed Dogs. Sometimes the drop feed button might get hit or adjusted as sewing machines are moved back and forth. If you are trying to sew and the fabric is not moving through, check to see if the feed dogs are up or lowered. If they are lowered, adjust them so they are up so they can catch the fabric and move it through as you sew.
TIP: Encourage your students students to touch the feed dogs when the machine is unplugged and turned off. As students feel the texture of these metal parts, the words “feed dog” may resonate more deeply in their brain. Encourage them to visually observe the “teeth” of the machine moving as they turn the hand wheel toward them. Visual learners will enjoy seeing the feed dogs and kinesthetic learners will make greater connections with this term if allowed to touch, raise, and lower the feed dogs. Create opportunities for students to safely explore the various aspects of the sewing machine as you teach them the names of the parts of the machines and their functions (Deaton, 2021).
- Drop the Foot. Frequently, novice apparel production students will begin sewing and forget to put their presser foot down. This results in the fabric moving around, inconsistent stitches, and an inability to sew a straight line. Be sure to lower the presser foot before beginning to sew. The combination of the presser foot from the top and the feed dogs from the bottom will easily move the fabric through the machine.
TIP: A room full of sewing students dropping their presser feet all day long can get exhausting for the instructor. Discuss with students the importance of respecting the equipment and how lowering the feet can help with the wear and tear of the machine over time. Model for the students how to do this quietly, setting the “norm” for the classroom. Some students will enjoy having a contest to see who can raise and lower their presser foot the quietest for a set amount of time (Deaton, 2021).
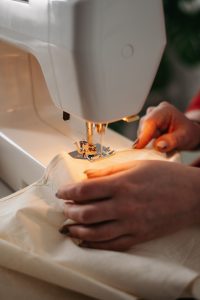
- Thread Carefully. Most of the time when a student tells me they are having an issue with the machine it is because it is not threaded correctly. This is the first step to check if you are having problems.
Every sewing machine is threaded differently, yet the process is very similar. Check out this machine where Mrs. Roth explains how to thread a sewing machine to her students at South View Middle School. This is one example of how teachers can use technology to assist their students as they explore these concepts and apply these skills on their own.

TIP: Practice, practice, practice this skill! Time spent teaching students how to thread their machines is not wasted; rather, it is time invested. Allow students to work together in heterogeneous groups created by the teacher. The use of grouping techniques can increase students’ motivation and confidence as they practice and problem-solve together. Note the students in the class who have mastered these skills, and consider utilizing them as a “more knowledgeable other” during other laboratory experiences. Consider having threading the machine races where students work together to correctly thread their machines to see who can do this the fastest yet without error. The use of games can spark energy and excitement in the classroom faster than direct instruction or a teacher demonstration (Deaton, 2021).
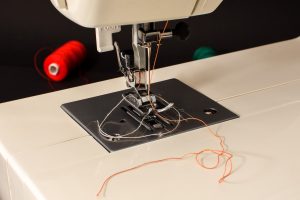
- Adjust the Tension. Balanced stitches are essential for sturdy seams that will wear evenly and will withstand wear over time. If a stitch is not balanced, it can easily be pulled. This problem should be addressed by adjusting the tension on the tension regulator on the machine.
- If the bobbin thread lies along the surface of the fabric, the upper tension is too loose. Turn it to a higher number to increase the tension and create a more balanced stitch (Westfall, 2013).
- If the top thread is lying along the surface of the fabric, the upper tension is perhaps too tight. Turn the regulator to a lower number to decrease the upper tension and create a more balanced stitch (Westfall, 2013).
TIP: Create sample stitches demonstrating tension that is too tight, too loose, and balanced tension. Post samples around the room and challenge students to identify which sample best matches the descriptions. Encourage students to problem solve and consider what they should do if they see their thread tension has been skewed. This can be a difficult concept for students to understand, so creating examples for students to see will enhance their comprehension of what they are looking for and what they should do if they encounter this problem (Deaton, 2021).
- Consult an Expert. Sometimes issues are beyond our understanding or our abilities to repair. Check out this resource created by Coats as another reference for you to look into to Solve your Sewing Problems.
TIP: Consider the use of skits as you teach students how to problem-solve when they encounter issues with the sewing machines. Assign students a sample “problem” and then allow them to create a brief skit showcasing what they would do if this was their issue. Students can learn through these vicarious experiences. Their ability to problem-solve with pretend problems will increase their confidence when they encounter these issues in the production process (Deaton, 2021).

Hemming it Up
Sewing can be so much fun! It can also be incredibly frustrating. Inevitably, your bobbin will run out of thread, a needle will break, or your sewing machine will become unthreaded. These issues happen. How we respond to these issues sets the tone for the classroom. Practice patience with yourself and with your students as they are learning how to operate a sewing machine.
Remember, children rarely learn how to tie their shoes proficiently and quickly in one sitting. This skill takes time, repetition, and patient teaching.
Students rarely learn how to thread a machine and use it with ease the first time. This takes time, repetition, and patience. With proper guidance and support, students will learn how to properly use the machines, becoming more confident in their abilities, one stitch at a time.

Resources
| Resources | QR Codes |
| Sewing Machine Tension Top 10 Tips |  |
| Understanding Thread Tension on your Sewing Machine |  |
References
Deaton, S. (2021). Teaching Apparel Production. Presentation.
Westfall, M. (2013). Successful sewing. The Goodheart-Willcox Company, Inc.
