24 Zippers
Sheri Deaton
Zippers
Growing up, my family did not have an enormous amount of discretionary spending money. What we lacked in finances, my family more than made up for in love, talents, and work ethic. I remember my mother and grandmother making numerous articles of clothing for me over the years. I also remember my mom dreading the installation of the zipper.

When I took an apparel production course in college, I dreaded the day we began discussing how to install a zipper. However, I also remember the instructor letting us in on a few tips and tricks that she used to ensure a quality zipper that was installed with limited tears and frustration. I went from dreading the installation of zippers to looking forward to the challenge (Deaton, 2021).
Before diving into the procedures for installing a zipper, let us make sure we know the zipper terminology.
TIP: Do not forget your professional blind spots. What are these? Professional blind spots are areas where you are the expert, and you may forget or not see that others do not know something that you consider “common sense” or “common knowledge.” Take time to establish a base floor of understanding with your students, never forgetting how difficult these concepts might be for someone new to sewing.
Zipper 101
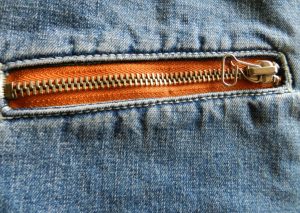
- Zippers have TEETH. The teeth are the metal or plastic parts of the zipper that interlock into each other.
- Zippers have TAPE. This is the fabric part of the zipper that does not have teeth. You will be using the edge of the tape to line up with the zipper installation line or the edge of the fabric, depending on the installation technique used.
- Zippers have a TAB, also called SLIDER. The tab (or slider) is the metal or plastic pull that is used to zip up or unzip the teeth of the zipper.
- Zippers have a CLAMP, or a STOP, at the end of the teeth. The clamp (or stop) could be metal or plastic. The purpose of this part of the zipper is to keep the teeth together.
- Zippers should be installed using a ZIPPER FOOT. The zipper foot was designed to allow the foot to gently push the teeth back while sewing to ensure that the seam is as close to the teeth as possible.
- Zippers have different classifications and lengths. Read the pattern envelope to determine the length of the zipper you need to purchase and the type of zipper you need to purchase. A standard zipper is common for many projects; however, an invisible zipper may be called for in certain apparel. Always purchase the appropriate style and length of the zipper.
NOTE: For a step-by-step process on how to alter the length of a zipper, check out the resources at the end of this chapter.
Zippity Do-Da
While everyone has their unique approach to installing zippers, consider the following concepts as you tackle this task.
- The first thing you need to do is to change your regular presser foot to a zipper foot.
TIP: You can put the zipper foot on EITHER way, so the needle is on the left or the right. The goal behind the placement of the zipper foot is to ensure that the needle is as close to the teeth of the zipper as when sewing.
Technique #1
Use this technique when sewing a zipper to two separate pieces of fabric.
- Put the GOOD side of your zipper on the good side of the fabric.
- The tape and edge of the fabric should be lined up.
- Sew SLOWLY, adjusting as needed. Backtack at the beginning and end. Move the zipper pull as needed.
- Once you have sewn one side, sew the other, matching the pretty side of the zipper with the pretty side of the fabric, with the tape of the zipper on the edge of the fabric.
- Sew the same seam allowance that you sewed on the other side, backtacking at the beginning and end.
- Press the fabric.
- Topstitch to make the fabric less likely to get caught in the zipper.

Technique #2
Use this technique when creating a concealed zipper.
- BASTE a 5/8” seam, with the right sides of the fabric together. Do NOT backtack at either end.
- Press the seam open.
- Line up the teeth of the zipper along the center of the based seam. Pin this carefully!
- Carefully and slowly sew along the side of the zipper.
- Sew until you are below the metal clamp.
- Turn the fabric with the needle in and sew across the base.
- Turn the fabric with the needle in and sew up the other side.
- Using a seam ripper, rip open the basting stitches, revealing the teeth of the zipper. Do this slowly and carefully!
- Take out all loose threads. Press and you are done!

Technique #3
Use this technique when installing an invisible zipper. If the pattern calls for an invisible zipper, be sure to purchase an invisible zipper, not a standard zipper. Also, many sewing machines have an invisible zipper foot that you could use when installing an invisible zipper. You can use the standard zipper foot if your machine does not have this foot.
- Stabilize the seam with interfacing about 1” longer than the zipper.
- Line up the interfacing on raw edges and press.
- Press the zipper teeth away from the zipper tape.
- Use the line on the zipper to guide your sewing.
- Start with the zipper closed, with the right side of the zipper on the right side of the fabric.
- Pin in place, then unzip the zipper.
- Line up the zipper’s edge on the seam allowance’s edge. Pin in place.
- Sew until notch/mark at the bottom to indicate where sewing should stop.
- Make a mark on the other side of the zipper to indicate where you should stop sewing.
- Pin the other side of the zipper, with the right side of the zipper on the right side of the fabric.
- Pin in place, then open the zipper all the way.
- Pin in place as you did before.
- Move your foot so the zipper teeth are close to the needle.
- Stitch until the mark on your zipper. **Very important that these match up!
- Place the pin on the seam allowance under the zipper teeth, pushing the zipper out of the way.
- Start sewing just a few stitches above where you left off, and stitch down a few more inches.
- Switch to a standard presser foot and finish off the seam allowance.
- Start on your last stitch and sew to the end of the fabric.

Hemming it Up
Zippers may seem intimidating to install, and admittedly, they do require time, effort, and patience. However, once you have practiced this skill you may find yourself zipping through projects just to get to the zipper installation!
This author challenges you never to give up, never stop learning, and keep on, even when the project or life seems difficult. It is in those difficult moments that true strength is developed and skills like problem-solving, critical thinking and stick-to-itiveness are formed.

Author Created Tutorials
Check out these videos created during the spring 2020 semester for step-by-step tutorials on how to create zippers using these techniques.
| Resources | QR Codes |
| Technique 1: part 1 |  |
| Technique 1: part 2 |  |
| Technique 2 |  |
| Technique 3: part 1 |  |
| Technique 3: part 2 |  |
Resources
| Resources | QR Codes |
| How to Shorten a Zipper, Three Ways on the Craftsy Blog |  |
| Sewing a Centered Zipper |  |
| Structure of a Zipper / YKK FASTENING PRODUCTS GROUP |  |
References
Deaton, S. (2021). Teaching Apparel Production. Presentation.

