8 Transfer Marking of Pattern Symbols
Sheri Deaton
Transfer Marking of Pattern Symbols
Transfer of Knowledge
It is important to know the pattern symbols and what they mean, but what do you do next? While it is good for students to have memorized the pattern symbols, if they cannot use this information in the real world and apply the concepts during a sewing lab, this knowledge is about as helpful as random trivia.
To transfer the pattern symbols to the fabric, you should select the appropriate tool based on the type of fabric you are using. There are three primary methods for transferring markings: chalk or wax pencils, tailor’s tacks, or snips in the fabric (Deaton, 2021). You must know the type of fabric you are working with before using chalk or wax pencils to make sure they are appropriate and will not stain or ruin the garment.
Check out Wendy Ward’s (2017) suggestions for each of these three methods (chalk or wax pencils, tailor’s tacks, and snipping) in her article How to Transfer Pattern Markings.
For a closer step-by-step look at the transfer process, check out Debbie Colgrove’s (2020) take on How to Transfer Pattern Markings.

Watch these videos to learn more about pattern markings and when to use them.
Video Resources
| Sewing Pattern Markings |  |
| Sewing Pattern Symbols: Buttons |  |
| Sewing Pattern Symbols: Pleats |  |
| Using a Tracing Wheel |  |
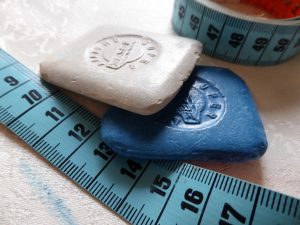
Regardless of the tool you use (chalk, pencil, pins, tailor’s tacks, or snips), you must transfer these symbols to the fabric. Notches indicating the front and back pieces will help you line up the front and back pieces, but they are useless if you do not note them. Circles indicating where to place the pocket or pleat are very helpful, but only if you transfer them to the fabric itself.
TIP: It is a good practice to check (and double-check) to ensure you have transferred all appropriate markings before unpinning the pattern from the fabric. Consider implementing self or peer evaluations for this step to reinforce the importance of transferring the markings from the pattern. Often, a fresh set of eyes can see things we have overlooked. Students who engage in self-reflection and peer evaluations learn how to accept and give constructive criticism, which is essential in many professions.
Hemming it Up
Knowledge without context and usage is trivia. While trivia and fun facts are interesting, we want students to be able to know, use, and apply what they have learned in the classroom, recognizing how to apply this in a real-world scenario (Deaton, 2021). Allow students to self-explore the process of transferring pattern markings, giving them scraps of fabric and sample patterns to practice with before implementing an actual garment. Opportunities to practice this skill are essential.
Additionally, just as every student in the class is different, each person will have a technique they feel most confident with when transferring markings. Allowing students to practice with all three methods (chalk or wax pencils, tailor’s tacks, and snipping) will help students define for themselves what avenue works best for them. Embrace the diversity represented in the classroom, recognizing that each student will have a slightly different approach and technique. Celebrate these differences and encourage your students to do the same!

References
Colgrove, D. (2019). How to Make Sure Your Sewing Project Will Fit Properly. The Spruce Crafts. Retrieved 21 September 2022, from https://www.thesprucecrafts.com/sewing-pattern-alteration-and-fitting-articles-2977364.
Deaton, S. (2021). Teaching Apparel Production. Presentation.
Ward, W. (2017). How to Transfer Pattern Markings. Wendy Ward. Retrieved 21 September 2022, from https://wendyward.wordpress.com/2017/12/30/how-to-transfer-pattern-markings/.

