23 Snaps
Sheri Deaton
Snaps
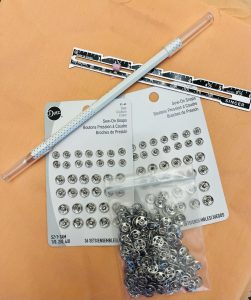
While hooks and eyes are commonly used fasteners for areas of a garment that receive a good amount of stress, snaps are generally used in areas where there is little stress or strain on the fabric (Hackler, 2018). Snaps are an alternative fastener to buttons and are commonly used in bridal apparel, costumes, infant and toddler clothing, shirts, and lingerie.

Snaps come in a variety of sizes, colors, and finishes (Hackler, 2018). Each type of snap has various applications and purposes. In general, use small-sized snaps for lightweight fabrics and larger-sized snaps for heavyweight fabrics. There are two different parts to a snap:
- The ball has a little round knob that sticks up. The ball goes into the socket.
- The socket is concave and allows the ball to fit in the opening.

Oh, Snap!
The following are general suggestions for how to affix a snap to a garment. It is important to note that hanging snaps, covered snaps, gripper-type snaps, and snap tape are all installed in slightly different ways. Teaching students how to install a traditional snap is most important as this knowledge can be transferred to other types of snaps and their specific installation techniques (Deaton, 2021).
- Double-thread your needle with a knot at the end.
- Position your ball snap about 1⁄8 inch from the edge of the garment on the wrong side of the fabric.
- Make a small stitch, catching only the inside layer of the fabric.
- Start your stitching with a knot that will lie under the snap.
- Thread the needle through one hole on the snap, and work through the hole with 3-4 stitches to secure.
- Once you complete the first few stitches, push the needle across the top layer of the fabric and underneath the hole to move on to the next hole. Repeat step 3 for each of the four holes around the edge of the snap.
- Once the snap is sewn on, knot off the thread with a backtack stitch concealed under the snap. Going through just the top layer will ensure an invisible finish.
TIP: Double-check that you have this correct before stitching the snaps onto the garment, otherwise you may finish sewing and find that you have put one side on the wrong way therefore the ball cannot go into the socket.
- Repeat these steps for the socket side of the snap. The socket side will be sewn on the top of the underside of the flap. Check to be sure the garment will lie smoothly when snapped.

TIP: Give students ample time in class to practice this skill, creating a classroom that is calm and conducive to student engagement and construction. Light music playing in the background can calm students’ nerves and set the tone for the day. This skill would be an excellent skill to put in a working portfolio as students continue to refine their hand-sewing abilities. Consider even taking some snapshots of students creating snaps as a fun play on words and a way to document their growth and abilities.
Hemming it Up
Sewing on snaps can be quite tricky for individuals as it requires an enormous amount of hand-eye coordination and meticulous stitches. To prevent students from snapping, offer multiple opportunities for them to practice this skill. We know that practice makes permanent!

Resources
| Resources | QR Codes |
| How To Attach Snaps to Clothing |  |
| Setting Snaps: How to Set 4 Types |  |
References
Deaton, S. (2021). Teaching Apparel Production. Presentation.
Hackler, N. (2018) Hooks & eyes, snaps, and tape fasteners – University of Kentucky. Edited by M.M. Baker. University of Kentucky College of Agriculture, Food, and Environment. Available at: https://fcs-hes.ca.uky.edu/sites/fcs-hes.ca.uky.edu/files/ct-mmb-029_0.pdf (Accessed: November 4, 2022).

