13 Sewing Machine Parts and Safety
Sheri Deaton
Sewing Machine Parts and Safety
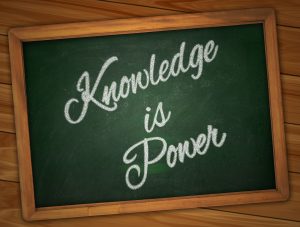
Knowledge is Power
You have likely heard before that “knowledge is power.” This is true in many areas of life, and sewing is no exception. The more you know about sewing machines and how to operate them safely, the better equipped you will be to handle issues that will inevitably arise. Machines will break down, parts will be discontinued, and issues will have to be addressed. Knowing how a machine works and the names of the parts involved will help you pinpoint issues and communicate clearly if your machine needs repair (Deaton, 2021).
For example, did you know that the size of the sewing machine needles varies? According to Westfall (2013), the following sizes should be used for the following fabric weights:
- Size 9-11 for lightweight fabrics
- Size 12-14 for medium-weight fabrics
- Size 16-18 for heavy fabrics
This simple piece of information can save you a host of time, frustration, and fabric. The more we know about sewing machine parts and how to operate a machine safely, the better equipped we are to accomplish projects in the apparel production laboratory.
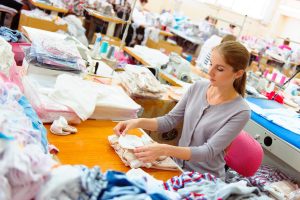
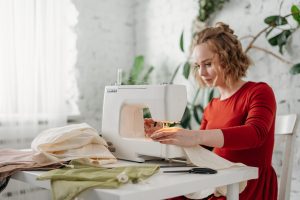 Photo by cottonbro: https://www.pexels.com/photo/woman-sewing-while-sitting-on-chair-3738088/
Regardless of the brand of sewing machine you are operating, the names and parts are going to be similar. For this text, Janome Sewing Machines will be referenced and used as a resource due to their availability and ease of use in the classroom.
TIP: Consider the socioeconomic conditions of students enrolled in your classroom. Consider purchasing machines comparable to the type of machine they could afford if they wanted to purchase one for home projects. Having a few higher-end machines in the classroom is a good way to showcase a variety of price points; however, the machines they use daily should be similar to those they could afford and use at home. Discuss these concepts with your students, encouraging them to purchase a machine that best fits their needs, lifestyle, and budget, while also informing them of other options they could pursue at different points in their life (Deaton, 2021).
- Read this article on Janome Life discussing the importance of knowing the parts of your machine.
Bobbin
- The bobbin is wound with the thread that will make up the underside of a machine stitch. Machines have either a top drop-in style of bobbin, or a front-loading bobbin.
Bobbin Case
- The bobbin case holds the bobbin. Some machines use metal bobbins, others use plastic. Use only the bobbins the manufacturer recommends for your model, or the machine may not work properly.
Bobbin Winder
- This is where you place an empty bobbin to be filled with thread from the spool. It is best to always start with an empty bobbin to ensure that the thread winds evenly.
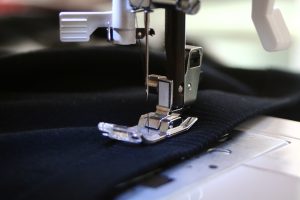
Feed Dogs
- These small metal or rubber teeth feed the fabric through and help pull it between the presser foot and throat plate. The feed dogs also regulate the stitch length by controlling how much fabric passes through at once. As you guide the fabric, always allow the feed dogs—not your hands—to move it. Manually pulling or pushing may cause the needle to bend or break.
Foot Controller/Pedal
- The speed of the stitches is partially controlled by pressing on this pedal. The harder you press down, the faster you go!
Handwheel
- This knob, which can also be called a flywheel, raises and lowers the take-up lever. Always turn the handwheel toward you (it will also turn toward you as you press the foot controller). This can be very helpful when making corners or small amounts of stitches in difficult locations.
Needle
- Sewing machine needles are removable and come in a variety of sizes. When installing a needle, install the needle with the flat part of the needle toward the back and tighten the needle clamp screw to secure it in place.
Needle Clamp
- As its name implies, the needle clamp holds the needle in place.
Presser Foot
- The presser foot provides pressure as the fabric is sewn, helping keep the fabric in place. Different presser feet are used for different techniques or types of fabrics.
Reverse-Stitch Button
- If you want to sew backward, press (and hold this button down on some machines) to reverse the direction of the stitches. This is the technique used to secure a thread at the beginning and end of a seam. Some call this backstitching or backtacking.
Slide Plate or Bobbin Cover
- Depending on the machine, this could be a slide plate or a hinged bobbin cover. Opening this allows access to the bobbin.
Speed Control
- In addition to the foot pedal, the speed control feature on a machine helps regulate how fast the machine will go. Newer machines have three different speeds including slow, medium, and fast.
Spool Pin
- This is the small dowel that holds the thread. Spool pins can be horizontal or vertical, but horizontal ones provide smoother thread feed. Be sure to load the thread so that the cut on the spool is pointed away from the thread guides, otherwise, the thread is likely to get caught on the cut and break, resulting in a need to re-thread the machine.
Stitch-Length Selector
- This is the dial or lever used to set the length of the stitches on machines. Each manufacturer measures stitch length differently. The stitches may be measured per inch, usually ranging from zero to 20 (by metric scale, from zero to four stitches per millimeter), or simply numerically from zero to nine. Read and follow the manual for your machine when adjusting the stitch length. In general, use medium-length stitches for fine fabrics, use shorter stitches for heavier fabrics, and when basting or gathering, use long stitches.
Stitch Selector
- This is the dial or buttons used to switch between various machine stitches.
Stitch Width-Selector
- This is the dial or lever that controls the width of decorative stitches, such as the zigzag stitch.
Take-Up Lever
- The top thread passes through this metal lever, which moves up and down in tandem with the needle. Depending on the machine, the take-up lever may protrude from the front or be hidden inside the plastic casing. It is important to raise the lever completely to ensure the needle is at its highest point before placing fabric under the presser foot. This will keep the needle from snagging the fabric and will give you a visual confirmation that the machine is threaded correctly before you begin sewing.
Tension Regulator
- This dial controls the tension on the top thread. With proper tension, the top thread and bobbin thread will join together in uniform stitches. If the tension is set too tight, the stitch will pucker and break; if set too loose, the stitches will not hold. For machines with a manual dial, turn the dial counterclockwise to decrease tension, and clockwise to increase tension. For machines with computerized tension, which displays digitally, press the control to a higher setting to increase tension and a lower setting to decrease it.
Thread Guides
- These are the metal loops through which the thread passes from the spool pin. They help regulate the tension of the thread. Bobbin winding thread guides will be used when winding the bobbin and the other thread guides will be used when threading the machine. Carefully read and follow these guides to ensure your machine is threaded correctly.
Throat Plate
- Sometimes called a needle plate, this metal plate sits below the needle and presser foot. A small opening in the plate allows the bobbin thread to come out and the needle to pass through to make stitches. Most throat plates have small lines notched to the right of the presser foot which serve as guides for seam allowances and for sewing straight lines. The throat plate should be removed to clean underneath when servicing the machine.
For this text, we are going to explore the names and parts of sewing machines using Quizlet. Quizlet is an online resource designed to help students study through interactive tools, flashcards, and games.
- Check out this set of Sewing Machine Quizlet Cards to help you see the parts of the sewing machine and their definitions.
Sewing Machine Safety
Some students will approach the sewing machine from a perspective of wonder, while others will approach it from a place of trepidation. Teachers should know their students and respond appropriately. The more students know about how the machines work, the more they begin to understand and respect the process of using a sewing machine. Teach and practice the following guidelines to ensure you and your students are safe in the apparel production lab: (Deaton, 2021):
- Read the manual. Sewing machines will vary in their processes and abilities, so take time to familiarize yourself with your machine by reading the sewing machine manual.
- Don’t drive distracted. Put away the phone, put away the drink, and put away any distractions that might interfere with your ability to focus on the task at hand.
- Plug in safely. Plug in the iron with dry hands, ensuring that the plug goes firmly into the socket, without forcing it in the wrong way.
- Unplug safely. Unplug the machine from the plug–do not yank on the cord. This could cause electrical damage to the cord’s interior and lead to a faulty machine.
- Sit comfortably. Move the machine closer to you or farther away from you so that you can “drive” comfortably. Practice proper posture as you complete your sewing projects.
- Relax! Have fun, enjoying the process, one stitch at a time.
TIP: Once you know your students, pick a formative assessment tool matching their interests or career aspirations. Use either collaborative or competitive games to encourage remembrance of part names, recognition of where they are located, and recall of the purpose of the sewing machine part.
“Sewing is like driving… you can’t do it well if you are not comfortable. Arrange your machine and foot pedal so that you are comfortably seated and ready to drive.”
–Sheri Deaton
TIP: For students who are struggling with keeping the foot pedal stabilized, consider having students create a non-slip foot pedal pad as a modification and resource. Check out this step-by-step tutorial for a Non-Slip Sewing Machine Foot Pedal Pad.
Hemming it Up
Knowing the names of the sewing machine parts is the beginning of becoming comfortable and confident with the use of the machine. Students should be able to identify the sewing machine parts on their machines and describe how each part works together to make the machine function.
Model and reinforce proper use of names of parts of machines, demonstrating the workplace behaviors and knowledge expected of those who work in the apparel industry. We will build off of this knowledge as we seek to understand how the machine works as well as how to solve common issues that arise when using a sewing machine.
Resources
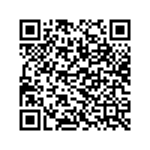
| Resources | QR Code |
| Sewing Machine Parts and their Functions Worksheet |
References
Deaton, S. (2021). Teaching Apparel Production. Presentation.
Westfall, M. (2013). Successful sewing. The Goodheart-Willcox Company, Inc.
