22 Hooks and Eyes
Sheri Deaton
Hooks and Eyes
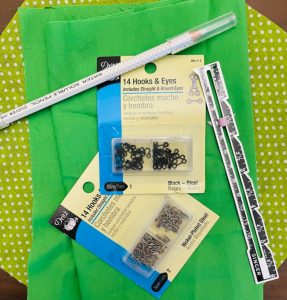
Hooks and eyes are commonly used fasteners for areas of a garment that receive a good amount of stress. These could include waistlines of skirts and pants, cuffs of shirts, lingerie, and neck openings. Additionally, hooks and eyes are the most common fastener used on bras.
Hooks and eyes come in a variety of sizes, with size 0 being the smallest and size 3 being the largest (Hackler, 2018). Some patterns will call for multiple hooks and eyes if the area being secured is wide; however, most patterns use one set of hooks and eyes. In general, here are the common uses for the different types of hooks and eyes:
- Heavy Duty Hooks & Eyes: Waistband closures
- Hook & Round Eye: Necklines where the edges of the garment meet, but do not overlap
- Hook & Straight Eye: Necklines where the edges of the garment overlap
Hook & Eye How-To
While there is “more than one way to Wal-Mart” the following step-by-step tutorial was co-created in the author’s course by students who were involved in researching and teaching this topic. Student success has been consistent when students focus on their skills for one part of this fastener at a time. Additionally, consider using tape to hold the fasteners in place if they are slipping as you begin to sew. Take your time, breath, and relax (Deaton, 2021).
Steps for Hook
- Double-thread your needle with a knot at the end.
- Prepare your hook and eye for use by placing them on your fabric (1/8th of an inch away from the side of the fabric; hook on the left, eye on the right).
- Start the stitch where you plan to place your hook or eye to hide the starting point, but only stitch through the top layer of fabric.
- Sew on top of that stitch 2-3 times.
- Position the hook on your fabric and slide the thread underneath the actual hook sliding the needle through the fabric to the side of the hook (use the width of the hook to determine where to enter and exit the fabric; do this 2-3 times).
- During the last stitch of securing the hook, bring the needle to the top and exit through the hole.
- Bring your needle and thread back through the hole and put your needle through the loop, as if you’re knotting it off. Do this 4-5 times.
- Do the same thing to the other hole. Finish the seam with a backtack knot.
Steps for Eye
- Position the eye on the hook.
- Line up the garment so you know exactly where to sew the eye.
- Sew through the eyes just like you did on the holes of the hook.
- Anchor down the loop of the eye by doing the same stitch you did on the eyes to one side (2-3 times).
- Do the same thing to the other side of the loop. Finish the seam with the backtack knot.
- Hook the eye into the hook and you are finished!

Hemming it Up
Lau Tzu is credited with saying “The journey of a thousand miles begins with one step.” To properly insert hooks and eyes you need to take many steps. Each step along the way, practice small and even stitches, pulling the thread all the way through to eliminate bunches of thread and knots. Ideally, the back of the hook and eye will be neat, and the fasteners will firmly adhere to the fabric.
Remember that each step must be taken, so do not rush through this process or you will be disappointed with the results of your work. One step at a time, one stitch at a time, and this fastener will be secured, and you will be happy with the product.
Resources
| Resources | QR Codes |
| Hooks & Eyes, Snaps, and Tape Fasteners |  |
| How to Sew Hooks and Eyes Video Tutorial |  |
| Sewing Hook and Eyes |  |
References
Deaton, S. (2021). Teaching Apparel Production. Presentation.
Hackler, N. (2018) Hooks & eyes, snaps, and tape fasteners – University of Kentucky. Edited by M.M. Baker. University of Kentucky College of Agriculture, Food, and Environment. Available at: https://fcs-hes.ca.uky.edu/sites/fcs-hes.ca.uky.edu/files/ct-mmb-029_0.pdf (Accessed: November 4, 2022).


