29 Gathering and Easing
Sheri Deaton
Gathering and Easing
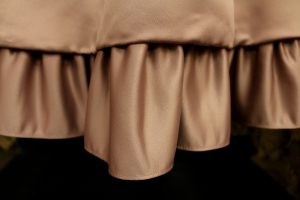
Gathering and easing are both strategies for controlling extra fabric when you have two pieces of fabric that are not the same length. In general, easing is used for a little extra length and adds a small amount of shape to a garment while gathering controls a larger amount of fabric and creates more interest and movement.
When the directions state to create gathers, the purpose is to work in fullness. Generally, gathering is used to work in a greater amount of fullness than easing. Both techniques are essential to know and understand and are easy ways to add movement or shape (Deaton, 2021).

Gathering Guidelines
Consider following these step-by-step directions to create a simple gathering for your next project. Additional resources are located at the end of the chapter to enhance your sewing experiences and allow you to explore this topic through a variety of mediums.
- Adjust the stitch length on your machine to make it a longer stitch. (3.0 – 4.0)
- Sew one row of basting stitches ⅛” from the edge of the fabric across the area to be gathered. Do not backtack. Leave tails of thread at the end of the seam.
- Sew a parallel line ⅛” from this first basting stitch, following the same method.
- Grab the top strings from both seams and pull the fabric toward you. You should start to see the seam gather.
TIP: Some people find it valuable to wrap the remaining strings around a pin to ensure they stay in place as they gather. Consider using this technique to see if it works well for you!
- Pull the top strings from both sides, ensuring the gathers are even and the fabric is the length you desire.
- Once you have the fabric gathered enough and to the right size, tie off both sides. Tie all four strings together on both ends of the fabric to ensure the gathers do not come out when you adjust and sew.
- When the gathers are where you want them, adjust your machine back to a normal sewing stitch length. Sew a normal straight seam through the middle of the two basting rows.
- Sew slowly and guide the fabric to ensure a straight stitch and that the gathers are evenly spaced. Backtack at the beginning and end of the seam.
- Use a seam ripper and carefully remove the basting stitches.
TIP: The gathering seams will be removed during the final phases of construction, so it is not necessary to choose a thread color that mirrors the fabric. Encourage students to use a thread that contrasts or pops against the fabric to see the gathers more clearly when they are first learning how to accomplish this skill.
Easy Easing
Easing is typically used when you need to add an extra amount of shape to a garment in the shoulder, sleeves, hem, or waistband. Note the pattern symbols (dots, circles or notches) and transfer these markings to the fabric. While there are many strategies for easing in easing, consider using the following approach to help with this process.
- Transfer the pattern markings indicating where the easing will start and stop
- Pin the seam at the beginning and end of the area to be eased
- Bend the seam slightly away from you to smooth out the ease
- Pin down the fullness to keep it from bunching
- Follow the steps for creating gathers by creating parallel basting stitches and finishing the seam (See above)

Hemming it Up
Gathering and easing are fun ways to add movement, bulk, and interest to apparel. Creating gathers and easing are fairly simple processes, but ones that should be practiced. The most common error in creating either of these techniques is not adjusting the stitch length to create the basting stitches. Remind yourself of the importance of this step and you will see success in your gatherings.
Go forth and Gather with Ease!

Resources
| Resource | QR Codes |
| Easing and Gathering |  |
| Easing, Gathering, and Shirring |  |
| Gathering Fabric This Way from Now On |  |
| Gathering Fabric Techniques |  |
| How to Gather Fabric |  |
| The Ease Stitch |  |
References
Deaton, S. (2021). Teaching Apparel Production. Presentation.

