
17 Shirt
Simplicity Pattern
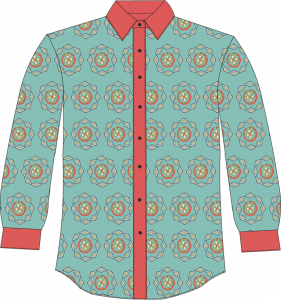
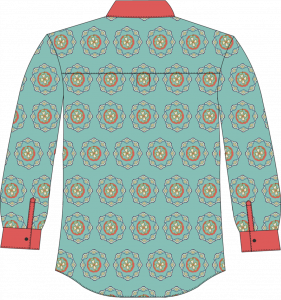
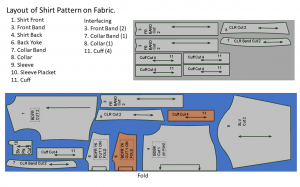
Lay out pattern pieces on fabric and interfacing.Cutting out and marking shirt.Mark all symbols on the shirt pieces. Shirt Video #1 |
Apply interfacing to appropriate pieces. Shirt Video #1 |
Staystitch neckline on both front and back pieces.If placing pocket, staystitch around the pocket folding under the top of thepocket.Stitch pocket on bodice front (either left or right or both for 2 pockets whereindicated. Press. Shirt Video #2 |
Roll the back bodice piece up to fit inside the yoke pieces and pin.Stitch back to front pieces at shoulder seams.Pull shirt through one of the openings at the armscye to turn right side out.Topstitch yoke 1/8” and ¼” from yoke seam. Shirt Video #2 |
Place sleeve placket on the wrong side of sleeves where designated.Stitch. Cut opening for each sleeve placket.Turn placket to outside of sleeve and edge stitch to secure.Pin pleats on sleeves in place and staystitch.Shirt Video #3 |
Pin sleeve to bodice armscye easing to fit.Stitch undersleeve and side seams in one continuous stitch.Serge both sleeve/side seams.Serge the bottom (hem) of shirt. Shirt Video #3 |
Sew cuffs pieces together wrong sides together with one side turned under ½”. Trim. Turn cuffs to right side. Press.Pin to sleeve to cuff, matching cuff edges to placket opening edges.Stitch cuff to sleeve. Trim seam allowance and press up into the cuff.Take the folded cuff edge and pin it over the seam. Hand stitch the cuff closed using a slip stitch.Topstitch around cuff 1/8” and ¼” from edge. Shirt Video #4 |
Stitch notched edge of front plackets to each side of front bodice.Fold plackets toward under side of bodice and staystitch in place at top.Shirt Video #4 |
Stitch upper and under collar together, right sides together.Turn under edge of one collarband piece ½” and press.Pin collar between upper and under collar band matching notches.Stitch collar to collarband.Stitch collarband to shirt neckline. Hand baste collarband on the under side. Shirt Video #4 |
Turn hem under ¼” and press. Turn another ¼” and pin.Topstitch hem all the way around shirt bottom. Shirt Video #5Fold the front plackets right side together and stitch at bottom even with the hem of the skirt. |
Mark buttonholes on the front plackets and cuffs.Stitch buttonholes on front plackets (left side for men’s, right side for women’s) and cuffs.Sew buttons on the opposite placket and cuffs.Press. Shirt Video #5 |