14 Samples
A. Practice Sewing
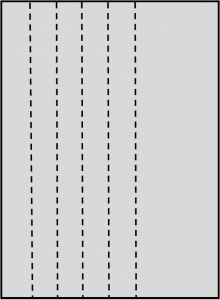
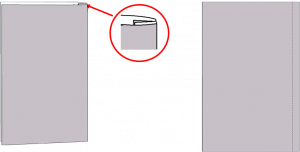
Cut a set of 5” by 7” sample fabric. With right sides together, stitch 5 lines lengthwise 1” apart back tacking at the beginning and end or each stitched line. Insert completed sample in the Sample notebook.
B. Sample Cutting
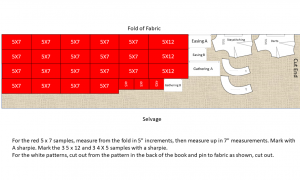
Cutting out samples. You will need 19 sets of 5” X 7” sample fabric on grain; 3 samples measuring 4” X 5”; and the remaining samples cut from the patterns in the back of this manual.
C. Samples
For all sample instructions, gray indicates wrong side of fabric and white indicates right side of fabric.


1. Types of Seams
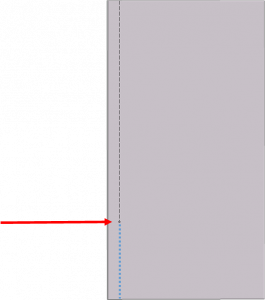
a. Plain – Use 1 set of 5” x 7” sample fabric Use 1 set of . With right sides together, stitch a straight seam 1/2” from edge of fabric. Unfold sample and pressing seam allowance open. Using a sharpie, label the sample “plain seam” and place in your sample notebook.

b. Mock Welt—Use 1 set of 5” x 7” sample fabric. Start by repeating steps 1–3 of the plain seam. Trim the right side of the seam allowance to 1/4 “. Fold left seam allowance over trimmed right seam allowance and press. Turn to right side and topstitch 1/4” from seam line. Label “Mock Welt Seam”.

c. French—Use one set of 5” X7” sample fabric. Place fabric wrong sides together. Stitch 1/4” seam.
Turn fabric with right sides together, seam will be on the inside. Press and stitch at 1/4″.
Lay sample flat and label “French Seam”.
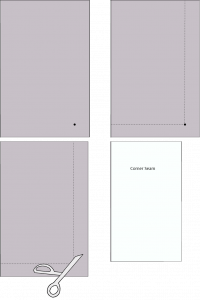
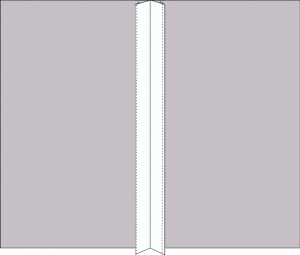
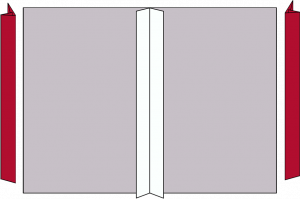
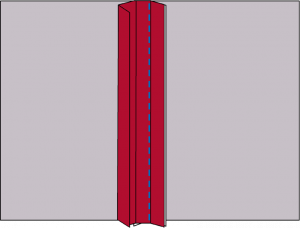
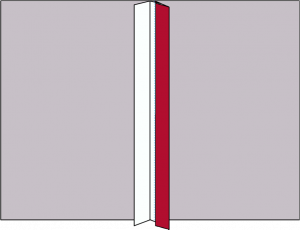
d. Corner—Use one set of 5” X 7” sample fabric. With right sides of fabric together, mark a dot at 1/2” from right edge and 1/2” from bottom as shown. Stitch at 1/2” from edge to dot, leave needle in fabric and pivot fabric swatch to stitch across the bottom at 1/2”. Trim corner at a 45 angle. Turn to right side and press. Label “Corner Seam”.
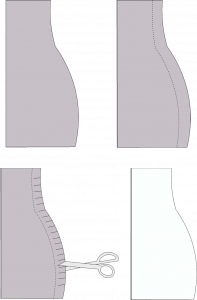
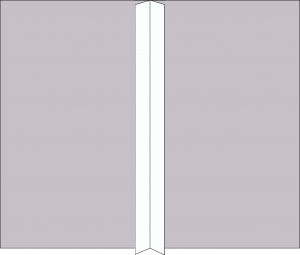
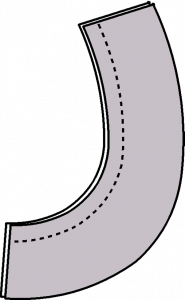
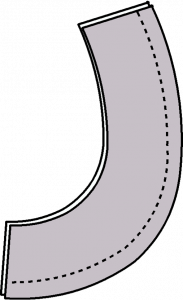
e. Curved—Use one set of 5” X 7” sample fabric. Using the template found in the back of the book, cut out the curved sample with fabric doubled. With right sides together, stitch 1/2” on the curved side of the fabric. Clip curves and turn right side out, press. Label “Curved Seam”.
Seams Video
2. Types of Seam Finishes
a. Turned and Stitched—Use one set of 5” X 7” sample fabric. Start by repeating steps 1-3 for plain seam. Turn seam allowances under 1/4” and edgestitch (line up with outside edge of presser foot) each seam allowance. Do not stitch through to the right side of fabric.

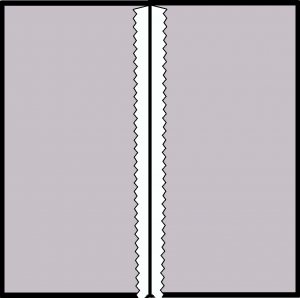
b. Stitched and Pinked—Use one set of 5” X 7” sample fabric. Start by repeating steps 1-3 for plain seam. Trim seam allowances 1/4” with pinking shears.
c. Hong Kong—Use one set of 5” X 7” sample fabric. Start by repeating steps 1-3 for plain seam except make seam allowances 3/4”. Using 1/2” double fold bias tape, cut 2 strips the length of the seam. One for the left and one for the right sides of the seam allowance.
Unfold the bias tape with the sorter side on the right. Line up the edge of the unfolded bias tape to the edge of the right seam allowance.

Stitch in the ditch of the fold of the bias tape to the seam allowance.
Fold bias tape to the under side of the right seam allowance as shown.

Stitch in the ditch of the seam, catching the under side of the bias tape.
Repeat for the left side of the seam allowance. Label Hong Kong Finish’ and place in Sample Notebook.
d. Serged—Use one set of 5” X 7” sample fabric. Start by repeating steps 1-3 for plain seam. Using the JUKI MO-6700 Serger, serge both seam allowances, trimming 1/8”.
Seam Finishes Video
3. Stitching Techniques Prior to Garment Construction
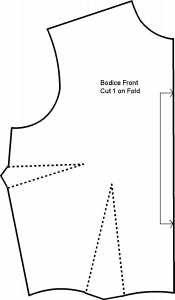
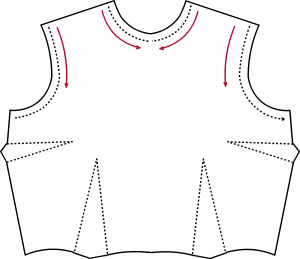
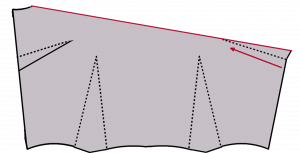
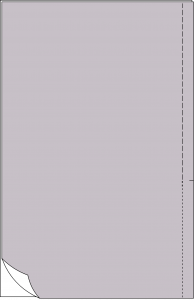
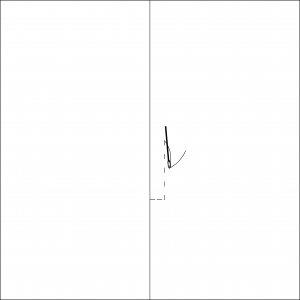
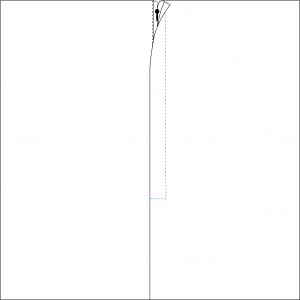
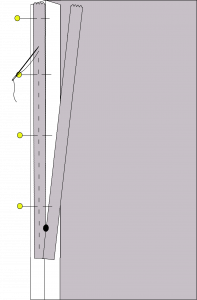
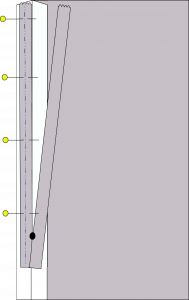
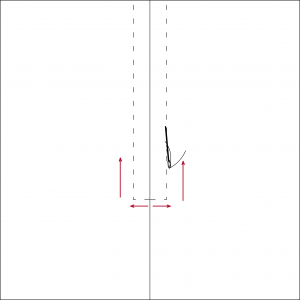
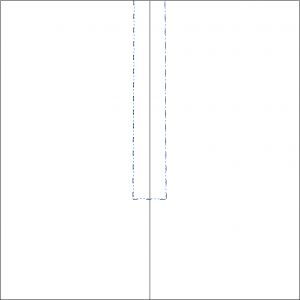
a. Staystitching-staystitching is used to stabilize curved seams, i.e. the neckline and armscye. Using the bodice block pattern in the appendix, cut one bodice front on fold.
Stitch neckline and armscye at 1/2″ in the direction indicated below. Label sample ‘Staystitching” and place in Sample Notebook.
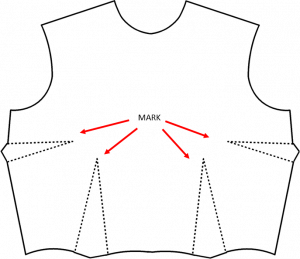
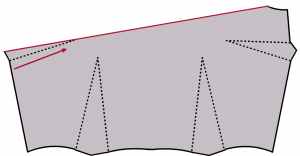
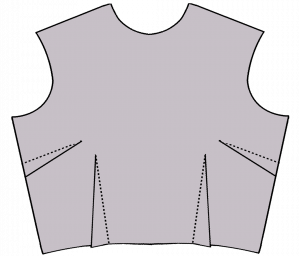
b. Darts– Darts are used to make flat fabric 3 dimensional to fit over fullness in the body, i.e. bust, hips, etc. Using Bodice front pattern in the appendix, cut one bodice front on fold. Mark the two bust darts and the two waist darts with marking pen.
Folding toward the right side of the fabric, fold the left dart in half and secure withpins. Stitch from base of dart to apex. Press the dart toward the waist.
Fold the right dart in half toward the right side of the fabric and stitch from base to apex.
Fold the left waist dart in half and stitch from base to apex. Repeat for right dart.
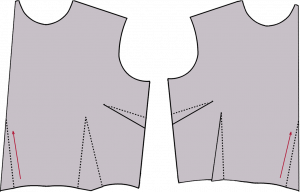
Label bust and waist darts. Place sample in Sample Notebook.

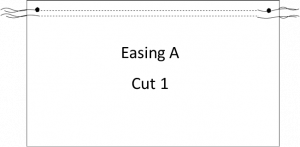
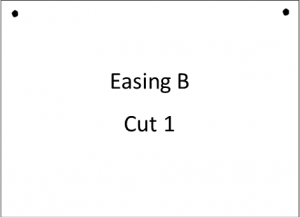
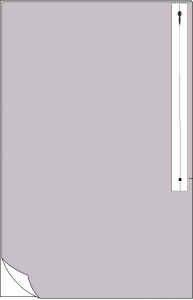
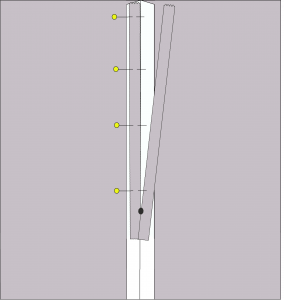
c. Easing-Easing is used to force fullness of one fabric into a smaller area without causing ripples, gathering or pleating. For this class, easing will be used to place a sleeve cap (as shown below) into the armscye of a shirt.
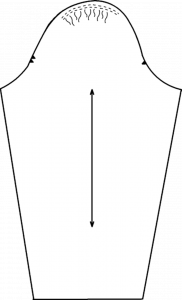
For the easing sample, using the pattern provided for easing in the appendix, cut one of each pattern A and B. Using a basting stitch of 5, stitch 2 rows at 1/4” and 3/4”. Leave 4” tails of thread on each end of stitching. Do not back tack.
Videos of Pre Stitching Techniques prior to Garment Construction
4. Stitching Techniques after Garment Construction
a. Trimming-trmming is used to remove bulk form both seam allowances.
b. Grading- grading is trimming only one side of the seam allowance.
c. Edge Stitching/Understitching- is used to help keep seam allowance or facing in place. It is also used as a decorative stitch on the face of the fabric. It is stitched on the right side of the fabric next to the seam allowance following the inside edge of the presser foot.

d. Topstitching – is used as a decorative stitch on the face of the fabric. It also adds strength and supporr to seams. It is stitched at 1/2″ from the seam.
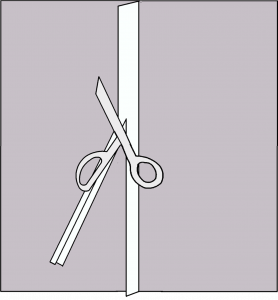
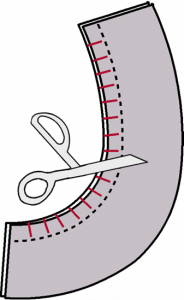
e. Clipping—clipping is used on concave curved seams to remove bulk. Using the pattern in the appendix for clipping, cut 2. With right sides together, stitch 1/2” seam from concave side of sample. Make small slits in the seam allowance around the curve approximately 1/2” apart.
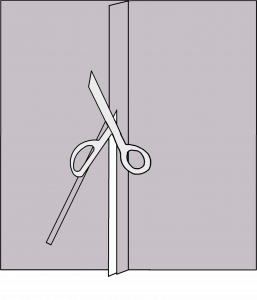
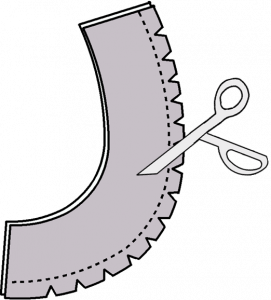
f. Notching—is used on convex curved seams to remove bulk. Using the pattern in the appendix for notching, cut 2 out so sample fabric. With right sides together, stitch 1/2” seam from the convex side of sample. Make small notches in the seam allowance around the curve approximately 1/2” apart.
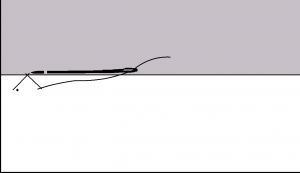
5. Hand Stitches
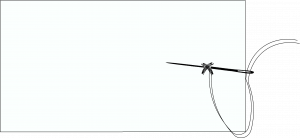
a. Catch Stitch -is used to hand sew hems and facings. It is a series of small X’s. The needle direction is from right to left, but you are stitching from left to right. See steps below. Label as “Catch Stitch” and place in Sample Notebook.
Step 1. Using a single thread with a knot in the end, begin the stitch on the hme side of the fabric taking just a few threads.
Step 2. Pull thread through to the knot and begin the next stitch on the garment just above the folded hem edge.
Step 3. Pull thread to just taut and begin the next stitch on the hem about 1/2″ from the first stitch.
 Step 4. Repeat to the garment and alternate back and forth from the garment to hem until you reach the end. Secure the thread by stitching in the same place several times.
 b. Blind Catch Stitch -The blind catch stitch is the same stitch as the catch stitch with one exception, the top of the hem is folded down so the stitches occur between the garment and the hem . This allows for the catch stitch to be hidden once the fold is pressed up.
View after the fold in the top of the gem has been pressed up. You should only see the small stitches. Label “Blind Catch Stitch” and place in Sample Notebook.
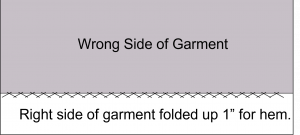
c. Slip Stitch – The slip stitch is a hidden stitch. It is stitched into a fold (or channel). For this sample, you will fold the edge up 1/4” then press, fold again at 1” and press.


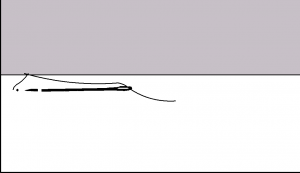
 Close up view of folded edge.
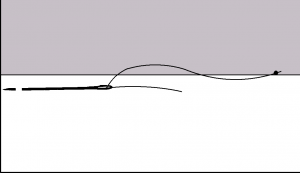
Start by threading a sewing needle with a single thread and knot at the end.
Step 1. Insert needle into fold of hem, run the needle in the fold about 1/4”.

Step 2. Bring needle up through the fold.
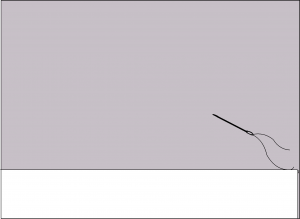
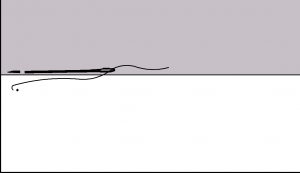
Step 3. Insert needle directly above the fold on the garment and catch a few threads of garment.
 Step 4. Insert needle back into the fold of the hem directly below the stitch of the garment.
6. Closures: Zippers
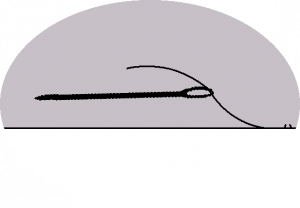
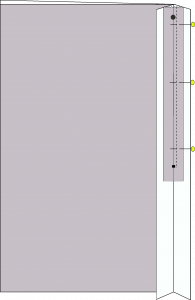
A. Invisible Zipper – an invisible zipper is used in a seam line to hide the zipper from being seen from the outside of the fabric. Cut a set of 5” by 12” rectangles from the sample fabric on-grain. Serge the long edge on both pieces with right sides of fabric facing up.
Unzip the invisible zipper and turn over to wrong side. Using just the left sample piece, place the right zipper tape on the seam line of the left sample.


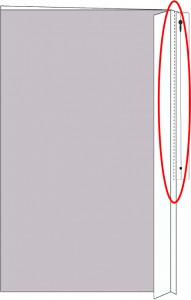
Uncoil the zipper teeth to the left, there will be a ditch (fold) seen. Using the invisible zipper foot, place the uncoiled zipper teeth in the left groove of the zip per foot and stitch down to the head of the zipper and back tack.
Turn the zipper to the right side by flipping to the right. You should be able to zip the zipper all the way to the top. If you cannot zip to the top, you may have caught the zipper teeth in your stitching and will need to remove and restitch. Next, flip the entire sample and zipper upside down.


Place the zipper on the right serged edge of the sample piece. Uncoil the zipper teeth to the right and place in the right groove of the zipper foot and stitch in the ditch.
Complete the seam below the zipper by placing right sides of fabric together. Begin stitching where the zipper stitching ended and stitch to the bottom of the sample.
B. Lapped Zipper – this zipper is hidden by a lap of fabric that folds over the zipper and is a common zipper to use for side seam zipper openings.
- Cut a set of 5″ by 12″ sample fabric.

2. With right sides together, lay the zipper on the edge and mark the end of the zipper stop on the fabric with a marking pen or straight pin.
3. Using a stitch length of 5, stitch a basting stitch from the top edge to the mark. Leave your needle in place and change your stitch length to 2.3-3, back tack and continue stitching to the bottom of the fabric sample.
4. Press the seam open.
 5. Move the right side of the sample fabric under the left side with only the seam allowance on the right edge.
6. Place the zipper face down on the right side of the seam allowance with zipper teeth on the seam line. Pin in place.

7. Using the notched zipper foot, stitch from the top edge of the zipper to the bottom of zipper.
8. Fold the zipper to the right so that the right side is showing. The fold should be on the right seam allowance. Edge stitch on the fold of the seam allowance.
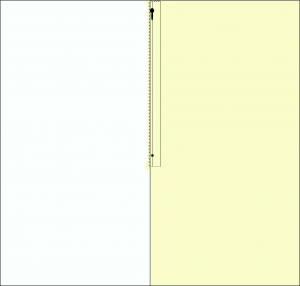
9. Unfold your sample with right sides up. You will not be able to see the zipper, but make sure the zipper is laying right side up under the sample. If you could see through the right side, it should look like the right yellow shaded area.
10. Use a needle and thread and hand baste from just above the metal zipper to the top edge of the sample.
11. Machine stitch (BLUE) the zipper following the basting lines.

12. Remove the basting thread.

13. Gentle open the seam and remove the basting thread from the seam to expose and open the zipper all the way to the zipper stop. Label “Lapped Zipper” and place in the Sample Notebook.
C. Centered Zipper-this zipper is hidden by a 2 laps of fabric that meet over the center of the zipper teeth.
Step 1. Cut a set of 5″ by 12″ sample fabric.
2. With right sides together, lay the zipper on the edge and mark the end of the zipper stop on the fabric with a marking pen or straight pin.
3. Using a stitch length of 5, stitch a basting stitch from the top edge to the mark. Leave your needle in place and change your stitch length to 2.3-3, back tack and continue stitching to the bottom of the fabric sample.
4. Press the seam open.
5. Unzip the zipper and turn it face down. Take the left side of the zipper tape and place on the left seam allowance. Pin in place.
6. Hand baste the zipper tape in place to the seam allowance only.
7. Using the notched zipper foot, stitch the zipper tape to the seam allowance. Remove basting stitch.
8. Close the zipper and pin the right zipper tape to the right seam allowance. Remember to move the sample fabric so you only pin the seam allowance and zipper tape. Hand baste in place then machine stitch.

9. Turn the sample to the right side with the zipper closed. Press the seam and hand baste from just above the zipper stop (you can feel it through the fabric) and 1/4” away from the seam to the top on both sides.
10. Using the notched zipper foot, machine stitch over the basting lines 1/4” from the seam on each side making sure you do not hit the zipper stop at the bottom.
11. Remove basting stitches from stitching line.

12. Remove basting stitches from seam line to expose zipper. Label “Center Zipper” and place in Sample Notebook.
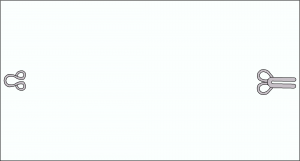
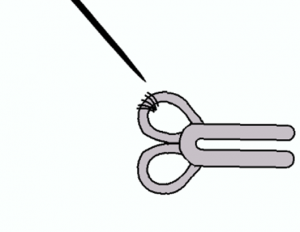
D. Hooks and Eyes – hooks and eyes are options for closures and come in a variety of sizes depending on the application and weight of fabric. You must use them in pairs. The regular hook can be used with either a round eye or a straight eye. The skirt hook is much larger and more stable. This hook and eye combinations is found on waistbands for skirts and pants for both men and women.
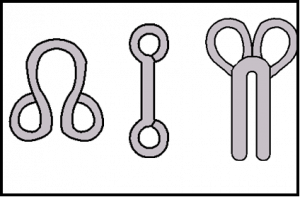
General Hook and Eye
- Cut 2 pieces of sample fabric 4″ by 5″. Select 1 regular hood and round eye.
2. Using a hand sewing needle, thread the needle for double thread use. Take 1 length of thread about 10” long, double it, matching ends and thread ends through needle eye. When you begin your hand sewing you can run the needle through the loop to secure, avoiding a knot.

3. Starting from the top side (where you can see the hook, hold the hook in place and stitch around each eye. Then do the same for the round eye.

 Close up view.
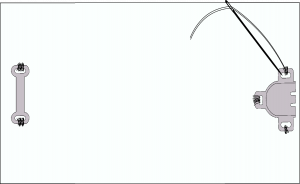
Skirt Hook and Eye
- Cut 2 pieces of sample fabric 4″ by 5″. Select 1 skirt hook and flat eye.
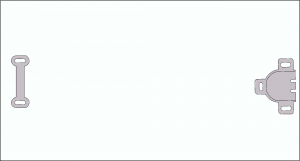
- Using a hand sewing needle, thread the needle for double thread use. Take 1 length of thread about 10” long, double it, matching ends and thread ends through needle eye. When you begin your hand sewing you can run the needle through the loop to secure, avoiding a knot.
- Starting from the top side (where you can see the hook, hold the hook in place and stitch around each section with a hole. Then do the same for the flat eye on both ends.
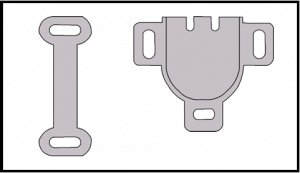
E. Buttons are used to close overlapping garment pieces. There are a variety of sizes and shapes to buttons including number of holes for sewing. A 4-hole button will be used for your shirt project as listed in the supply list.
- Cut 2 pieces of sample fabric 4” by 5 “. Select 1 4-hole button. Thread a hand sewing needle with a double thread and knot one end. Start by inserting needle from the underside of the sample and come up through 1 eye of the button. Pull thread to the knot.

2. Insert the needle into the opposing eye diagonally.

3. Continue stitching from the first hole to the second hole 4-5 times. Then insert needle from under the sample in the hole next to the first hole and stitch 4-5 times.

4. To secure the stitches, from the underneath side of the sample, run the needle under the crossed stitches 2 times and cut the thread.